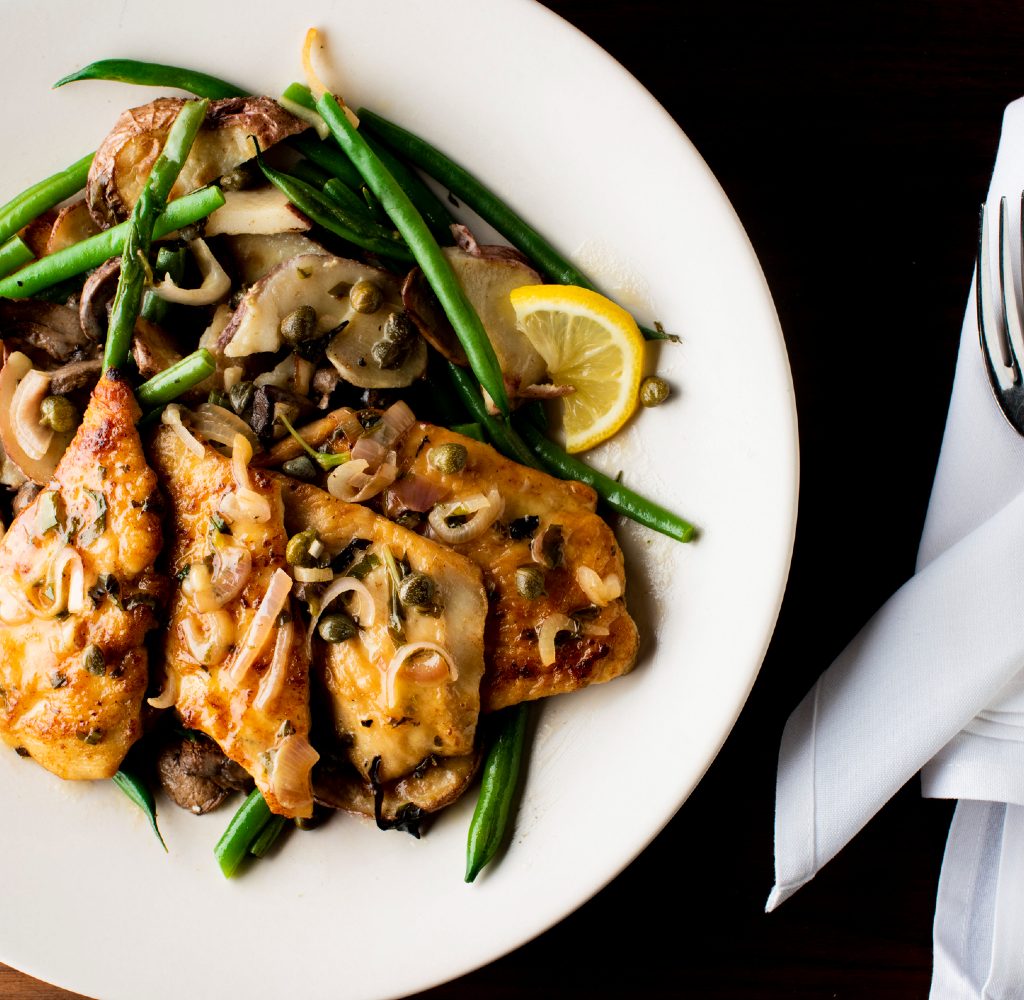
Chicken is the go-to protein for many households when it comes to whipping up a quick dinner. It’s packed with protein, doesn’t contain much fat, and is quick and easy to make. But chicken can get boring, especially if you recycle the same few recipes or dishes repeatedly, and there’s nothing worse than being sick of eating the same thing time and time again. If you’re looking for a new way to prepare chicken that is quick and packed with flavor, we have a chicken piccata recipe that is sure to excite your palate. This 30-minute meal is versatile, healthy, and nutritious, making it a great weeknight meal. Plus, it appears way fancier than it is, so you can impress your guests at your next dinner party.
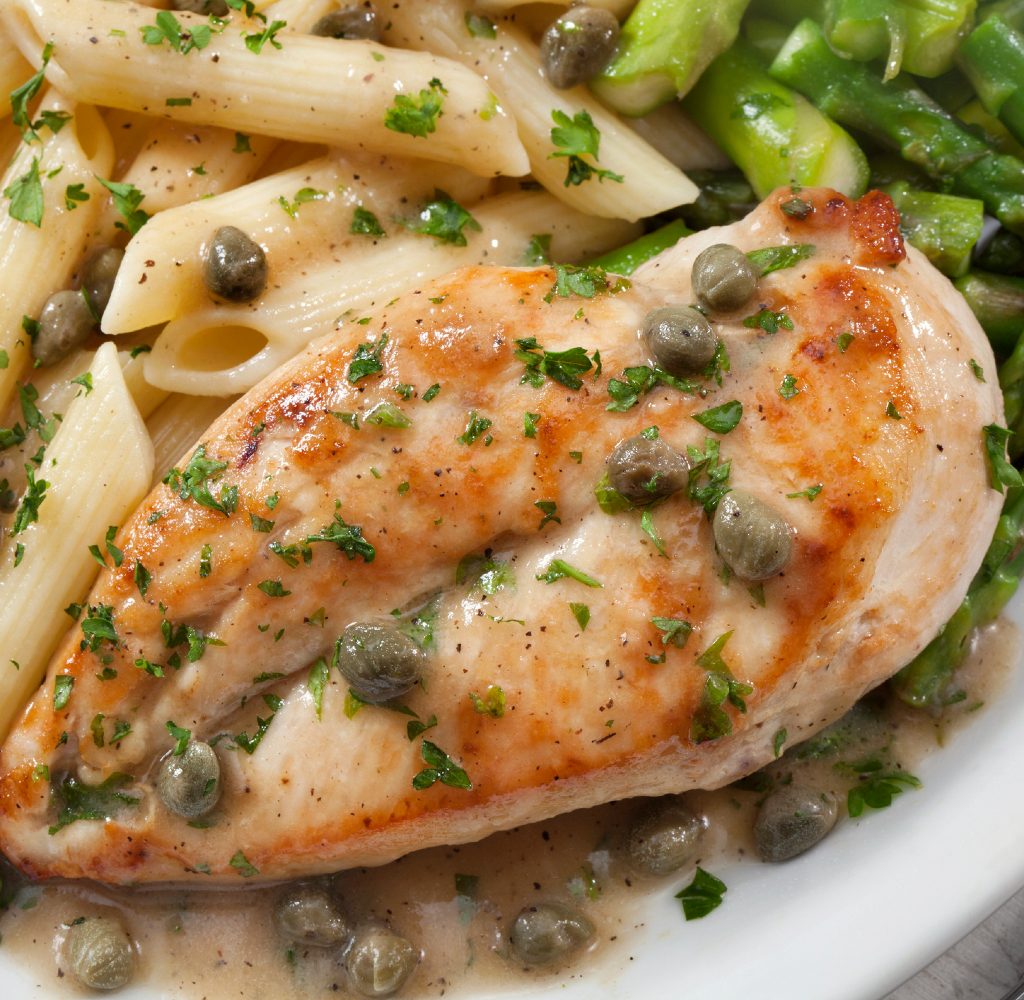
Piccata is an Italian word that refers to sauteeing sliced foods in a sauce containing butter, lemon, and spices. The dish originated in the United States in the 1930s and was created by Italian immigrants. Traditionally, the meal was prepared with veal but today is commonly served with chicken. What we really love about this dish is its versatility. Once you learn how to prepare the chicken and sauce, you can pair the protein with pasta, vegetables, potatoes, or any other side dishes. Plus, this dish is great for every meal, from luncheons to leftovers, and as a solo dinner or part of a family-style dinner party. Ready to get cooking? Check out the recipe and some of our tips below.
Ingredients for chicken piccata
- 1½ pounds boneless, skinless chicken breasts, thighs, or tenders (see below for chicken tips).
- Kosher salt and black pepper
- About a cup of all-purpose flour for dredging the chicken
- Six tablespoons butter
- About three tablespoons extra-virgin olive oil
- One shallot, peeled and sliced lengthwise
- One lemon halved: Thinly slice half and remove the seeds, then juice the other half for the sauce
- ¾ cup chicken stock, preferably low-sodium
- Four teaspoons drained capers
- Coarsely chopped fresh parsley (the recipe says this step is optional, but in our opinion, the parsley adds a brightness to the dish that you’ll miss if you don’t use it)
Instructions for chicken piccata
- Season both sides of the chicken with salt and pepper, pressing the spices down into the chicken so they stick.
- Season the flour with salt and pepper, and then dredge the seasoned chicken in flour. Shake off any excess flour.
- Heat the butter and olive oil over medium-high heat in a large skillet until the butter has melted.
- Add the chicken to the pan and sauté until golden brown and cooked through, working in batches to avoid crowding the pan. This should take about three minutes per side, depending on the size of your chicken pieces. (Don’t worry if you think the chicken isn’t cooked entirely through at this point. You’re going to finish the chicken in the sauce to keep it tender).
- Remove the chicken from the pan and place it on a plate. Repeat with the remaining pieces of chicken. (You may need to add more olive oil to the pan as you go.)
- After all of the chicken is cooked and set aside, add the sliced shallot and lemon slices to the pan. Sauté, occasionally stirring, until lightly caramelized and fragrant.
- Slowly add the chicken stock and simmer until reduced by half.
- Reduce the heat to low. Stir in the remaining three tablespoons of butter, capers, and lemon juice, to taste.
- Season with salt and pepper if needed.
- Return the chicken to the pan to coat with the sauce and rewarm the chicken. If any chicken juices accumulated on the plate, be sure to pour them back into the pan too!
- Serve the chicken with extra sauce poured over the top and garnish with parsley.
Chicken tips
Most people like to use chicken breasts for their meals, but you can use thighs instead if you like dark meat. Thighs are typically cheaper than breasts as well. Regardless of the type of chicken you use, the pieces should all be about the same size.
If you choose to use breasts, cut them in half length-wise, so they aren’t so thick. You can also pound the chicken to make it thinner. Simply place the chicken on a cutting board and cover it with plastic wrap before hitting it with a kitchen mallet. Use even strokes so you don’t tear the chicken and try to make the entire piece about the same thickness. If you don’t have a kitchen mallet, use a heavy pot or full can of vegetables. For easier preparation, you can always purchase thin-sliced chicken cutlets at the grocery store.
Chicken piccata is a classic dish that is crowd-pleasing yet different from typical baked or sauteed dishes. For a lighter meal, pair it with healthy sides like quinoa or broccoli, or create a more luxurious dish by serving it over pasta or risotto. The meal is versatile and comes together so quickly that it certainly deserves a spot in your weeknight go-to rotation. If you haven’t tried chicken piccata, or it’s been a while since you’ve had the dish, give it a shot this week — we know you won’t regret it.


