Want to reduce energy waste and save money on your monthly bills? Properly insulating your home is a great way to do it. If your attic isn't well insulated or if you’re not confident that its existing insulation is holding up, it may be time to reinsulate your storage space.
Doing this project yourself is complicated, and if you’re not a seasoned DIYer, you may want to enlist some help. We’ll discuss what you need to know and how to insulate your attic before you dive into this energy-saving project.

Is adding insulation to an attic worth it?
Heat loss happens all around your home, including through the walls, floors, and windows. Heat rises, though, so it makes sense that a poorly insulated attic would be the area responsible for the most heat loss. In fact, 85% of the heat lost in your home is likely to escape through the attic. So, would energy savings from insulating your attic make up for the cost of insulating it? Here are the facts:
- The average energy bill in the U.S. was $117.46 in 2020.
- Proper home sealing and insulation can save you anywhere between 10% and 20% on monthly energy bills.
- The average cost of installing attic insulation falls between $1,700 and $2,100.
What this data means is that while insulating your attic comes with some upfront costs, one of your priciest monthly bills will be reduced to the point that the installation cost will be made up in as little as five years.
Since it’s considered an energy-saving renovation, some states and regions even offer rebates when insulation is updated in a home. Check with your local utility company to find out if you qualify for even more annual savings.
Is it better to insulate an attic ceiling or floor?
This is one of the first questions you need to ask yourself before you dive into installing your attic’s insulation materials. The reality is that it’s easier, more economical, and more effective to insulate the floor of your attic instead of the ceiling. There are pros and cons to each method, though.

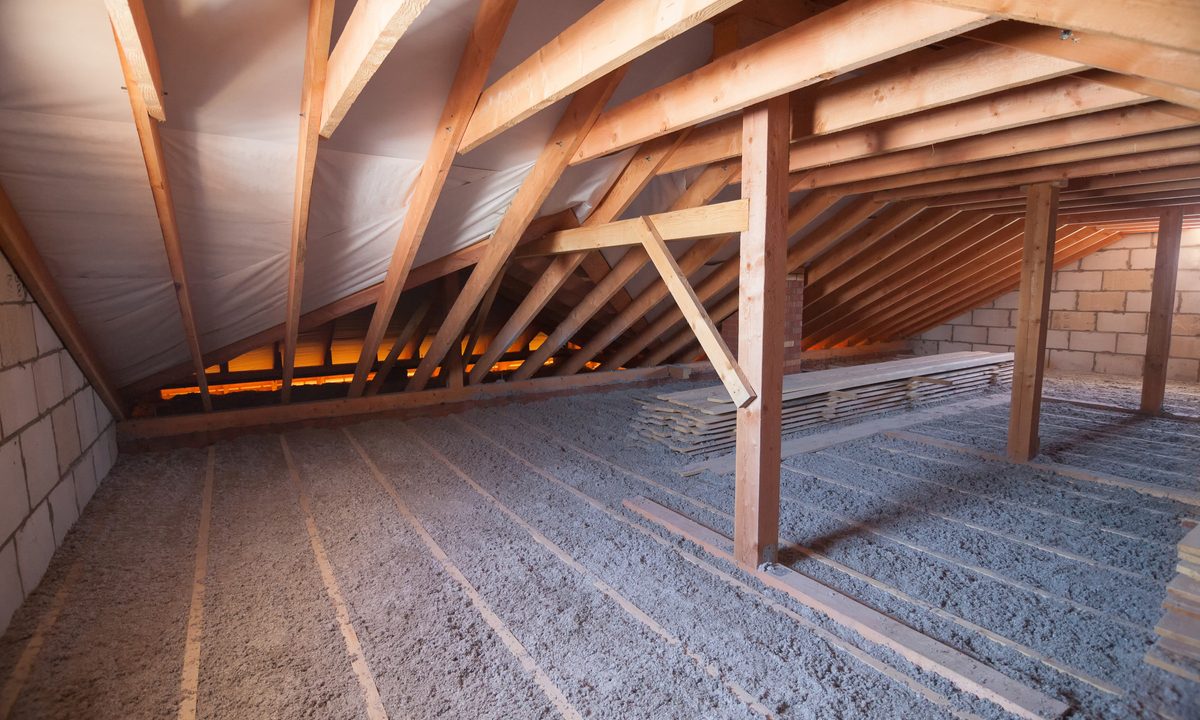
Insulating the attic floor
The attic floor is a smaller surface area than the ceiling and walls, so you’ll buy fewer materials and spend less time on the project. However, insulating the floor means you won’t be able to use the space for storage.
Insulating the attic ceiling
While you will be able to use the attic for storage space, insulating the ceiling is much more labor-intensive and a bit more costly. It also leaves more room for error since you’ll need to insulate in more cracks and crevices.

How to insulate an attic the right way: Choosing insulation material
Once you've decided on whether to insulate your attic ceiling or floor, the next thing you'll need to decide is which material to use.
The two types of insulation materials are:
- Batts: Come in strip or blanket form and are applied by cutting the pieces to size and laying them over the surface
- Loose fill: Comes loosely and is applied using a blower
Batts are easy to use if the attic is open, has joists that are spaced equally, and contains no complicated obstructions. Loose fill is useful in attic spaces that have a nonstandard size or joist spacing. The loose material easily fills hard-to-reach cracks and crevices and awkwardly shaped areas.
Step 1: Measure the square footage of your attic and read the label on the product to determine how much insulation material you’ll need.
Step 2: Be sure to check the insulation’s R-value, which measures its ability to block the flow of heat, so that it is appropriate for the recommended R-value in your region.

Prep the attic for insulation
Step 1: While you can layer new insulation over old material, any old insulation that’s damaged or compressed should be pulled out prior to installing the new stuff.
Step 2: Once removed, check the entire space for drafts and locate any cracks or gaps that are letting heated air escape.
Step 3: Check these problem spots thoroughly, and seal them with an appropriate sealant:
- Air ducts, vents, fans, and exhaust pipes
- Chimneys and flues
- Windows
Step 4: Before you start laying insulation, check the whole attic for leaks coming in through the roof. Wet insulation won’t just be useless; it could also lead to mold.
Step 5: You’ll also need to put box barriers around light fixtures, electrical components, and any other item that will create a fire hazard if it touches the insulation.

Install the insulation
Step 1: Following the insulation product's package instructions, apply the insulation to the attic’s surface.
Step 2: If you’re applying it to the floor, be sure you install it around the edges of the attic first and work your way to the entrance so you don’t have to step on the new insulation. If the material is compressed, it will be less effective.
Cautions and tips for insulating an attic
- Make sure the space is well-lit while you’re working in order to avoid trips and falls.
- Only step on the joists and not between them to prevent falling through the floor.
- Always wear a dust mask so you don’t breathe in the harmful insulation material.
- Prevent moisture from touching the material by laying a polyethylene barrier on the underside of the insulation.
- Make sure you’re not blocking the attic’s airflow when you lay the material. If soffits are blocked, ice dams could form on the roof, causing damage.
- Shower after you’re done to remove any insulation material from your skin and hair.
While insulating an attic is a complex process with a bit of upfront cost, the long-term energy savings are enough to make this project an economical one. Not only will you see a drop in your energy bill, but you’ll be able to feel how much cozier your home is without all that heat escaping through the roof.


