Everyone has a favorite Thanksgiving food that’s a must-have on the big day. Some believe the turkey is the star of the show while others have a side dish their grandma used to make that has to be on the menu. For us, homemade dinner rolls are essential to the meal whether it’s a vessel for butter, gravy, and all the other sauces on the plate or as an appetizer to whet your guests’ appetites. Sure, you could buy dinner rolls from the grocery store, but homemade ones are just so much better. This super easy dinner roll recipe from Food Network only takes 20 minutes to prepare and 20 to cook, so, in no time at all, you’ll be on your way to impressing friends and family this year.
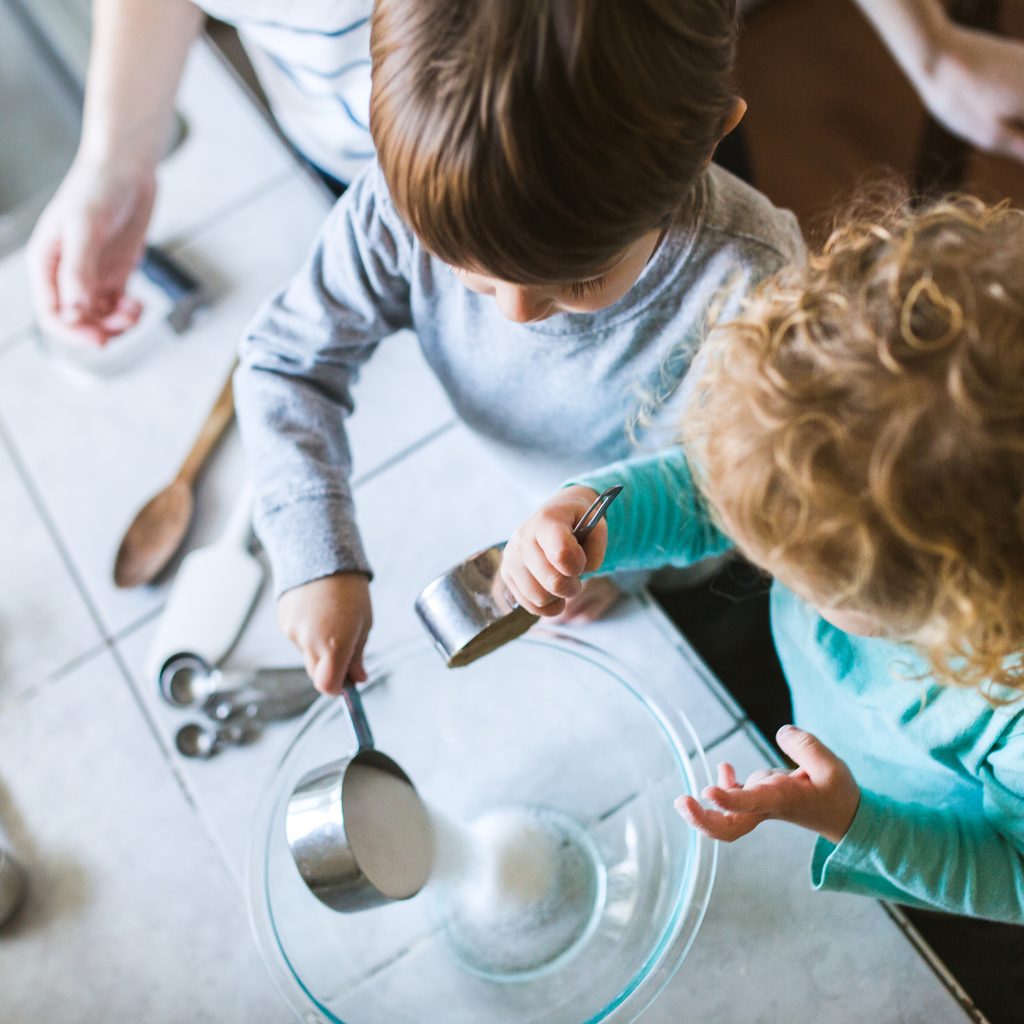
You don’t need too many ingredients for these rolls and you likely already have most of them on hand for other recipes. Let us show you just how easy it is to make the perfect dinner roll.
What ingredients do I need?
To start, you’ll need:
- 1 (1/4-ounce) package dry active yeast
- 1 cup warm water (110-degrees F)
- 1/2 cup sugar
- 1 egg, beaten
- 2 teaspoons salt
- 1 cup milk (scalded then cooled so it’s warm)
- 4 ounces melted butter, plus 2 ounces
- 5 cups flour (plus more as needed)
The recipe calls for a six-cup muffin pan as well (with a three-inch opening), but you can use whatever pans or tins you have available. This recipe makes 24-30 rolls, but you can double or even triple the recipe to ensure you have enough to feed everyone.
What are the directions for making the rolls?
- Using your dough hook on a stand mixer, dissolve the dry yeast in one cup of warm water.
- Once it becomes slightly foamy, pour in the salt, sugar, egg, milk (make sure it’s warm), and four ounces of butter.
- Continue mixing and slowly add five cups of flour until it’s mixed well and the dough is elastic.
- To know if it’s ready, tear off a piece of the dough and stretch it between your fingers. If it stretches without breaking, you have perfectly elastic dough!
- Once it’s done, take the dough ball and place it on a floured surface. Knead the dough manually for another five minutes.
How long should I proof the dough?
- Next, put the dough in a buttered bowl so it doesn’t stick. Cover it with a towel and let it sit in a warm place until it doubles in size.
- While you’re waiting for it to proof, lightly grease the muffin pan with Pam spray and preheat the oven to 425-degrees.
- Once the dough is ready, punch it down to release any air pockets and form it into small one-inch balls.
- Put three dough balls into each muffin opening and cover it with the towel again for 30 minutes.
How long should I bake the rolls?
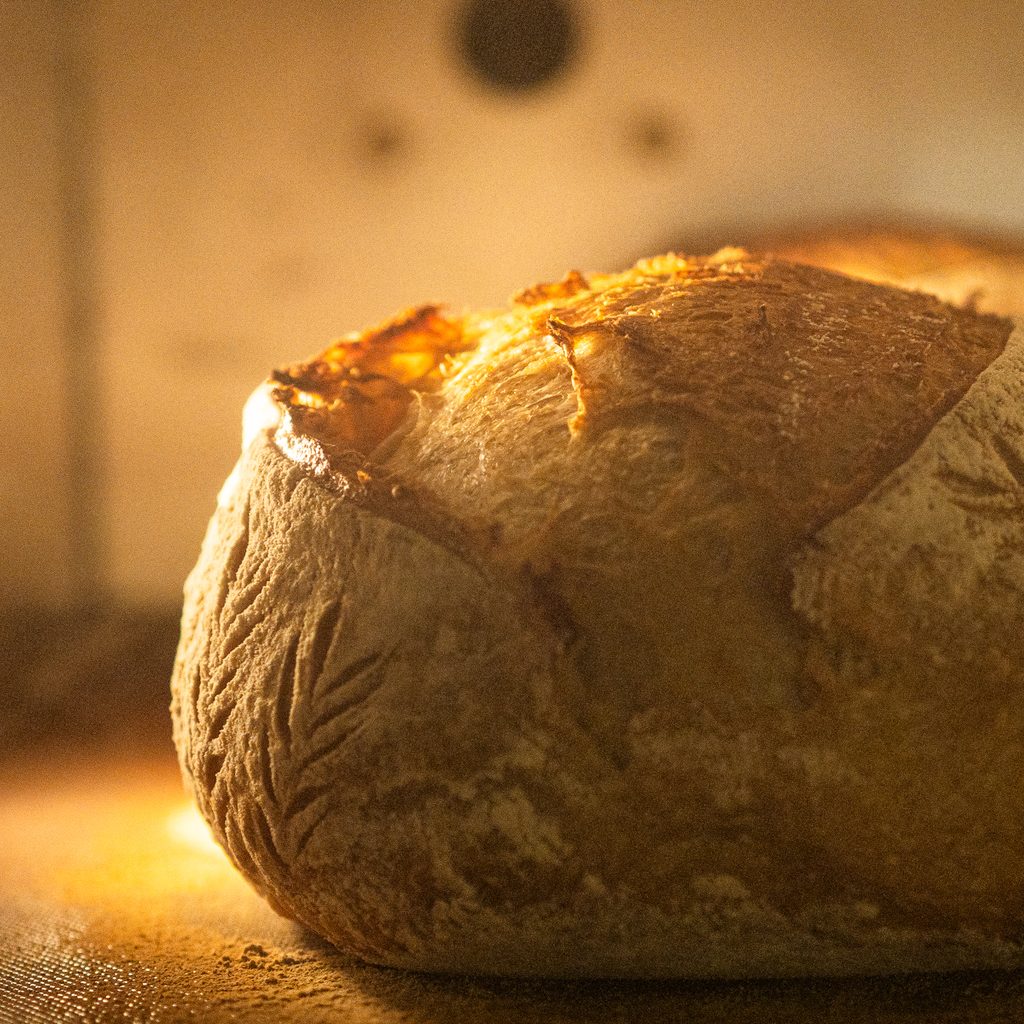
- Once your oven is preheated, lightly brush melted butter on top of the dough. This will create that beautiful golden brown color that makes them look so appetizing.
- Place the tins in the oven and bake them for 10-15 minutes, watching to make sure they don’t get too dark on the top.
- Once they’re cooked through, remove them from the oven and let them rest for about five minutes before serving.
You can serve them at room temperature, but they’re especially hard to resist when they’re fresh out of the oven. Since they cook so quickly, put these in the oven last so you can serve them right as all your guests sit down to eat.
Making homemade dinner rolls is just that easy. This is also a great activity for kids to participate in because the mixer does most of the work, so they can work with you to measure out the ingredients and pour them into the bowl. It never hurts to have an extra set of hands available and ready to help, and they’ll love to tell people they made the rolls themselves.
You can leave them as-is and serve them with fresh butter, but you can also elevate the whole meal by accompanying the homemade rolls with infused butter. Mix in honey, rosemary, lemon, or basil and give your guests the ability to choose their own flavor profile. Try this recipe once and it will become a family favorite and maybe even a new Thanksgiving tradition!


