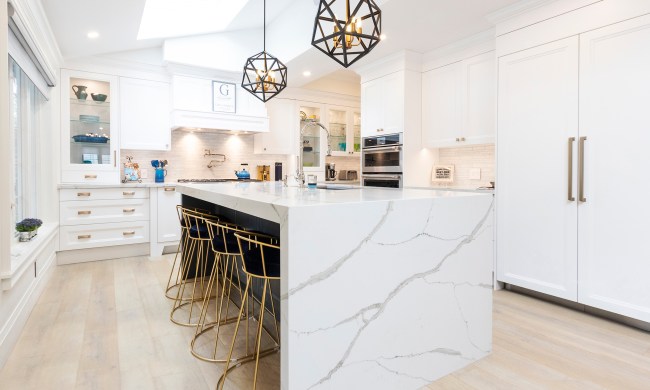
Many homeowners dream of having marble countertops in their kitchen but are put off by the price tag. If real marble countertops aren’t in your budget, you can transform your existing laminate countertops, regardless of the material, so they closely resemble marble. The best part is, you can do it yourself with a simple process that’s beginner-friendly.

When painting your kitchen countertops, prep work is key
Marble is popular in part because of its smooth surface. To replicate that look, give your countertops a thorough cleaning with soap and water, then rinse them and let them dry. Check the counters for any scratches and use a filler to smooth out the surfaces.
If you have laminate counters, use medium-grit sandpaper to make the tops of the counters rough and help the paint stick to them. Wipe away dust with a damp cloth, then let the counters dry.
Some companies sell paint that is specifically designed to create the appearance of marble, which makes the process much easier. If you decide to use marble paint, you may not have to sand the countertops first. The cleaning process may also differ, depending on the type of material your counters are made of, so check the instructions on the product you use before proceeding.
Painting is a messy job. Before you open any cans of paint or primer, protect other surfaces in your kitchen, such as the floor, walls, and appliances, with sheets of plastic and painter’s tape.

Carefully prime and paint your counters
- Use a small roller to apply primer to the countertops. You may need to apply multiple coats to get full coverage. Let the primer dry completely.
- Next comes the fun part: Select the shades that you think will work best with the walls, cabinets, and decor in your kitchen. When you paint your countertops, don’t strive for perfection. Each piece of marble has variations that make it unique, so be careful not to over blend the paint.
- Start by painting the entire surface with a base color, such as white, using a paintbrush and roller.
- After the paint has dried, begin to incorporate other colors to produce the desired marbled effect. Use a paint brush to dab on a few other shades of paint, starting with the lightest and working your way to the darkest. Blend the paint together with a brush and a sea sponge.
You may find it helpful to look at some photos of real marble countertops and study the shapes of the veins and the way the colors blend. Figure out approximately where you want veins to run and how wide you want them, and plan out your pattern before you start painting.

Create veins like real marble
Use a small artist’s paintbrush or a feather to create patterns that resemble the veins that give marble its distinctive appearance, taking care to paint the veins in a diagonal direction.
Remember that you want variations in the width of the veins and the shades of paint in order to create a realistic appearance. Your counters should have some major veins and some lighter and more subtle “ghost veins.” To create that effect, spray some water on an area or dab the counter with a paper towel to remove some of the paint, creating a muted tone. Once you’ve painted the veins, use a dry paintbrush or sea sponge to blur the lines and make the effect even more realistic.
Be careful not to go overboard during this step. Too many veins will look unrealistic and can detract from the overall appearance. If you paint the countertops and think there aren’t enough veins, you can always add more later.
After the paint has dried completely, apply a topcoat to seal the counters and protect them from damage:
- Apply the topcoat in long, even sections a few feet wide, using a brush in the corners and a roller on the rest of the surface. Put enough of the topcoat on the roller so that the roller is always wet.
- After you apply the topcoat, check it carefully for dust, hair, and any other forms of debris, then use tweezers to remove them.
Give the counters at least 24 hours to dry before you use them. Remember to remove the painter’s tape before the topcoat has completely dried, or else you may have a hard time getting the tape off later.
Real marble countertops may be out of your budget, but your home can still have the attractive and distinctive look of marble at a fraction of the price.