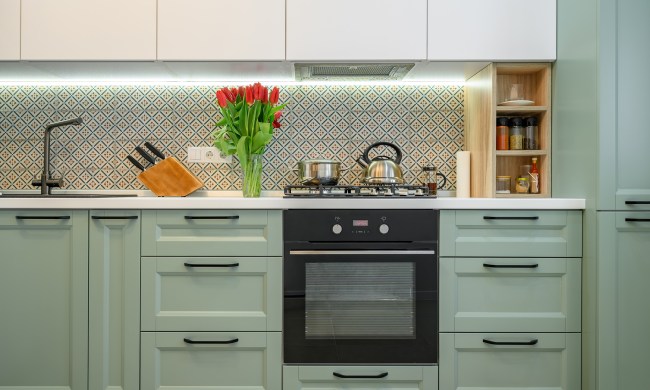
Your cabinetry is one of the strongest focal points in your kitchen. While it may not be as sleek and shiny as stainless steel appliances, it usually runs across the entire room, bringing the whole space together. Therefore, when designing your kitchen according to a theme, it’s crucial that your cabinetry aligns with the overall design style. For rustic themes specifically, using antique cabinetry will make sure your remodel is a home run.
Purchasing authentic, aged white cabinets can be expensive and difficult to maintain, but that doesn’t mean the rustic look is out of reach. By distressing new or unfinished cabinets, you can achieve the look you desire without paying the price. All you need are a few dents, worn patches, and scratches (even gouges), to pull off a look that screams “vintage!” By antiquing the pieces yourself, you can also control just how worn they look, whether you want a touch of wear or more dramatic time-weathered pieces.
Store the contents of your cabinets
Step 1: Before you get started, use a screwdriver to remove all of the contents from the cabinets.
Step 2: Be sure to take off any knobs and pulls and set them aside in a safe place if you intend to reuse them.
Step 3: If the fixtures don’t quite match the antique look, purchase more traditional ones to maintain a cohesive design.
Clean your cabinets
Step 1: Wipe down the cabinets to clean off any visible dirt and dust. You don’t need any intense cleaning agents for this. Diluting a light grease-cutting detergent in water will do the trick.
Step 2: Once the cabinets are clean, leave them to dry.
Step 3: Lightly sand the wood to get rid of any existing paint or stains. Don’t go overboard as you can always distress it more during a later step.
Step 4: When you’re finished, take a rag and softly wipe away any remaining sawdust.
Use a primer
Next, it’s time for the primer. If you already have white kitchen cabinets, you can skip the priming and painting stages and move right on to distressing them. If you don’t have white kitchen cabinets yet, use a standard primer for solid wood cabinets and a high-shine primer for veneer ones.
Step 1: Before you dip your brush in paint, ensure your workspace is safe and protected. Open any windows for better ventilation and cover the countertop with plastic to shelter it from paint splatter.
Step 2: Let the cabinets dry, then sand them down again and wipe away left-over dust with a clean rag.
Step 3: Use a roller or paintbrush to apply a coat of primer.
Time to apply the paint
To ensure your cabinets are well-painted, apply at least two coats. Allow the paint to dry fully before adding the second layer. Don’t be overly conscientious about getting every nook and cranny on the first pass. If you miss some spots, pay extra attention to them in the second round.
Instead of a paintbrush, we recommend spreading the paint in circular motions with an old rag for a more distressed look.
Distress the cabinets
This is the fun part — if they don’t already have enough bangs and bruises, it’s time to scuff up the cabinets. Keep in mind that beating up your cabinets can be fun, but it doesn’t work as well with veneer cabinets. You should only use these more severe distressing methods on real wood.
Step 1: If you painted your cabinets, allow the paint to dry completely before distressing.
Step 2: Using a sanding block, lightly wear away the dried paint.
Step 3: Scrape the grooves, and, if you’re comfortable doing so, use a chisel to chip away bits of the corners.
Step 4: Remember that distressing of this kind is permanent so go slow and step back to check your work every so often.
Glaze it up
For the final step, apply a coat of acrylic glaze and then a coat of non-yellowing polyurethane. Once everything is dry, replace the handles and pulls or install new ones.
Remember that less is usually more when it comes to distressing your cabinets. Instead of going in blind and adding tons of scrapes and scratches, do your research and have a few examples of old wooden furniture and cabinets handy. With images of real-life wear and tear to guide you, you’ll be well prepared to transform this space into the kitchen of your dreams.