Some of the most lovely pieces of furniture are stressed and weathered, showing a history of previous ownership and the durability of handcrafted work. Unfortunately, these antique pieces can be quite expensive. Instead, get all the beauty without the expense by mimicking the antique look yourself. The process of distressing furniture is relatively inexpensive, you just need the time and space to get it done. With the right amount of stain and paint, you can turn almost any piece of furniture into a vintage-inspired treasure.
You’ll need the following tools and materials
Once you’ve chosen the perfect piece of wood furniture to antique, grab the following tools and supplies:
- Spray primer
- Spray paint with a satin finish (flat finishes may soak up the stain, leaving it looking unevenly weathered).
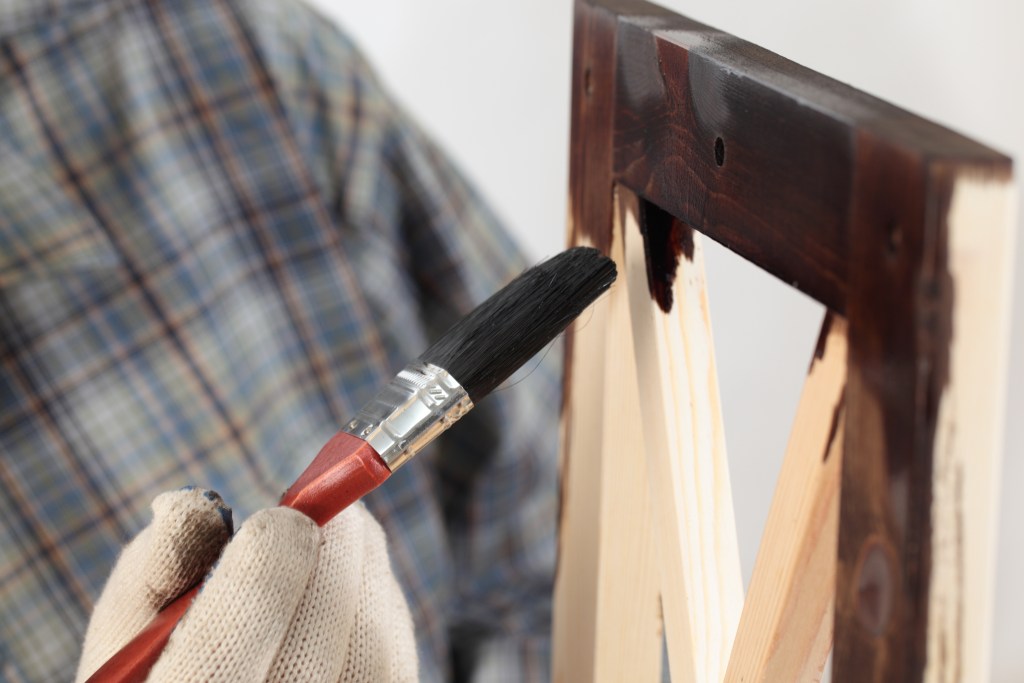
- A dark Walnut or Chestnut stain
- Clear spray sealer
- Clean rags
- Standard 150-grit sandpaper
- Electric sander with 80-grit and 150-grit sandpaper
- Foam brush
- Paintbrush
Prepare your furniture
First, take off all hardware and save them in a bag or small container so they won’t get lost. Use painter’s tape to mask off any areas that you don’t want to paint, like the trim or other decorative elements. Carefully clean the item of grime and ensure that the furniture is completely dry before moving on.
Use the electric sander to rough up the surface of your furniture and remove any existing stain or paint. Instead of sitting atop the existing stain, your new paint will adhere directly to the wood. Sand with medium-grit paper until there are no shiny spots left on your project, paying special attention to areas like the high points and edges. Don’t worry too much about getting the weathered look at this step. There will be more opportunities later to sand and distress more.
Finally, wipe down any dust or particles from sanding, clean it once more with a wet rag, and allow it to dry completely.
Stain or paint the bare wood
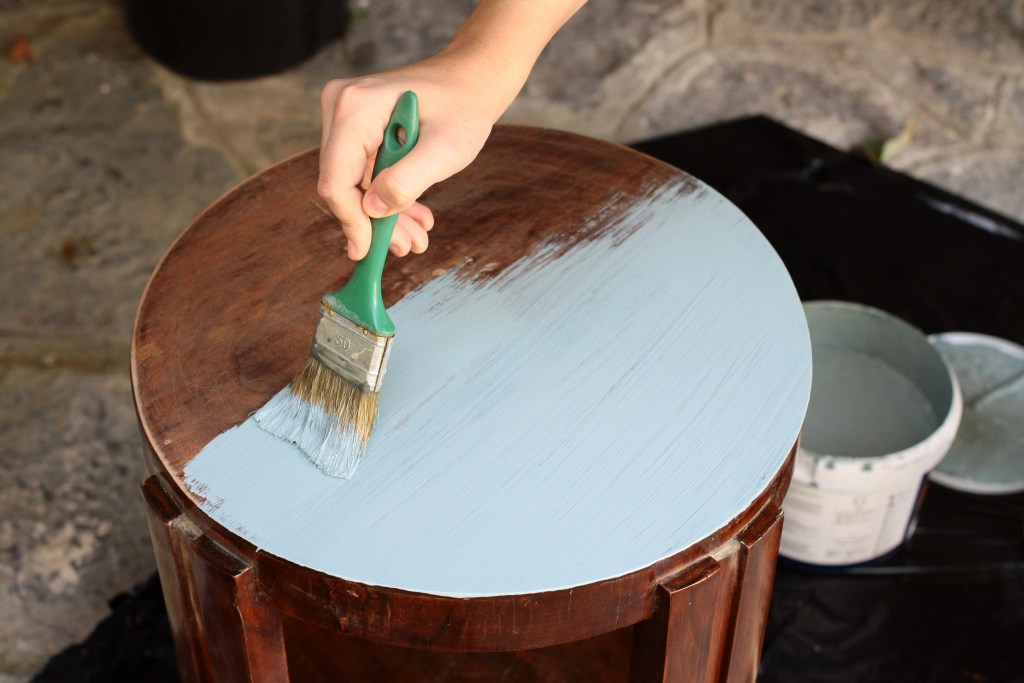
Before painting, consider which base coat will be most compatible with your ideal final product. For example, if you plan to use antique white paint for the finished piece, opaque dark brown paint won’t be the best coloring agent. The base coat will come through the piece ever so slightly to give it the illusion of being older than it is. Keeping this base coat close to the final paint color or similar in color and texture to natural wood can ensure the layers are visible but not overly exaggerated.
Layer on several coats for best results and allow ample drying time between each coat. We recommend applying the coloring agent using a rag, rubbing it into the wood using circular motions. This brings out the texture of the grain, and the circular patterns prevent the piece from looking too new and sleek.
Time to paint your furniture
When painting, use a light hand and only apply very thin layers one at a time. This way, you can gradually reach your desired color. There’s nothing worse than applying a thick layer, realizing it’s too dark, and having to start all over again. Before moving forward, be sure to allow at least 24-hours for the paint to completely dry.
Once dry, apply a second coat of paint. Remember, you want the result of your efforts to look natural, so don’t worry too much about creating a uniform appearance. Antiquing is something of an art, so you’ll have to make some creative decisions as you paint.
As we mentioned before, it’s best to use a slightly different color than your first layer. Once you distress the piece, you’ll start to see hints of the various layers. This gives the illusion that, over time, the piece has been painted, repainted, and retouched as it changed ownership. Aiming for more visible layers gives your furniture a natural yet aged look.
Sand, buff, and make magic happen
To wrap up this DIY antiquing project, sand and buff your furniture one more time. Take your time and be careful. Don’t rush this phase because you can easily go too far and ruin all your efforts — it should look antique and usable, not old and rickety. Be smart about your sanding, paying attention to areas that naturally wear quickly like edges and corners.
Wipe away any dust, apply stain to a clean rag, and coat the piece one last time, giving it that beautiful, shiny sheen. This process can also enhance the aged look and bring out the details in the wood grain. Once you’re finished, let your furniture dry for at least three days before displaying it in your home.