Installing new interior window trim can instantly make a room look more finished and add a decorative element to your home. Trimming a window can seem like a complex project to many homeowners, but doing it yourself may be simpler than you imagine.
So, how do you trim the inside of a window? This method for installing basic window trim involves two parts: installing the stool and attaching the casing. Keep reading to learn which materials and tools you need as well as the steps to completing this project.

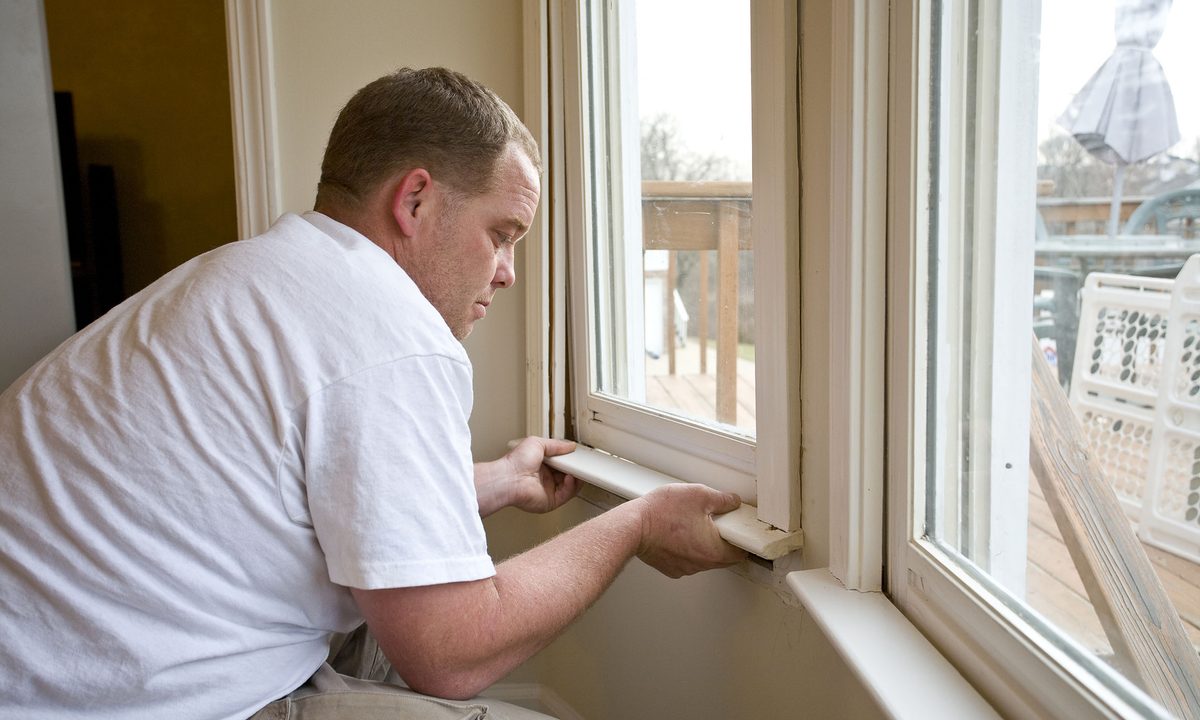
Install the stool
With this window trimming technique, you’ll first install the stool. This is the bottom section of the trim that juts out from the wall like a mini-shelf. Before you begin construction, make sure all the jambs are flush with the surface of the wall. If they don’t reach the wall’s edge, add wood strips to extend them. If they protrude beyond the wall, smooth them down until they’re even. Follow these steps to attach the stool correctly.
Step 1: Draw the reveal: Using the combination square, draw the reveal on the edge of each jamb. This quarter-inch of space is the area of the jamb edge that the casing won’t cover. Make the markings easily by setting the square and then holding the tip of the pencil against it as you slide the square along the jamb.
Step 2: Measure and mark: Next, you must determine the proper length of the stool. Hold one piece of casing flat against the wall in line with the reveal line. Mark the edge lightly on the wall. Then, turn the casing on its side and make another mark at its edge. The distance between the two marks should be equal to the width of the casing. Repeat this process on the other side of the window. Measure the length of the two outer markings with the tape measure — this is how long the stool should be.
Step 3: Cut and create notches: Cut the stool to the proper length. Then, you will need to mark the notches on both ends of the stool. Mark the depth of each notch first, then the length. Cut out the notches with a handsaw or jigsaw. If you’re using a jigsaw, adjust the blade so that it undercuts slightly, removing a little more from the bottom of the wood than the top.
Step 4: Fit and attach: Put the stool in place and ensure that it fits snugly. Saw or plane the wood to make any necessary adjustments before attaching it to the rough sill. Once the fit is perfect, drill pilot holes and attach the stool with 8d finish nails.

Attach the casing
Next, you’ll need to attach the casing on the sides and top of the window. Here’s how to finish the project with ease.
Step 1: Cut the top piece: Cut one edge of the top (head) casing piece at a 45-degree angle. For this part, it may help to have an extra set of hands. Hold the casing in place, aligning the cut edge with the reveal line on one side. Then, mark the other side of the casing where it intersects with the reveal line, and make another 45-degree cut. Tack the casing into place, only driving the nails in partway.
Step 2: Mark the side casing: The process is similar for the side casing. Cut one edge to 45 degrees. Hold the piece upside-down, placing the tip of the cut end on the outer edge of the sill. Mark the other end for a straight cut where it aligns with the top edge of the head casing. Make the cut and repeat with the piece of casing for the other side of the window.
Step 3: Drive the nails: Hold the casing together and use the nails to attach the pieces to the frame. Use 6d finishing nails to fasten the casing to the studs, and 3d nails when attaching it to the jamb. If you’re driving a nail near the edge of a piece of wood, be sure to drill a pilot hole first so you don’t damage the wood. At each miter, hammer a 3d nail horizontally to tightly and securely attach each piece of casing against the other.

Window trim FAQs
Learn everything you need to know about window trim before starting this DIY project.
- What is the trim on a window? Window trim is the frame that surrounds your windows. Trim on the exterior of your house covers the gap between the siding and the window, but inside, the trim is purely stylistic. Interior window trim can be made of wood, polystyrene, polyethylene, and more.
- What is the trim around a window called? There are a few different parts of interior window trim, including the casing, which lines the top and sides of the window, and the stool, which lines the bottom.
- How much does it cost to trim windows? According to Fixr, interior window trim costs an average of $50 to $150 per window.
Now you know how to trim a window interior! This DIY project is simple to complete, as long as you measure and cut carefully. Begin by installing the stool, then measure, cut, and attach the casing. In just a few hours, you’ll have a beautifully trimmed window that you can be proud to say you installed on your own.


