If your bathroom tile grout is stained, dirty, or otherwise looking old, it's not only unsightly, but it can make it difficult to sell your home. You may be wondering if you should regrout the shower or other tiled areas of the bathroom. Sometimes grout staining occurs no matter how much you clean it, and the result is tile that looks dirty even though it isn't.
Luckily, there are a few different ways you can freshen up your grout without remodeling your bathroom, and they include some affordable, do-it-yourself options.
One go-to option for a bathroom tile revamp is to regrout the shower tiles: removing the old grout and replacing it with fresh, clean, new grout. This process takes some work, but it can leave your bathroom looking refreshed and it's less work than installing a new shower or all-new tile. Before you get started, though, you'll want to make sure it's the right option for your needs.
Can I regrout my shower myself?
Yes, you can regrout your shower yourself if you're comfortable with basic DIY tasks. It may even be more cost effective for you if you already have the tools and materials needed. Regrouting involves removing old grout, cleaning the area thoroughly, and applying new grout with the proper tools. However, there are a few important considerations.
If you notice cracked tiles, signs of water damage behind the tile, or mold that keeps coming back, it’s best to call a professional. Improper regrouting can lead to leaks or further damage, especially if the underlying issue isn’t addressed. Professionals can also ensure the job is sealed correctly for long-lasting results. When in doubt, a consultation can help determine the best course of action.

How to regrout the shower or other tiled bathroom area
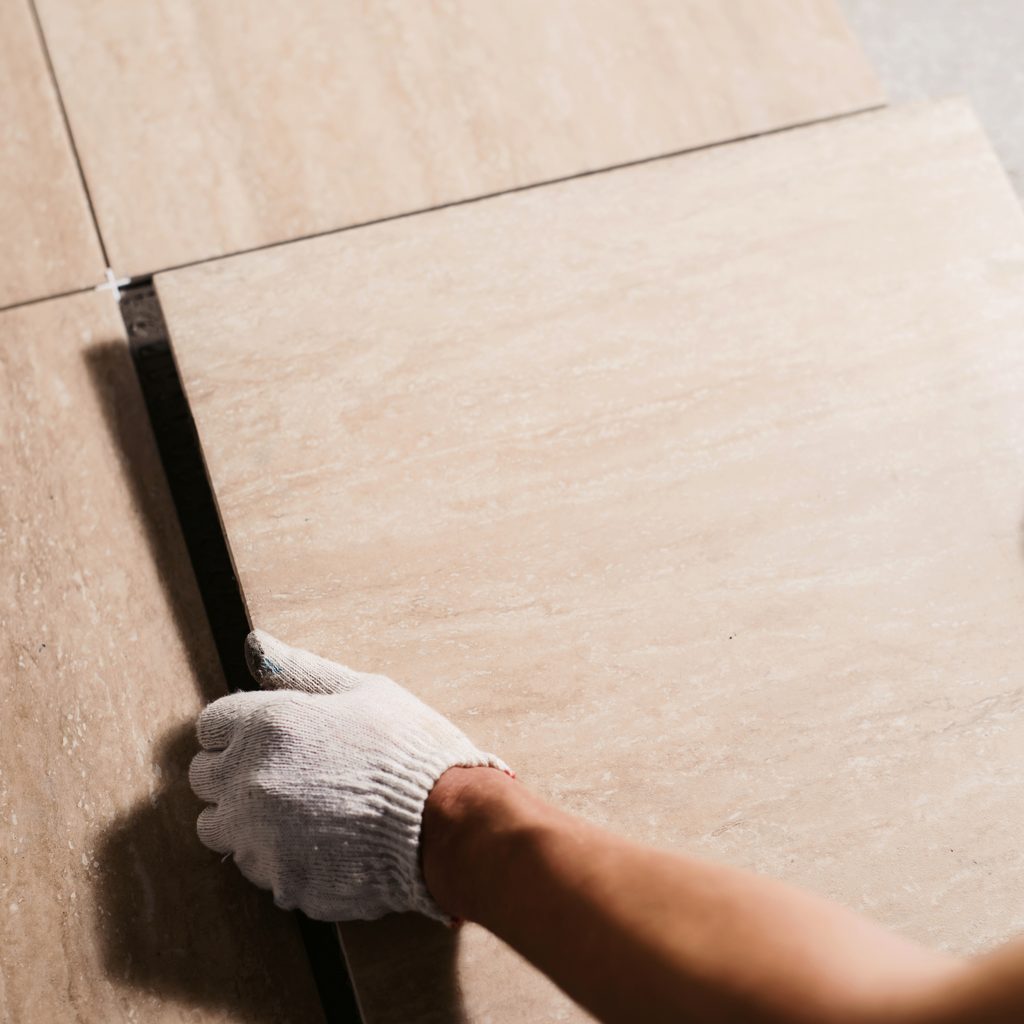
Regrouting your tile means that you’ll replace the existing grout without actually removing any of the tiles from the walls. It’s a relatively simple (but labor-intensive) process that you can accomplish by yourself, as long as you have the right tools. It’s also highly affordable, making it a great way to freshen up your bathroom if you’re on a budget.
Regrouting is a three-part process.
Step 1: Start by scraping out the old grout.
You can use a variety of tools for this, including a grout saw, steel utility knife blades, grout scrapers, a drill, or a Dremel. This is the most time-consuming part of the regrouting process.
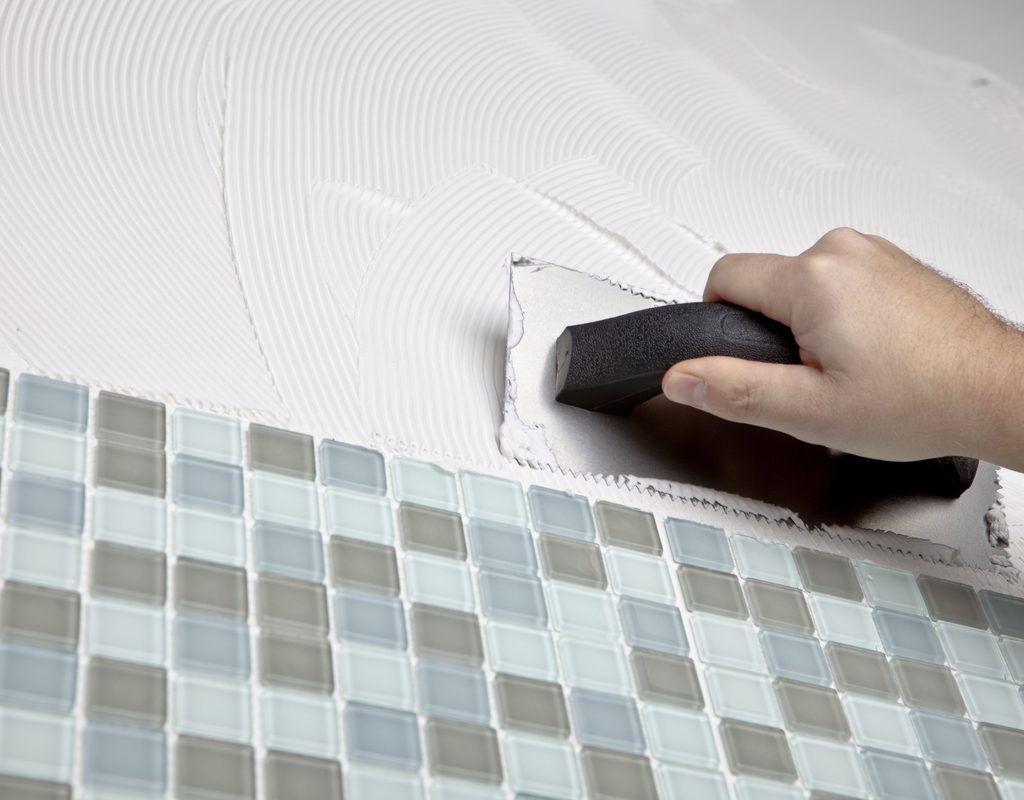
Step 2: Mix up and apply new grout.
You’ll need a grout float and a sponge to pack the grout into the joints between the tiles.
Step 3: Clean up and buff the tiles after the grout has dried.
After the grout completely cures — which can take up to 36 hours — you can seal the lines to help prevent future staining.
Regrouting takes time, but it’s not too difficult. Before beginning the process, though, make sure that it’s the right option for your budget, situation, and goals. Alternatives like tile reglazing or even replacing all of your tiles might be a better option.
An alternative to regrouting: Tile reglazing
If both your tile and grout are looking tired, then tile reglazing might be a better option. While reglazing isn’t traditionally a DIY option, it is more affordable than having your tile entirely replaced, and it creates beautiful results.
When you have your tile reglazed, a professional will repair any broken tiles and acid etch them to remove any shine. They’ll then clean the tiles with chemicals before spraying on three or four coats of glossy enamel. The enamel will cover the tiles and the grout, making them look brand-new. The results can last up to 15 years!
CostOwl estimates that reglazing all of your bathroom tiles could cost $1,000 to $2,000, but be sure to get quotes from local professionals to get a better sense of what your specific project would cost.
If you want to go the DIY route, be prepared: Reglazing tile isn’t a simple process. There are kits that you can buy, but they contain dangerous ingredients like hydrofluoric acid. You’ll need to wear full protective equipment, including a mask and bodysuit. Depending on the size of your project, hiring a professional might make more sense.
Is regrouting worth it?
You’ll want to consider multiple factors when deciding if you should regrout, replace your tile entirely, or opt for reglazing.
Step 1: Start with the condition of your tiles and the grout.
If you have multiple chipped or broken tiles, or if many tiles are loose, then you may be better off retiling the bathroom. If the tiles are in good condition, but the grout is starting to crack or is stained, then regrouting could save you money over retiling the area.
Step 2: Think about your budget and the amount of time you have available.
If you’re always up for a good DIY project, then the idea of regrouting your bathroom yourself and saving money might appeal to you. Keep in mind that regrouting a bathroom takes time, and you’ll need to be able to set aside a day or two to tackle the project.
Step 3: Ask yourself if you can do it yourself or if it's safer to call in a professional.
Reglazing can be an appealing option if your tiles’ finish is worn but the tiles, themselves, are still in good condition. Attempting to reglaze the bathroom on your own is a major undertaking involving harsh chemicals, so think carefully before deciding to handle the process yourself instead of hiring a professional.

Do you have to remove old grout before regrouting tile?
In most cases, you don't have to remove old grout before regrouting. A simple cleaning to clear away dust and light debris prior to adding new grout can do the job effectively. However, in some situations, this may not be the best choice. If your old grout is filthy, crumbling, deteriorating, or moldy, you may want to consider clearing out the old material before adding any new grout on top. This will help preserve the integrity of your new grout and allow it to last longer without any underlying problems coming to surface.
Is it cheaper to regrout or retile a bathroom?
Generally, it's more affordable to regrout than to retile. Regrouting costs can range from $500 to $1,000, depending on the scope and scale of your project. However, retiling a bathroom can range from $1,000 to $5,000 or more. When retiling, quality tiles may cost you more than you expect during your renovation. Additionally, cheaper tiles may mean you’ll have to anticipate repair costs or retiling again sooner than you want.
Unless your tiles are broken, crumbling, or outdated, it is more affordable to regrout rather than to retile. If your tiles are in good condition but their appearance is less than pleasant, you might consider regrouting and painting them to give your space a facelift.
Whether you’re getting ready to sell your home or just want to revitalize your bathroom, you have plenty of options to choose from. Regrouting, retiling, and reglazing can all have your bathroom looking new again, without requiring a full renovation.
The option that’s right for you depends on your budget, goals, the amount of work and time you’re willing to put in, whether you’re looking for a project you can accomplish yourself, and the current condition of your bathroom tiles. Any of these options can help to improve your bathroom’s looks without investing in a full renovation.


