

Although peanut butter itself was first made by the Inca hundreds of years ago, it wasn’t until the early 1900s that peanut butter became an ingredient for cookies. These cookies were met with so much acclaim in the United States that they now have an official holiday: National Peanut Butter Cookie Day is celebrated each year on June 12th.
As one of the easier classic cookies to make, even the most complicated peanut butter cookie has only a handful of ingredients. But, for novice bakers or those baking with younger kids, sometimes even a handful of ingredients can be too many. That’s why we went on the hunt for a super easy — yet really yummy — cookie recipe that virtually anyone can make. With just three ingredients, you can create the most delectable dessert, starring everyone’s favorite nut butter spread. Here’s how to make the best 3-ingredient peanut butter cookies.
The very best recipe for 3-ingredient peanut butter cookies
Kids love baking, but some recipes might have too many steps, too many ingredients, or require complicated kitchen gadgets. If you’re looking for a simply delicious cookie recipe for accomplished and beginner bakers alike, this three-ingredient peanut butter cookie is it. It also has the added benefit of being gluten-free!
It’s a 1, 1, 1, ingredient list:
- 1 cup peanut butter
- 1 cup white sugar
- 1 egg
Instructions
- While your oven is preheating to 350 degrees Faharenheit, line your cookie sheets with parchment paper.
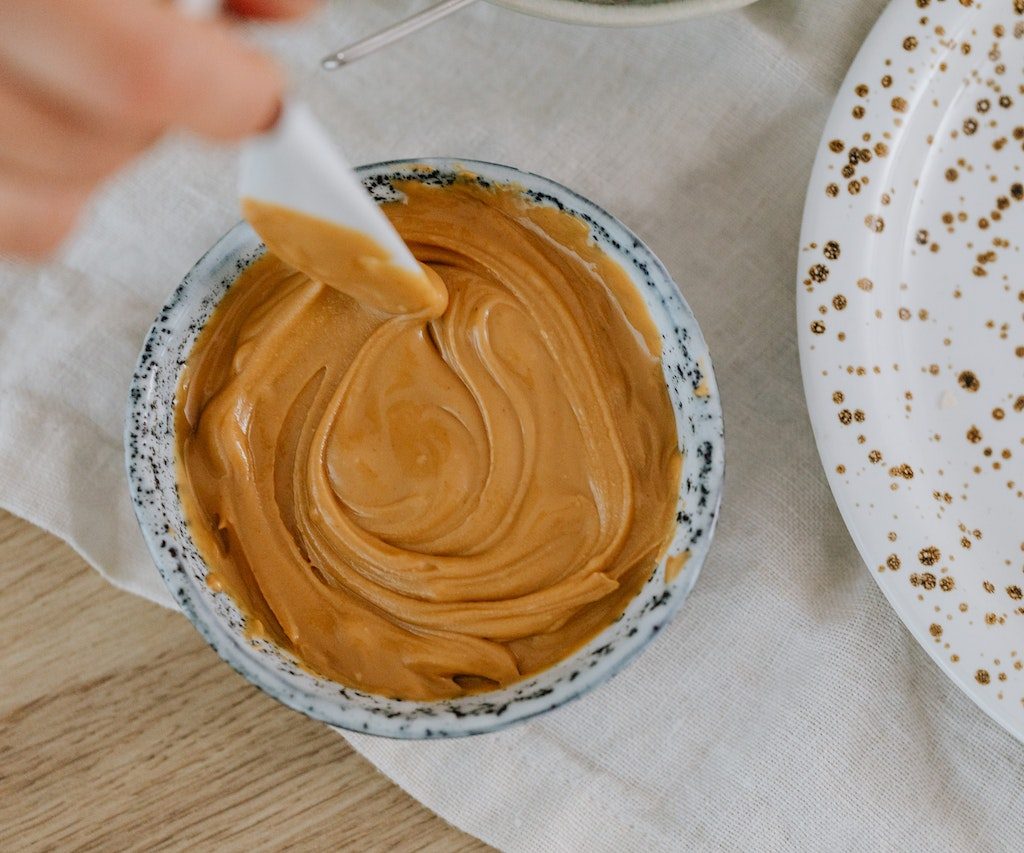
- In a medium-sized bowl, combine the peanut butter, sugar, and egg and mix until smooth. Drop spoonfuls of dough onto the cookie sheet.
- To get that trademark criss-cross pattern on your peanut butter cookies, use a fork to press down on the dropped dough. Press down twice: once horizontally and once vertically. For an added touch of sweetness, top with a light sprinkling of granulated sugar before popping into the oven for 6-8 minutes.
These cookies are best when soft and chewy. To make sure that your cookies have the proper consistency, do not overbake. Instead, bake them until they are just barely brown on the bottom.
The crisscross marks are there for more than just aesthetics. Peanut butter cookies are denser than many other types of cookies, and pressing them with a fork flattens the dough so it bakes more evenly.
How to store homemade peanut butter cookies
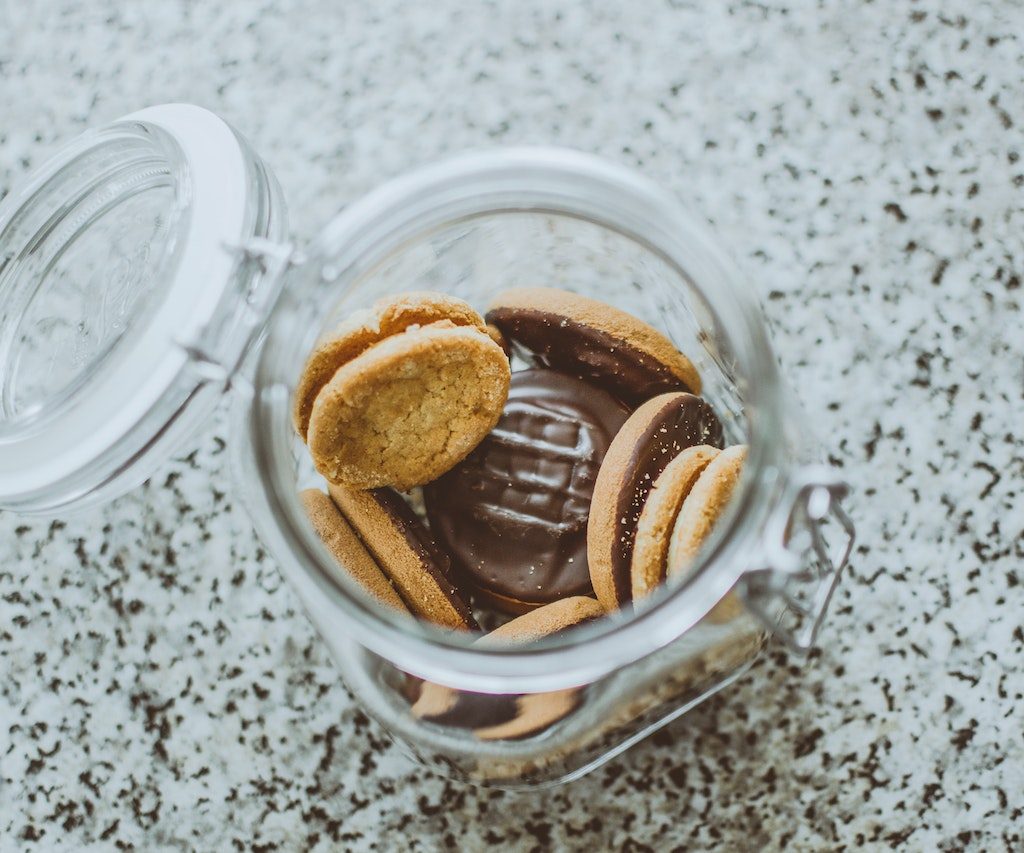
To properly store peanut butter cookies, make sure they are 100% cool before placing them in the container, otherwise, they could end up producing steam inside the container and you’ll be left with peanut butter cookie crumble. For best results, store your cookies in an airtight container at room temperature for up to a week. Pro tip: Skip those countertop cookie jars. Although they look cute, they allow cookies to get stale pretty quickly.
If your cookies start to become less soft ’n chewy after a few days, stick a piece of bread inside the container. The cookies will absorb moisture from the bread to make them soft and chewy all over again.
Can you freeze these peanut butter cookies?
Yes, you can freeze these 3-ingredient peanut butter cookies. Follow these steps:
- Allow the cookies to cool completely at room temperature after baking.
- Place a layer of parchment paper on a baking sheet or a flat surface.
- Arrange the cooled peanut butter cookies in a single layer on the parchment paper, ensuring they do not touch each other.
- Place the baking sheet with the cookies in the freezer and let them freeze for a few hours or until they are firm.
- Once the cookies are frozen solid, transfer them to an airtight container or a freezer-safe resealable bag. Place parchment paper between layers to prevent sticking.
- Label the container with the date to keep track of freshness.
Frozen peanut butter cookies can be stored in the freezer for two to three months. When you’re ready to enjoy them, simply remove the desired number of cookies, thaw them at room temperature, and they should still taste delicious.
6 inventive takes on the classic peanut butter cookie
Once you’ve got the classic peanut butter cookie recipe down, get creative and put a unique spin on it to create more inventive cookies and desserts for Halloween or other upcoming holidays.
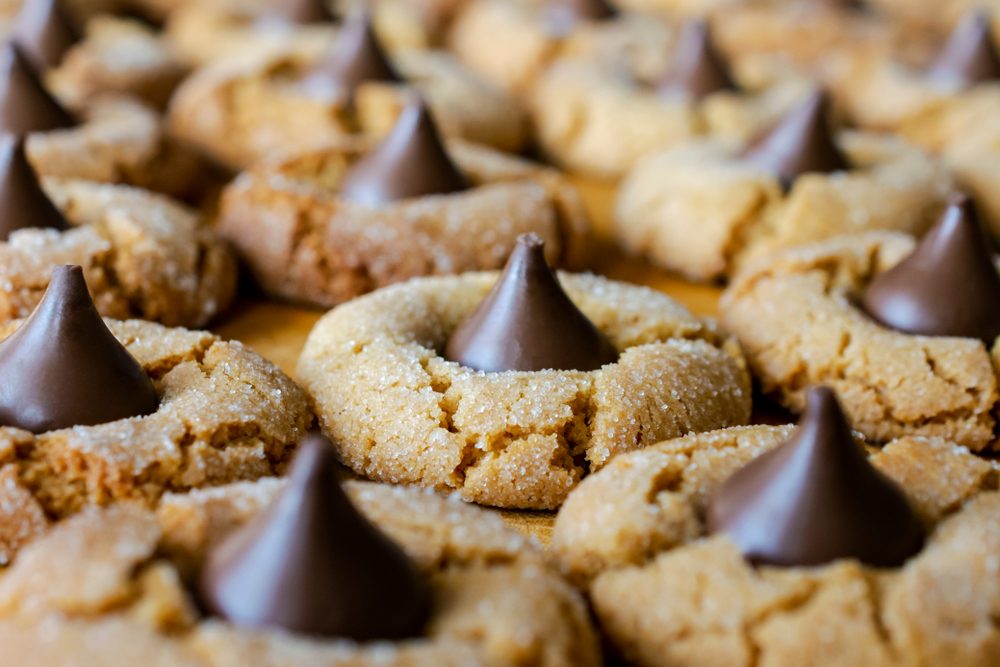
Peanut butter kiss cookies
Just five ingredients can give you a deliciously different way to bake peanut butter cookies. The milk chocolate kiss in the center of each one is the perfect finishing touch.
Chocolate chunk peanut butter cookies
Peanut butter, melted chocolate chunks, and a hint of sea salt… count us in. These thick and chewy cookies take the basic peanut butter cookie to a whole new level.
Peanut butter espresso cookies
Calling coffee lovers everywhere: This recipe is for you. Peanut butter cookie dough infused with espresso powder and a touch of cocoa is the key to a more adult take on a classic recipe.
Peanut butter cookie in a mug
A cookie that you can cook in a mug in the microwave — what could be easier?
Peanut butter oatmeal chip cookies
One-third oatmeal cookie, 1/3 chocolate chip cookie, and 1/3 peanut butter cookie result in one mouth-wateringly decadent dessert.
Sweet banana peanut butter cookies
Peanut butter and banana is a classic combo, and now you can enjoy it in cookie form. This cookie recipe is made in Oreo cookie fashion — two banana peanut butter cookies sandwiching a banana filling in the middle. Get ready to be wowed!
Whether you keep it easy with the 3-ingredient recipe or upgrade your baking to incorporate a slew of other fan-favorite ingredients, peanut butter cookies are a timeless dessert favorite that the whole family will love.


