A clean home can cultivate peace and kick stress to the curb, but it can be difficult to keep up with those often-neglected areas of the home. The laundry room is one of those areas, but it’s also a space that’s downright dangerous to neglect. In fact, FEMA reported that clothes dryers cause around 2,900 fires in residential buildings every year, resulting in widespread damage, serious injury, and even death.
However, you can prevent catastrophe in your home by cleaning your dryer regularly. If you don’t know where to start, don’t worry. We’ll walk you through how to clean the dryer vent so your laundry room and your home will be both clean and safe.
What you need
Before you begin, gather these items:
What is a dryer vent?
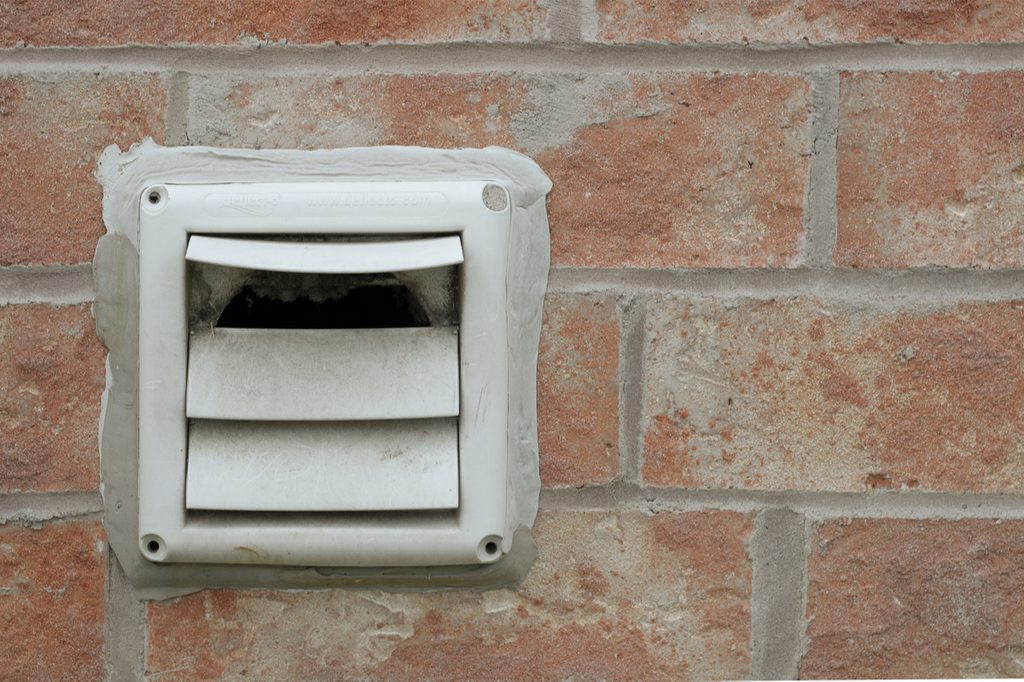
A dryer vent is a duct or pipe that connects the dryer to the exterior of a building, allowing hot air, moisture, and lint to be expelled outside. It serves as a crucial component in the dryer’s ventilation system, facilitating proper airflow and preventing the buildup of humidity and lint indoors.
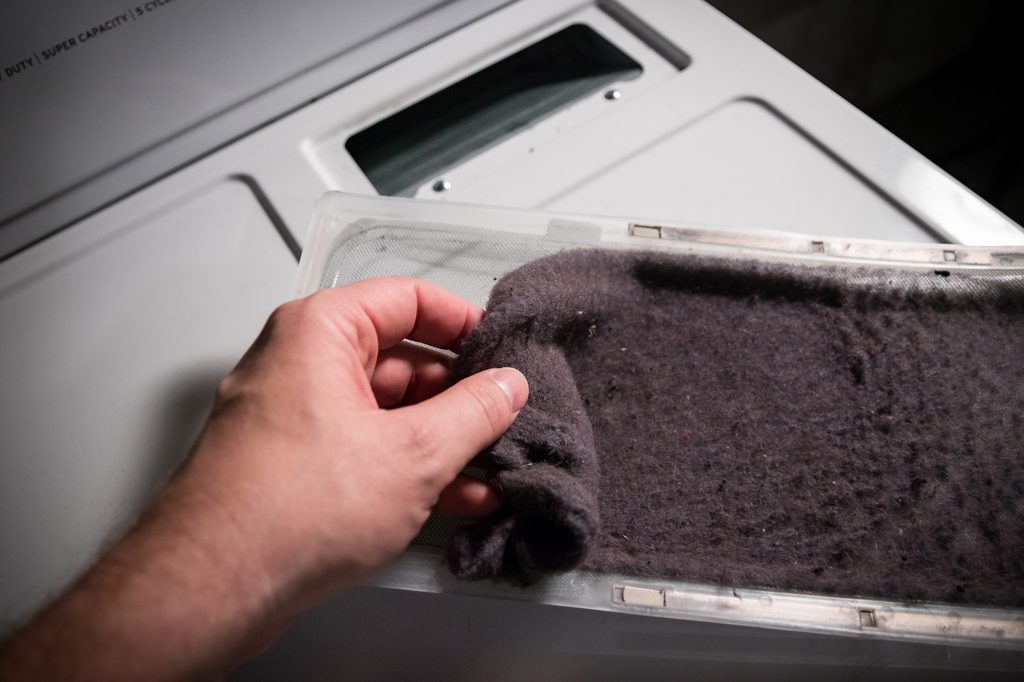
However, it’s important to note that a dryer vent is different from a lint trap. While the vent expels lint-laden air outside, the lint trap captures lint before it reaches the vent, typically located within the dryer itself. Regular cleaning of both the vent and lint trap is essential for optimal dryer performance and safety.
How do I know if my dryer vent is clogged?

Some telltale signs indicate your dryer’s vent has a clog, so watch out for these situations and clean out your vent at the first sign of trouble.
- Your clothes don’t dry completely after a regular cycle.
- Excess lint is suddenly appearing on your clothes after drying.
- Your laundry area is hotter than it normally is.
- A burning or musty smell is coming from your dryer when it’s in use or is on your clothes after drying them.
- The dryer vent on the exterior of your home has a lot of lint debris or is not releasing much air.
Can I clean my dryer vent myself?
While the filter screen on most clothes dryers is quick and easy to clean after every load, cleaning the vent itself requires a bit more work. Even so, it’s a simple enough task to complete on your own as long as you have a screwdriver and a vacuum cleaner with attachments.
How to clean a dryer vent

If you notice any of the above warning signs, it’s time to take action: Follow these steps to clean your dryer vent and avoid fire hazards in your home.
Step 1: Unplug your dryer from the wall outlet to shut off power to the machine. If you have a gas dryer, turn the gas supply valve to the “off” position until you’ve finished the project.
Step 2: Carefully drag your dryer away from the wall so that you can access the vent duct behind it.
Step 3: Use a screwdriver to disconnect the duct from the exhaust pipe and pull the duct away, being careful not to bend or otherwise damage it.
Step 4: You may see lint caked around the opening of the exhaust pipe. In this case, use a special dryer vent cleaning brush to break the debris apart.
Step 5: Grab your vacuum and use an attachment to suck out any lint and debris from the exhaust pipe.
Step 6: Take your vacuum outside and use the attachment to remove any dust and grime from the exterior vent.
Step 7: Before you replace the duct on the exhaust pipe, be sure to check it for damage. Any dents or cracks in the duct will make it difficult for lint to travel through, ultimately clogging the vent. Repair or replace the duct if necessary.
Step 8: Use a screwdriver to reattach your new or repaired duct to the dryer’s vent, then push the dryer back into place against the wall.
Step 9: Plug the machine into the wall outlet and, if using a gas dryer, turn the gas valve back on.
How often should I clean my dryer vent?
Experts recommended cleaning the dryer vent at least twice per year. Debris can easily build up and reduce the efficiency of your dryer, hiking up your electric bill while posing a fire risk in your home. It’s best to also have a professional examine and clean the duct once a year, particularly if you don’t regularly clean it.
Tips for keeping your dryer clean
To prevent dryer vent clogs and dryer fires, keep this appliance clean with the following tips.
- Clear off the lint screen after every use.
- Thoroughly clean the lint screen twice per year. Do this by removing the screen and clearing off any lint it has collected. Then, run it under hot water on both sides, use a nylon brush to rub some mild soap into it, then rinse it off. Make sure the screen is completely dry before replacing it in the lint trap.
- Clean out the lint trap, the part that houses the screen, every three or four uses. To clean the trap, simply remove the screen and use your vacuum’s attachment to suck up debris.
- Clean your dryer’s exterior regularly to reduce the collection of lint, dust, and other debris that can increase the risk of fire. Use an all-purpose cleaning spray and a cloth to wipe off the machine’s sides, front, back, buttons, and knobs. Move your dryer occasionally to sweep and mop the floor underneath.
Other dryer safety tips
Keeping your dryer, your lint trap, and your laundry room clean are just a couple of ways to help prevent the fire risk that this appliance poses. However, there are some practices that increase the risk of fire or pose larger damage risks if a fire were to start. For example, packing in storage around your dryer can increase fire risk by not allowing the appliance room to breathe. It can also give a potential fire more opportunity to spread.
You should also avoid running your dryer when no one is home to monitor it. The sooner a fire is noticed, the faster it can be contained, and if you’re not home, the risk of widespread fire damage increases.
Your laundry room gets a lot of use, particularly if you have multiple people living in the home. Keep your family and your belongings safe from fire by keeping your dryer clean and ensuring the vent properly expels exhaust out of your home and into the outdoors. With this handy guide, your laundry room will be safe and functional for years to come.


