
How to cook with lavender without your food tasting like soap

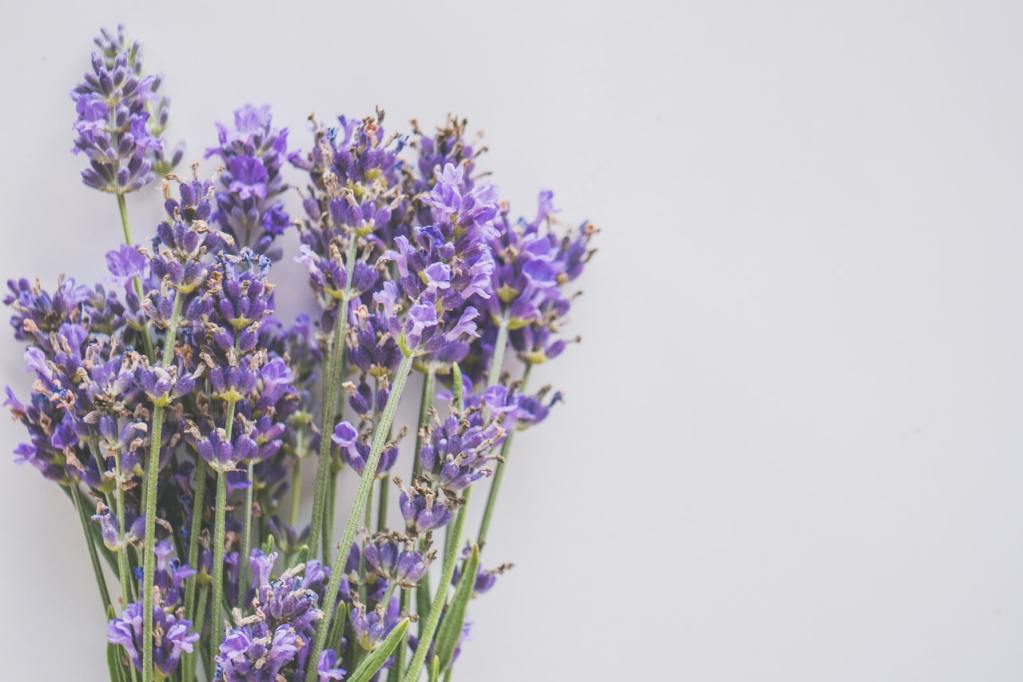
There’s a lot of hype around cooking with lavender. It’s fragrant, colorful, and earthy, giving complex flavors to desserts like ice cream, cookies, and whipped cream. Not only does it taste great when used properly, but lavender also has some health benefits: It can boost immune health, fight infections, and combat inflammation in the body. That being said, lavender is a very strong flavor and too much can make your dish taste a little bit like soap. That shouldn’t stop you from infusing gourmet meals with this purple herb, though. We’re going to walk you through how to cook with lavender and ensure your meal doesn’t taste sudsy.

inalex/Shutterstock

Foods that pair well with lavender

The unique taste of lavender tends to pair well with zesty flavors like lemon, mint, and other strongly flavored herbs. Lavender is also extremely versatile and can flavor marinades or rubs on mild meats like lamb or chicken while also fairing well in baked goods like cakes and cookies.

Tips for cooking with lavender leaves

Buy the right lavender

Be sure to buy a form of lavender that’s meant for consumption. Some varieties are cosmetic, similar to coconut oil and avocado oil, and others are purely ornamental. To find culinary lavender, check out your local health foods store or farmer’s market.

Prep your lavender properly

If you use whole lavender leaves in your dishes, you’ll likely find unpleasant and overwhelming chunks of lavender in your food. Instead, prep your lavender using one of these two tried and true methods.

  • Grind it up. Grind a small amount using a mortar and pestle or pulse a larger amount in a food processor for roughly four or five minutes. This method is best when combining your lavender with sugar for baking or with seasonings to flavor meat.
  • Infuse it with oil. This method is perfect if you plan to use lavender in syrups or oils. Simply place your lavender leaves in a sealable glass jar, add an edible oil, and let it sit for 1-2 weeks to infuse it fully. Then, use a mesh colander or cheesecloth to strain out the leaves, resulting in homemade lavender-infused oil.

Use your lavender sparingly

Lavender has a strong flavor, so if you use too much, it will overwhelm the dish. To counter this, pair this herb with a strong flavor like lemon or mint to equalize the punch of the lavender. Follow the recipe closely, and if the measurement of lavender feels too high, feel free to cut it down to a smaller size.

lavender flowers against white wall
Jessica Lewis / Pexels

Our recommended recipe: Lemon-Lavender Pound Cake

Since lavender pairs excellently with the tart and zesty flavor of lemon, our go-to recipe for cooking with lavender is Lemon-Lavender Pound Cake. Since the lavender flavor will be subtle, this is a great recipe to start out with if you’re just beginning to experiment with this herb.

Ingredients you’ll need

For the cake:

  • 2 tsp lavender, dried
  • 1½ cups flour of your choice
  • ¾ tsp salt
  • ¼ tsp baking soda
  • ¾ tsp baking powder
  • ¾ cup sugar (plus 1 additional tablespoon)
  • 4 tsp lemon zest, grated finely
  • ½ vanilla bean
  • 1 stick (½ cup) butter
  • 2 eggs
  • ½ cup milk of your choice (recommend buttermilk)
  • 3 tbsp lemon juice

For the glaze:

  • 1 lemon
  • 2 tbsp milk of your choice (recommend buttermilk)
  • 1 c powdered sugar

Instructions:

Making the cake

  1. Preheat your oven to 350°.
  2. Grease your bread pan (recommend 8½ x 4½ inch size) and line it with parchment paper.
  3. Whisk together flour, baking soda, baking powder, and salt in a mixing bowl and set it aside.
  4. Cut your vanilla bean lengthwise and scrape out the seeds.
  5. Add sugar, lemon zest, vanilla bean seeds, and lavender to your food processor and pulse until the lavender is ground finely. Set aside one tbsp of the mixture for the topping.
  6. Pour the contents of the food processor into a mixing bowl and add butter. Beat for 5-7 minutes on medium-high until the mixture is fluffy and light. Add one egg to the bowl and beat until blended, then add the second egg and do the same.
  7. In a separate bowl, combine milk and lemon juice.
  8. Continue to beat the sugar mixture on low as you alternate adding portions of the flour and milk mixtures in 2-3 portions each.
  9. Turn off the mixer before the dry ingredients are fully mixed. Continue mixing by hand until well blended to ensure the batter is not over-blended, as this could lead to a tough-textured cake.
  10. Pour the batter into a parchment-lined bread pan and smooth the top evenly.
  11. Bake for 55-65 minutes or until a toothpick comes out of the cake cleanly.
  12. Let cool completely before removing the parchment and adding the glaze.

Making the glaze

  1. In a medium-sized bowl, whisk together milk and powdered sugar.
  2. Pour the mixture over the cake and allow it to drip over the sides.
  3. Zest lemon into a bowl and toss in 1 tbsp of the lavender sugar mix to coat the strips of lemon zest.
  4. Sprinkle the glazed cake with the lemon zest mixture.
  5. Allow the glaze to set on the cake for about 30 minutes before serving.

Editors' Recommendations

Veronica Sparks
Veronica Sparks is a writer from Milwaukee, Wisconsin who loves writing about gardening, home décor, and DIY life. She’s…
How to prune a Dracaena marginata (dragon tree) so your plant stays thriving
Dragon tree getting too tall? Here's how to prune it so it flourishes
Dragon tree on a windowsill with copper watering can

Dracaena marginata, commonly called dragon trees, are not only great purifiers, but they're also super low-maintenance plants. To top it off, these guys are happy as both outdoor and indoor plants and they're incredibly easy to prune. Let's discuss some dragon tree pruning tips for a happy, thriving plant.

If you're a plant parent, you know that having indoor plants isn't just for aesthetics. Many plants have benefits like purifying your home's air and increasing the humidity during dry winter months. Plus, keeping plants in the home is a surefire way to boost your mood. But you have to keep those plants happy and healthy in order to keep your lush indoor garden thriving.

Read more
Eucalyptus in the shower? Here’s how to grow this fragrant plant for your spa-themed bathroom
Hanging eucalyptus in your shower has a ton of benefits. Here's how to plant it for months of use
Eucalyptus plant in shower

Are you looking to create a spa-like experience in your luxurious bathroom? Eucalyptus in your shower can create a relaxing ambiance and add a refreshing and invigorating aroma to your daily routine. If you're curious about the benefits of having eucalyptus in the shower, how to grow eucalyptus indoors, and the proper techniques for harvesting and using it in your shower, you've come to the right place. We'll walk you through how to grow this fantastic plant indoors and why you need it in your shower today.
Benefits of having eucalyptus in the shower
Eucalyptus is a fantastic choice for your next shower plant. Its aromatic leaves are not only known for their pleasant fragrance, but this plant also sits at the top of many lists of medicinal herbs due to its numerous health benefits. Here are just a few benefits of having eucalyptus in the shower.
Spa-like fragrance
Imagine stepping into your shower and having a soothing and refreshing scent reminiscent of a luxurious spa greet you. Eucalyptus emits a delightful fragrance when exposed to steam and warm water, turning your daily shower into a revitalizing experience. The aromatic oils released by eucalyptus can invigorate your senses and awaken your mind for the day ahead.
Reduces stress
In today's fast-paced world, finding moments of tranquility and relaxation is essential. Eucalyptus has been used for centuries to reduce anxiety, as its fragrance has calming properties. When the steam from your shower activates the eucalyptus leaves, it releases essential oils that can help reduce stress and promote a sense of well-being. Breathing in the fragrant vapor creates a serene atmosphere, allowing you to unwind and melt away the tensions of the day.
Soothes respiratory issues
If you're battling respiratory issues like congestion or allergies, eucalyptus can offer relief. The aromatic compounds in eucalyptus leaves are actually known to have natural decongestant properties. When infused with steam, the eucalyptus vapor can help clear your nasal passages and soothe irritated airways. Breathing in this therapeutic mist can provide a comforting sensation, making your shower a sanctuary for respiratory wellness.

How to grow eucalyptus indoors
If you're sold on the benefits of having eucalyptus in the shower, you're probably wondering how to get your hands on some of this amazing plant. Instead of searching for pricey sprigs of eucalyptus online or in stores, try your hand at growing it on your own as a beneficial indoor plant. Here's how to grow and nurture eucalyptus plants.
Step 1: Choose the right eucalyptus variety
Before embarking on your eucalyptus-growing journey, it's essential to select the right eucalyptus variety to thrive indoors. Some eucalyptus species are better suited for indoor cultivation due to their compact size and adaptability to container gardening. Consider varieties like Eucalyptus gunnii or Eucalyptus globulus, which are commonly grown indoors for their aromatic leaves and manageable growth habits.
Step 2: Create the ideal growing conditions
This aromatic plant thrives in bright, indirect sunlight, so find a well-lit spot near a window where your eucalyptus can receive at least 6 hours of sunlight daily. Ensure the room temperature remains between 60 and 80 degrees Fahrenheit, as the plant prefers moderate warmth. Adequate humidity is also crucial for its growth, so consider using a humidifier or placing a tray of water near the plant to increase moisture levels. Of course, growing it as a bathroom plant ensures wonderful levels of humidity that your eucalyptus will love.
Step 3: Plant and care for eucalyptus properly
When planting and caring for eucalyptus, make sure to use the following techniques to guarantee excellent growth and a healthy plant:

Read more
Say goodbye to dirt and odor: Learn how to wash pillows like a pro
Most people's pillows aren't even close to clean. Here's how to wash pillows and ensure they're fresh
Woman hugs pillows

Even if you succeed in choosing the right pillows for your maximum comfort and rest, you may not have considered the cleaning steps you'll need to take later to maintain their wonderful fluff and freshness. It may be the last thing anyone wants to think about, but the pillows where we place our heads at night are basically breeding grounds for bacteria and other microorganisms.

The average person spends one-third of their life asleep. During that time (it’s gross, but all too true), our skin and saliva can, shall we say, free themselves from the body, promoting the growth of bacteria inside our pillows and pillowcases in the process.

Read more