Did you know you can beautify your outdoor space with rocks? The rock garden — or “rockery” — is growing in popularity, and for good reason. It isn’t just a bunch of rocks thrown into a pile, though. Contrary to what you might think, rock gardens take little planning and effort. Don’t let that scare you, though – your effort will be well worth it when you have a beautifully landscaped outdoor area, and an area in your yard that you will never have to mow!
Here are some tips, info, and DIY rock garden ideas to get you started.
Why you should consider a DIY rock garden
There are many benefits to adding a rock garden to your landscaping:
- Rock gardens don’t require much maintenance, nor do they decompose over time.
- Pests are not attracted to rock gardens the way they are other types of gardens.
- Since most plants found in rock gardens don’t require much water, they’re great for areas prone to drought.
- Rock gardens hold the same appeal year-round, even with seasonal weather changes.
Where to start building your rock garden

Small rock garden designs are as easy as making a triangular space in the corner of your backyard. You will need some plants (that’s the “garden” part of “rock garden”), but they are generally not plants that require extensive upkeep.
You do need rocks (it’s implied in the name itself), but not all of them are the kind you can find on the ground; there are ways to get some rocks free, and we’ll get to that, but if you want a big centerpiece rock in your garden, you will need to buy it. You’ll also want to get plants for your garden or move some from elsewhere in your yard, as plants add height and interest to a rock garden (and no, weeds don’t count).
Designing your space

If your rock garden is going to be in a flat area, you may want to create a berm, or slight hill, out of rock to add some interest. But you don’t have to; you can also stagger the heights of the rocks and add taller plants toward the back to give you height.
The outlines of rock gardens should look a little haphazard, so if you are a regimented, pattern person, you will have to force yourself to go with a casual area (or rock gardens might not be for you). You will want to arrange your garden to look natural so get your inspiration from nature. An area carved out by nature will have tumbled rocks, moss, and lichens, a bare spot or two, and then, you guessed it, more rocks.
If you are creating a rock garden in front of the house, building it off to the side instead of smack dab in front of the picture window is a good plan. It makes mowing easier and it won’t kill your home’s curb appeal. Unless you live in an arid area where there are no lawns—then, as they say, rock on wherever you want.
Let’s get rocking
Now it’s time to get the materials for your rockery. You can get rocks from construction sites, farmers, road repair sites, but be sure you ask first. Avoid taking rocks from protected land like parks or nature conservancies; you’ll disrupt the local ecosystem and could inadvertently bring foreign plant and insect life to your garden.
If you have a specific color of rock in mind, you will need to buy it from a quarry or a larger gardening store. Sometimes, the cost of transporting and putting down a giant stone is pretty steep, so if you have your eye on one boulder that will be the focal point, you may have to source the rest.
Keep in mind that one giant boulder with gravel around it is not a rock garden. Your design eye likes ‘threes,’ so group at least three together. But, when you step back and look at your rock garden, it shouldn’t look like you tried to duplicate Stonehenge.
Building and development

If you are putting a rock garden on a hill, you have to account for the slope, so you will want to place the bigger rocks on the bottom. Bigger rocks can go at the top if there’s a flatter spot of land, but they have to be set pretty far into the soil, or gravity will move them for you.
- To get started, divide the area into sections and dig out about three feet of the dirt. You need a drainage layer of about one foot, consisting of rocks, chunks of stone, and/or old bricks. That layer can be less hefty if you already know you have soil with good drainage.
- Next, add a layer about three inches deep of sand. Horticultural sand is best because it’s clean.
- Your next layer will support the rocks and plants and should be about three inches deep. This layer is soil but without too much organic material in it. The rocks should be about three to eight inches in diameter and fit into the dirt several inches down. If you are worried about the rocks not fitting or looking right, place them on top of the dirt and stand back to take a look. Sometimes taking a picture helps with your view.
- If you like how it looks, nestle them into the soil and leave it for a solid amount of time. You want the dirt to settle before you add plants in. Do a little research and get plants that thrive in rocky areas with sandy soil. Of course, succulents come to mind immediately, but your ultimate selections will depend on the look you’re going for and on the climate where you live.
DIY rock garden ideas to consider

Whether you have a sprawling yard or a compact patio, a well-designed rock garden can add texture, color, and interest to your landscape. But how should you design your rock garden? With a bit of creativity and some basic materials, you can craft a stunning space that suits your personal style and complements your home.
Here are some inspiring DIY rock garden ideas to get you started:
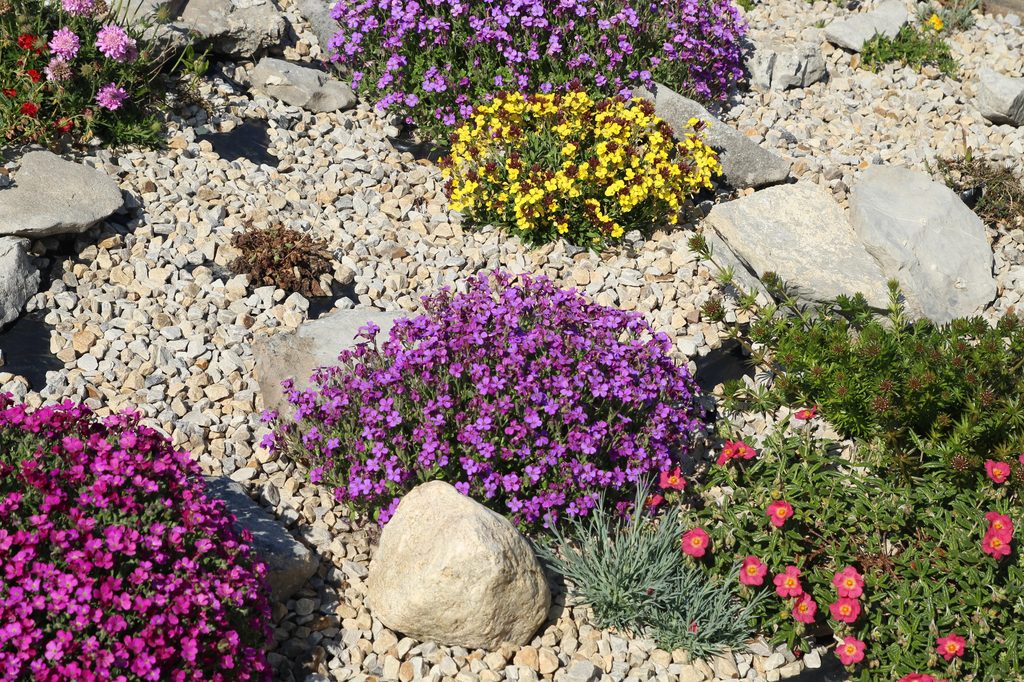
- Zen garden: Arrange smooth pebbles and larger rocks in patterns, adding a few plants for a serene, minimalist feel.
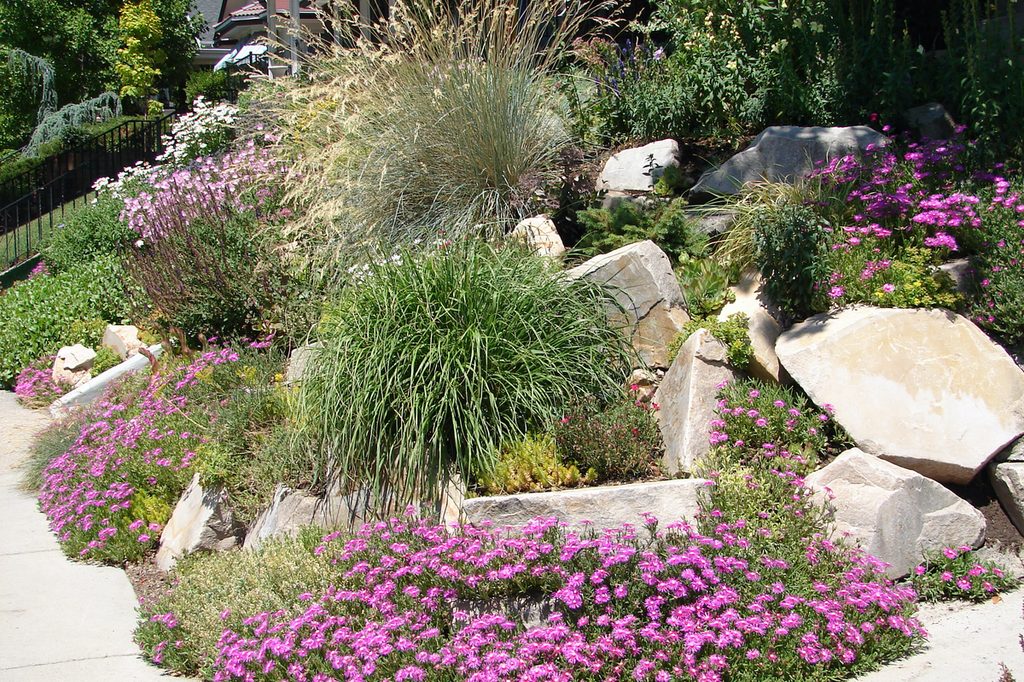
- Alpine garden: Use various sizes of rocks to create a mountain-like landscape with hardy alpine plants.
- Water feature: Incorporate a small waterfall or pond surrounded by rocks for a soothing touch.
- Terraced garden: Create different levels with rocks, planting diverse species on each tier.
- Succulent garden: Pair rocks with drought-resistant succulents for a low-maintenance, visually appealing garden.
And there you have it — a rock garden that can serve as a beautiful addition to your yard and can aid you in growing beautiful plants. With a little bit of planning and effort, you’ll be able to create a beautiful space out of natural elements. What could be better?