One of the things we all stress about is overcooking or undercooking our food. Sous vide is one of the best ways to mitigate that concern, but it’s a skill many don’t have. Sous vide is a bit of science, a touch of cooking logic, and a lot of great results when it’s done right.
A great thermal immersion circulator (we’ll call it a “sous vide” or “sous vide machine” as that’s the colloquialism most use) keeps your sous vide water bath at a consistent temperature no matter how long your cooking time. That sounds like a simple thing for a gadget to do, but so many fail at this.
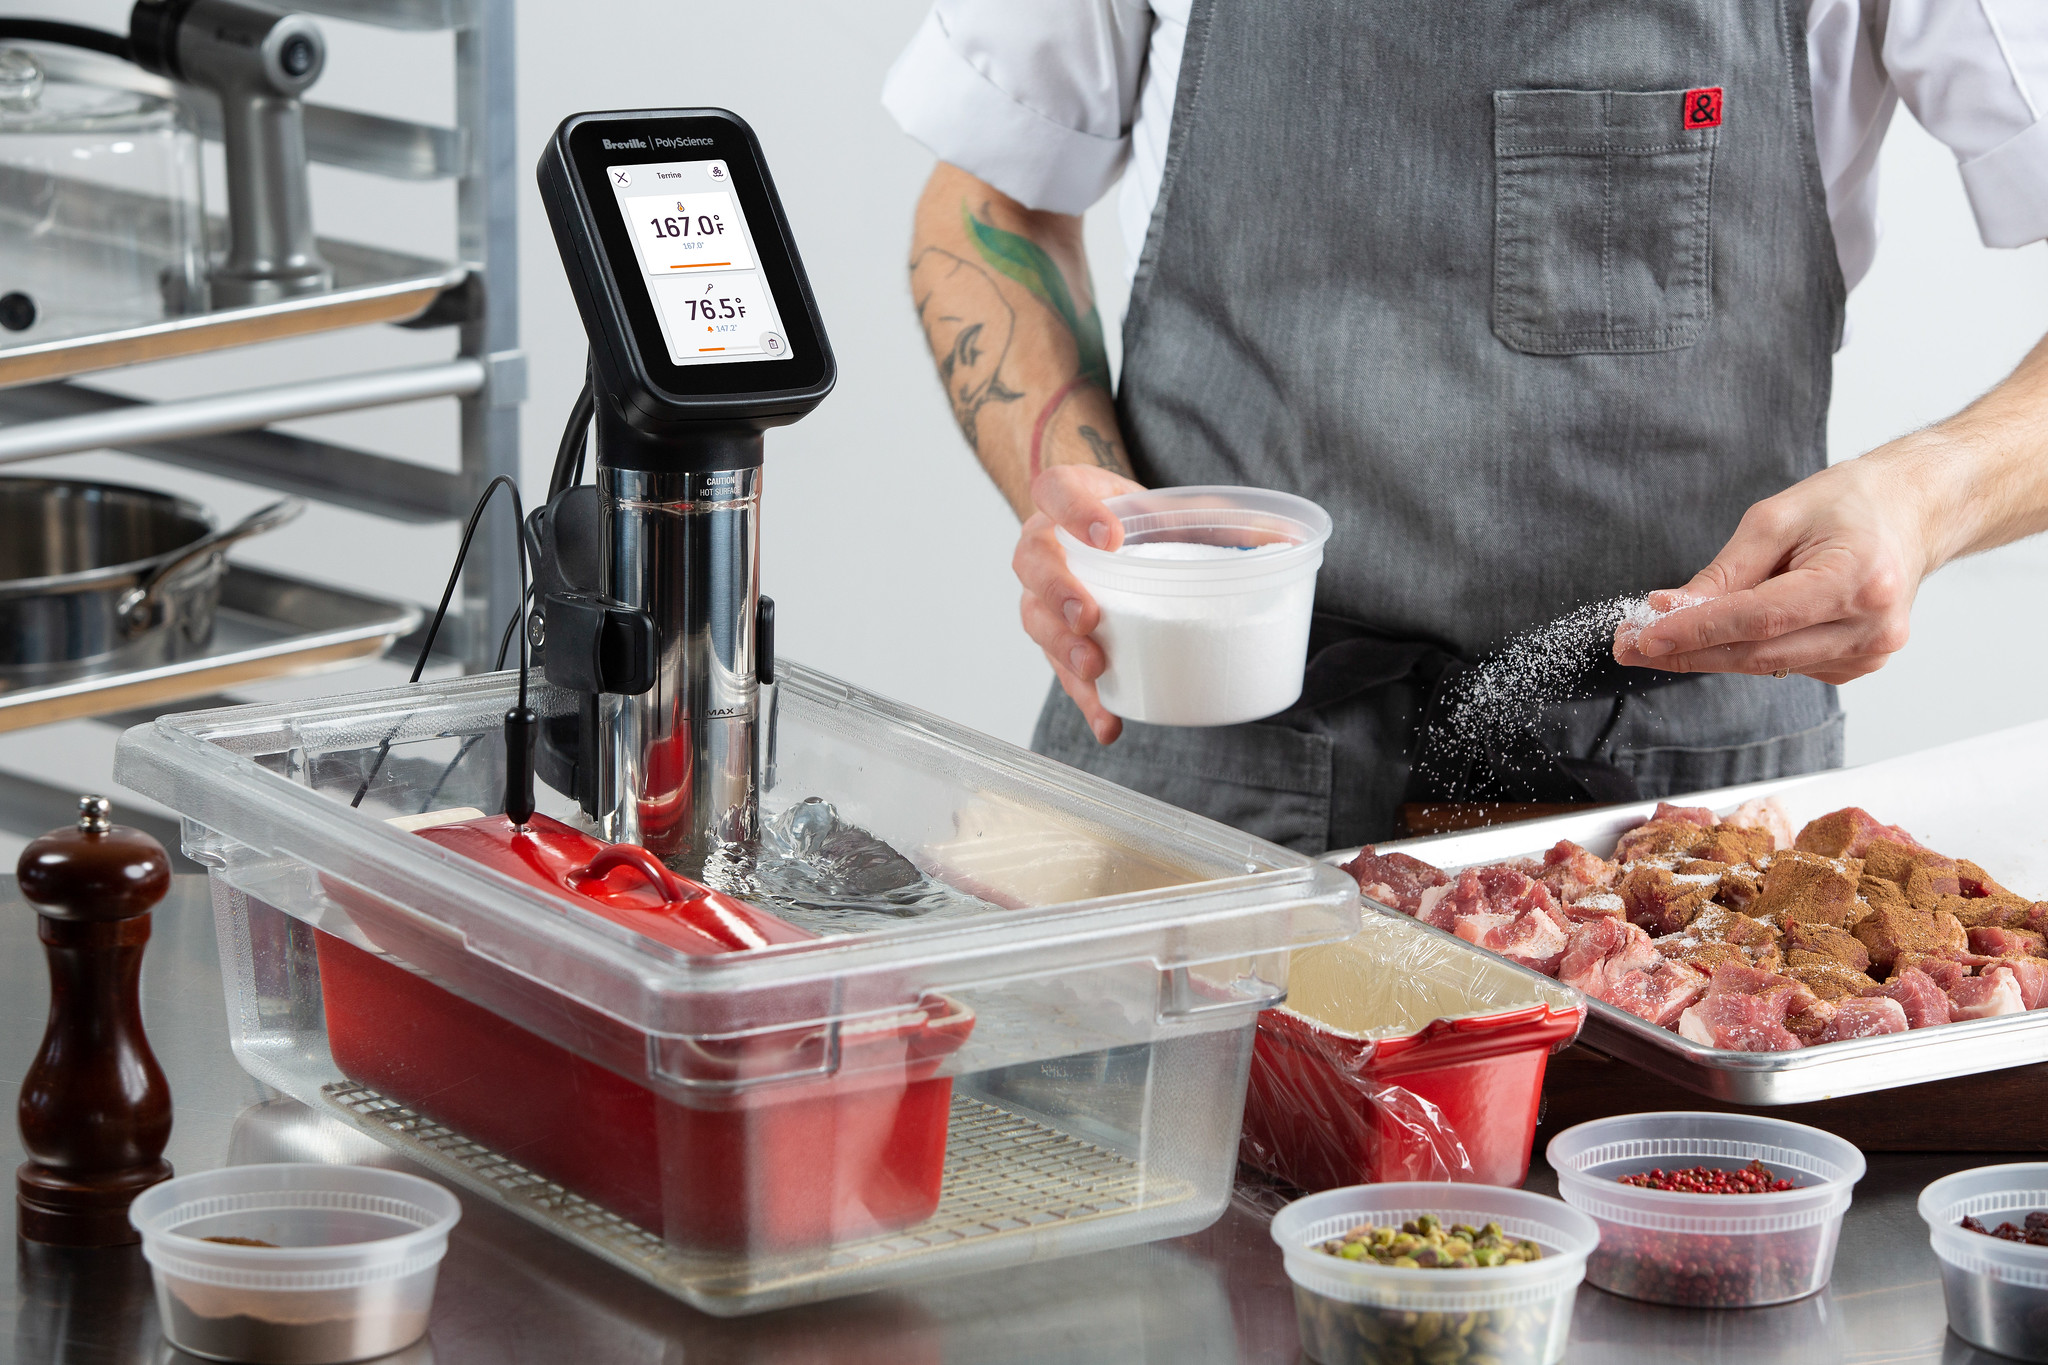
Professional-grade equipment isn’t always the surefire way to elicit great results, but it can help. We recently ran the PolyScience HydroPro Plus through its paces to find out if an expensive sous vide machine actually makes a difference. This is our honest take.
What’s sous vide, anyway?
We’ll keep it simple: sous vide cooking holds a water bath at a consistent temperature. Food cooks in a bag, which is submerged in the bath. You can use a vacuum sealer to remove air from the bag or let the water in the bath push water out of the bag. (Keep in mind if you use the “water displacement method” you will need to keep the top of the bag above the water level.)
The concept of sous vide is pretty simple but requires a touch of trust in food science. By keeping the water bath at a consistent temperature, your food can’t really overcook because the water temperature prevents as much. You can overcook food by leaving it in the bath for far too long, but you’d sort of have to forget it for hours, which is just unlikely. Say goodbye to dry chicken breast forever!
Is sous vide safe?
This is where trusting food science matters. We’re all taught the “safe” temperature for a chicken breast is around 165 degrees — but a lot of sous vide recommendations cook food at lower temps than we have learned are safe.
When it comes to sous vide, time is just as important as temperature. You might cook chicken breast at 140 degrees, but you do so for 45-60 minutes. For chicken, dangerous bacteria is killed off at around 130 degrees. Keeping the breast above that temp for a longer period helps ensure the food is safe without compromising quality.
That all describes basic sous vide cooking, which is what most of your sous vide adventures will look like. There’s also the “delta” method of sous vide cooking, wherein a digital probe is inserted into food as it cooks in the bath. The water for delta cooking is much higher, and you monitor the temperature of the food just like you would on a grill or stovetop. It’s faster, sure, but not the best option for all sous vide.
We loved fish cooked with the delta method more than traditional sous vide. Delta cooking allowed for more textural differences in a fillet of fish whereas traditional sous vide keeps the entire piece of fish the same texture. If you were cooking a halibut fillet sous vide to finish with a sear after it’s done in the bath, delta provides a much better result; the center is delicate and soft, and the texture gets a bit flakier as you get to the surface.
If you’re just not interested in delta cooking, Breville PolyScience also makes a HydroPro model (no “Plus” moniker) that eschews the probe.

The Breville PolyScience HydroPro Plus: Pros and cons
Pros
- Keeps water at a very consistent temperature
- Can handle huge baths (great for large cuts and big gatherings)
- Water jet can be redirected (good for crowded baths)
- Comes with a storage/carrying case
- Removable clip
- Heats water quickly
- Holds water to a precise temperature
Cons
- Large
- No WiFi capabilities
- App is more “pro” than we’d like
- Expensive
HydroPro Plus: Who’s it for?
As sous vide machines go, the HydroPro Plus is designed for professional kitchens. That doesn’t mean it’s not for you.
Sous vide cooking is simply amazing. We love that it’s a passive way to prep food like chicken breast or steak while getting perfect results. You can drop a protein in the bath, do other things (like deleting all your unread email, or prep some sides for dinner), and come back to some of the best food you’ve ever had.
The HydroPro Plus is meant for large batches. It’s just fine for a few steaks or some chicken thighs, but was clearly designed for kitchens where cooking 8 standing rib roasts was a task.
We love the no-screen Joule from Breville’s ChefSteps subsidiary, but many prefer a screen on their sous vide machine. The HydroPro Plus has a full touchscreen interface, which we venture is at least part of the reason it’s $600. That said, it’s as good an interface as we’ve ever seen on any gadget.
The HydroPro Plus interface
You have three paths to choose from: the toolbox, manual, and presets.
The Sous Vide Toolbox
Most will interact with the Sous Vide Toolbox when using the HydroPro Plus. The toolbox shows you a menu of food types like beef, poultry, pork, vegetables, and eggs, then asks more probative questions. You can even cook from frozen, which we absolutely love for food prep.
As an example, we’ll follow the beef path. Toolbox asks you if it’s a tender or tough cut, then the cut you’re using. You can choose from options like steak, medallion, short rib, rib rack, and more. Depending on your selection, HydroPro Plus will ask the thickness or diameter of the cut, if it’s fresh or frozen, then offer up some preset temperatures to cook to (medium rare, well, and so on).
From there, you can manipulate the time and desired doneness of your cut. This may be the most interesting aspect of the HydroPro Plus: you could potentially cook a less-tender medium rare steak if you wanted to. We say this is interesting because the reason chefs argue for medium-rare on some cuts is flavor, but the texture can put people off.
If you use the HydroPro Plus, you’ll find the perfect time and temp for cuts of meat and veggies you typically eat. Those can be added to the presets — but we’ll get there in a minute.
Manual
Let’s say you fell deep into a Reddit rabbit hole about sous vide and want to cook some unique cut of meat not found in the toolbox. Or maybe you’re tinkering with proofing pizza dough (yes, that’s possible with sous vide).
Manual mode has your back: it allows you to select the time and temperature you cook at. It’s great for projects and unique items, or when the toolbox just doesn’t have a suggestion for what you’re cooking. There is a lot you can cook sous vide.
Presets
Find that perfect time and temp for the 3lb bone-in pork shoulder your local butcher always has available that produced the absolute best pulled pork you’ve ever had? You can save it as a preset.
Presets are also great for recipes you find online that aren’t in the toolbox. Rather than dig up a recipe, you can save a preset then select it next time you’re cooking. Sites like ChefSteps have tons of great sous vide recipes.
The HydroPro Plus app
We won’t spend much time discussing the accompanying app because it’s very much geared toward professionals. The app — named HACCP Manager — is for logging time and temps to track food safety. HACCP is acronymous for “Hazard Analysis and Critical Control Points,” which is not something most will care to do. But if you’re a professional reading this review, know you can log data on your cooks and export it to PDFs that are shareable.
Results
We’re no strangers to sous vide here at 21Oak. The HydroPro Plus is far and away the best sous vide machine we’ve ever used, too.
It heats quickly, cooks accurately, and delta cooking is a game-changer for fish and other delicate items. Though I find a touchscreen unnecessary on the Joule, it’s still nice to have when there’s no accompanying app. Other sous vide machines with displays pale in comparison; those only let you set time and temp, but the HydroPro Plus offers so much more with its display and interface.
We don’t love the size of this unit, but it’s clear PolyScience is making great use of the space in the core barrel. The HydroPro Plus heats water insanely fast and keeps it at a precise temperature. This tells us there’s a big water jet and heating element as well as very precise sensors inside, all contributing to stellar results.
We’ve cooked chicken breast, chicken thigh, halibut, pork loin, and steaks in our testing. Results were perfect each time. Where HydroPro Plus stands out is high-temp cookery, like hard-boiled eggs and vegetables. Though other sous vide machines like the Joule can handle high temperatures, HydroPro Plus keeps those high temps much more reliably thanks to its beefy internals.
Quality product matters, too. We were absolutely blown away with steaks provided to us by Vermont Wagyu, which we cooked from frozen. This was our high risk/reward test, and it paid off in a big way. We couldn’t have been happier with the cook on such a quality cut of meat.
Verdict: Should you buy the HydroPro Plus sous vide machine?
If you have $500-600, the HydroPro family is an easy recommendation. We do advise you to consider how you cook before deciding. Those who eat a lot of fish should buy the $600 HydroPro Plus because of its probe and delta cooking capabilities. The results are incredible.
We’re also sensitive to the fact $500-600 is no small investment. We love the on-board screen on the HydroPro and HydroPro Plus, though the less-expensive Joule and its companion app may be more suitable for those starting their sous vide journey. We also like Joule’s WiFi capabilities, which the HydroPro family lacks.
Sous vide makes meal prep and cooking for large gatherings much easier. If you’re leading the charge on Thanksgiving and/or Christmas dinners this year, don’t sleep on the Joule, HydroPro, and HydroPro Plus. We’re enamored with all three.
Editors' Recommendations
- An interior designer reveals the home decor you should (and absolutely should not) buy at HomeGoods
- Review: The Helt Utility Work Shirt is our new favorite kitchen-only apparel
- An honest review of the NutriBullet Immersion Blender