
This ingenious hack for how to wash white sheets is amazing

Here's how to keep white sheets bright and crisp

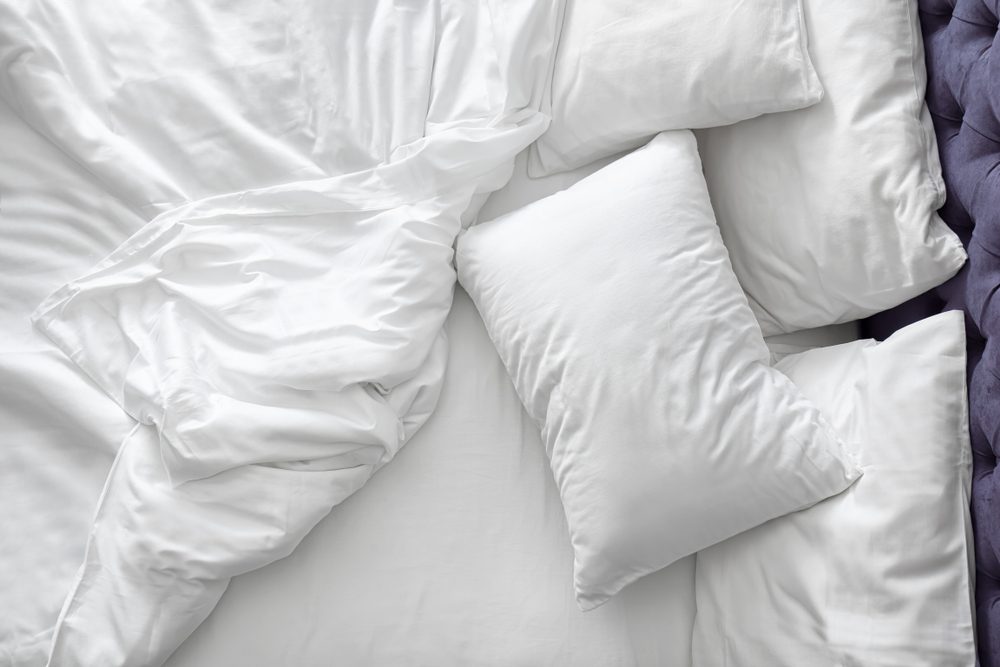
If you’ve ever spent a night in a fancy hotel, you know the indulgent luxury of clean, pristine, high-quality white sheets. They’re crisp, bright, and incredibly smooth to the touch. Perhaps you’ve already decided to duplicate this elegance in your own bedroom and bought white sheets to add to the modern feel of your sleeping space. It’s definitely a trending look. But knowing how to wash white sheets properly is crucial.

Recommended Videos

Difficulty

Easy

Duration

2 hours

What You Need

  • Distilled white vinegar

  • Baking soda

Since you likely don’t have access to the same industrial-grade washing machines that hotels have, your white sheets will no longer have that same clean, crisp feeling after a few weeks. Never fear. With this ingenious hack for washing white sheets, you’ll be left with a bedspread that looks and feels amazing after every wash.

Top view of bed with white sheets
Abubker Inam / Shutterstock

What’s the appeal of white sheets?

White sheets can easily be a recipe for disaster. If you eat or drink in bed, sweat at night, or have any pets running around your bedroom room, the sheets will become stained and damaged quite quickly. So, why do white linens remain a popular choice in bedrooms everywhere? It could certainly be because they the classic choice, but there are also a few other benefits you may not have considered.

Elegant, crisp appearance

When white sheets are smooth and crisp, they look and feel amazing. Flat, wrinkle-free sheets give your bed an air of luxury, and slipping between them is like slipping into a cool, smooth cloud.

Easily matched color

Integrating a new color scheme in your bedroom or undertaking an entire remodel is already difficult enough. You shouldn’t also have to worry about buying a matching bedspread. With white sheets, you can match your bed to any decor or color without having to replace your entire set.

Calming color

White is a soothing color that brings about calm and serenity. The neutrality of white bed sheets is not only great for decorating, but it also promotes relaxation, helping you slow down at the end of the day.

feet coming out the bottom of white sheets
Alejandro / Adobe Stock

Common problems with white sheets

When you first buy white sheets and stretch them over your comfy bed, they’ll be a dream come true. Several months later though, they simply won’t be the same.

Staining over time

While you sleep, you shed skin cells, release body oils, and sweat throughout the night. All of these unpleasant substances soak into the material of your linens and leave behind a yellow tint. Even your skincare and cosmetic products can rub off and stain your sheets and pillowcases. Unfortunately, washing your sheets with laundry detergent and bleach doesn’t always rid the material of those stains.

Dull or dingy coloring

While bleach can neutralize some of those stains, the harshness of the chemical will take its toll over time. After repeat uses of bleach, your sheets will start looking dull, and the chemical can damage the fabric, making it more susceptible to rips and tears.

Chemical smell

There’s such comfort in fresh-smelling bedsheets. If you’re using bleach, however, they won’t have that lovely just washed aroma. Bleach leaves behind a signature chemical smell that you definitely don’t want to breathe in while you sleep.

Rough texture

You spend approximately eight hours between your sheets, so you want them to be soft, snuggly, and comfortable on your skin. Due to the harshness of bleach, however, the fibers in your sheets can become damaged and they will eventually take on a rough texture that isn’t ideal for snuggling.

Close-up of a woman holding a wicker laundry basket with white clothes
Karolina Grabowska / Pexels

How to wash white sheets the right way

It may be hard to believe, but you can have gorgeous white sheets without sacrificing color or softness. This cleaning hack will leave you with linens that are as bright, crisp, soft, and cozy, as they were when you bought them.

Step 1: Grab some distilled white vinegar and baking soda, but do not mix them together. Mixing these two products will result in an ineffective clean since the acid and base combination cancel each other out.

Step 2: Turn on the washing machine and use hot water. Hot water is much more effective at lifting stains than cold or warm water.

Step 3: Add half a cup of baking soda to your washing machine’s drum. This chemical has natural whitening properties that also get rid of odors.

Step 4: In the fabric softener compartment, add vinegar, a natural whitener that also softens fabrics.

Step 5: Put your sheets in the washing machine and wash on a normal cycle.

Modern bed with white sheets and large pillows
Andrey_Popov / Shutterstock

Should you wash white sheets with bleach?

Washing white sheets with bleach can be appropriate, but it should be done cautiously and sparingly. When using bleach, follow these tips:

  • Check the care label for any specific instructions.
  • Dilute the bleach with water to prevent fabric damage, and pre-soak the sheets to remove stains and brighten the fabric.
  • Use the correct washing cycle and add bleach carefully.
  • Thoroughly rinse sheets after bleach use and follow proper drying and storage techniques.

Overall, bleach can be effective for white sheets, but moderation and care are key to preserving their quality. Overuse can weaken the fabric and lead to yellowing, so it's best for occasional stain removal or maintaining whiteness.

White bed sheets are classic, elegant, and easy to incorporate into your bedroom decor, so it’s no wonder they are such a popular choice in bedding. Issues with stains and rough texture, though common, can be a thing of the past with the right wash and care routine. With this simple solution, your white sheets will be soft and spotlessly white for years to come.

Editors' Recommendations

Veronica Sparks
Veronica Sparks is a writer from Milwaukee, Wisconsin who loves writing about gardening, home décor, and DIY life. She’s…
How to clean glass shower doors the right way (say goodbye to streaks)
The natural way to get a sparkling, clear shower door — without all the chemicals
Shower with a glass door

Glass shower doors add a touch of elegance to any bathroom, but they can quickly lose their sparkle because of soap scum, grime, and pesky streaks. Fear not! With the right cleaning techniques and a few simple ingredients, you can restore your glass shower door to its pristine condition. Let's explore effective methods for how to clean glass shower doors without leaving behind streaks.
What is the best thing to use to clean glass shower doors?

When it comes to cleaning glass shower doors, you have two primary options: DIY natural cleaners or commercial glass cleaners. DIY solutions are often cost-effective and environmentally friendly, while commercial cleaners may offer convenience and specialized formulas for tough stains.
White vinegar and dish soap for cutting grime
For a powerful yet natural cleaning solution, mix equal parts white vinegar and water in a spray bottle, adding a few drops of dish soap. Spray the solution onto the glass surface and let it sit for a few minutes to loosen the grime. Then, scrub gently with a sponge or microfiber cloth and rinse thoroughly with water. However, exercise caution when using vinegar on surfaces like natural stone, as it can cause damage.
Baking soda and dish soap instead of vinegar solution
If you prefer to avoid vinegar, a mixture of baking soda and dish soap can also effectively tackle grime on glass shower doors. Create a paste by mixing baking soda with a small amount of dish soap, then apply it to the glass using a sponge or cloth. Scrub gently in circular motions, focusing on areas with stubborn stains, before rinsing thoroughly.
Lemon and lemon oil to kick streaks to the curb
Harness the power of citrus to banish streaks from your glass shower doors. Simply cut a lemon in half and rub it directly onto the glass surface, focusing on areas with visible streaks. The acidic properties of the lemon help dissolve residue while leaving behind a fresh, citrusy scent. For added protection against future water marks, lightly coat the glass with lemon oil after cleaning. Your glass won't streak again for a long time!
Tips for keeping your glass shower doors clean and streak-free

Read more
How to get rid of that hideous water stain on the ceiling and beautify your home
Try this quick stain removal method before jumping into major ceiling repair
Water stain on the ceiling

When you’ve worked hard to keep your home clean and you've decorated your space perfectly, plumbing leaks or flooding can be frustrating. Not only does water destroy drywall, but it also leaves behind nasty stains on your ceiling, creating an eyesore in your otherwise pristine room.

The good news is that you may not have to replace the drywall or take on a huge painting project to get rid of that water stain on the ceiling. Try this easy stain removal method instead and clean up your space without breaking the bank.

Read more
How to remove stripped screws without any hassle
Unlock our best solutions for this common DIY woe
Single screw pointed up on a wood surface

Stripped screws can be a frustrating obstacle that can easily halt the progress of your DIY building or repair project. However, with the right methods and a bit of patience, you can tackle this problem effectively. Let's explore the various techniques for how to remove stripped screws, ranging from simple tricks to more advanced solutions for those severely stripped screws.
How to remove stripped screws: Initial methods to try
Here are a few simple methods to employ when the screws aren't too much of a problem.

Remove the screw with pliers
One of the simplest methods involves using a pair of pliers. Grip the head of the screw firmly with the pliers and slowly turn it counterclockwise. Apply steady pressure to prevent slipping and gradually loosen the screw from its position.
Use the rubber band method
If the screw head has enough grip left, place a rubber band over the head before inserting the screwdriver. The rubber band fills the gaps and provides extra friction, enhancing your grip on the screw. This method works particularly well for smaller screws like those on old wood furniture or screws with shallow stripping.
Try using a different screwdriver
Sometimes, the head of a stripped screw may still have one or two slots that can accommodate a different type or size of screwdriver. Experiment with various screwdrivers in your home toolkit, such as switching from a Phillips to a flathead screwdriver or adjusting the size of the screwdriver to fit the remaining slots.
Next steps: Take your removal method up a notch
Here, we have some more advanced options when the job isn't so simple.

Read more