Being an apartment dweller sometimes has challenges—noisy neighbors above or below you, lack of storage space, and the dreaded shared laundry room. But then comes the big indignity—when you move out, and your security deposit is in jeopardy due to the little holes left behind once you removed your pictures and artwork from the walls.
But, why surrender your hard-earned money (aka your security deposit) just because you hung up a few pictures around your place? The good news is, you don’t have to! We’ll show you how to patch walls with foolproof step-by-step directions even the most DIY-challenged person can follow and give you a few no-holes-required alternatives if you’re not willing to risk the ire of your property manager!
How to patch holes in walls—it’s easier than you think!
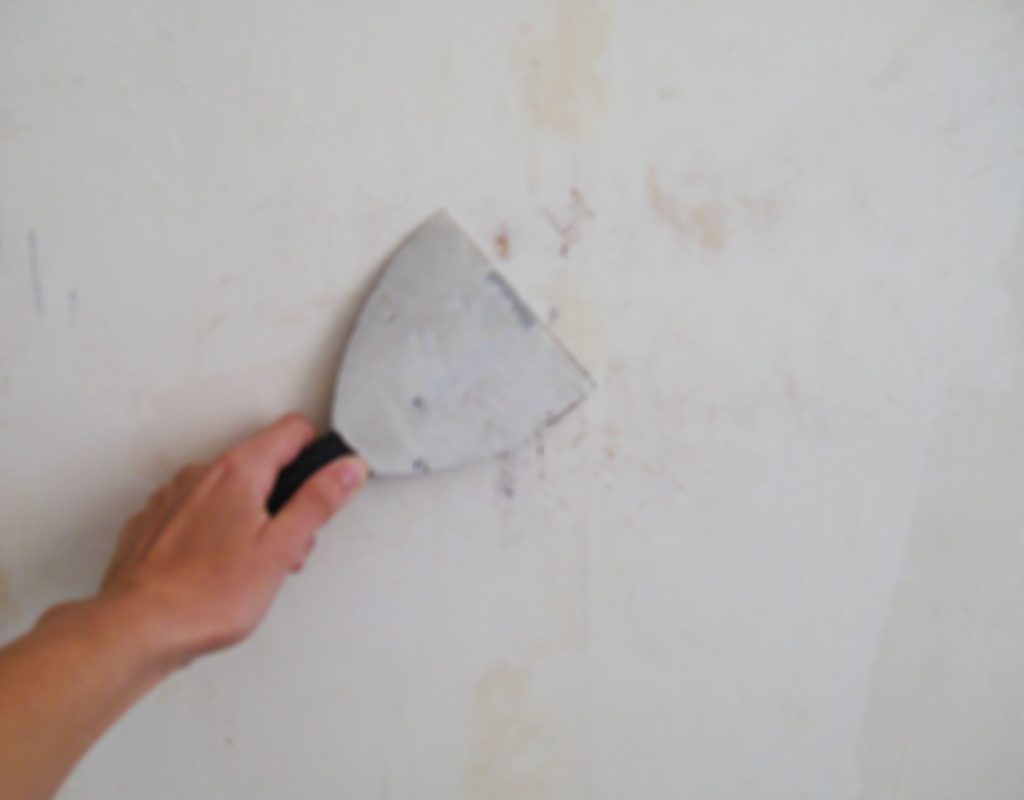
Even if you don’t think you understand wall plaster patching, follow these steps, and your walls will look as good as new! Note: Before you begin, make sure the walls are dry and clean.
Step one
After taking the picture down, use a hammer to remove the nail or picture hanger from the wall carefully. For added cushioning and protection, you can slide a paper towel between the hammer and the wall.
Step two
- Time to patch the hole. The correct way to patch is to buy a putty knife and some spackle at your local home improvement store (a small container of spackle will do because a little goes a long way).
- After stirring the spackle, scoop out a pea-sized blob onto the edge of the knife and cover the nail hole.
- Scrape the putty with the edge of the putty knife a few times to smooth it out, and then wipe it down with a damp sponge or cloth.
In a time crunch before your walk-through?
You can use an old credit card to apply and scrape the putty if you don’t have a putty knife lying around.
Don’t have putty or time to get any? You can fill the hole with white toothpaste or rub it with a bar of white soap—both are short-term solutions that will hopefully hold up long enough for you to pass the inspection and get your security deposit back.
How to minimize wall damage when you hang photos and artwork
Sometimes holes are simply unavoidable, but you can limit your need for spackling, sandpaper, or even painting with some easily concealed and filled hanging solutions.
If the item you are hanging is small and lightweight, opt for thumbtacks or even staples, as both create tiny holes that are easier to fill than nail holes or standard art hooks.
For heavy items, we are big fans of MonkeyHooks. These J-shaped hooks can hold up to 50 pounds but leave the tiniest, easily filled hole on your wall, and they don’t require any tools to install! MonkeyHooks have a self-boring tip that penetrates through the drywall with simple pressure and a back-and-forth twisting motion. The shaft simply slides through, and the self-locking feature locks it securely into place, with only the hook exposed. Hang your picture on the hook, and you’re done!
Ways to hang art without any holes at all!
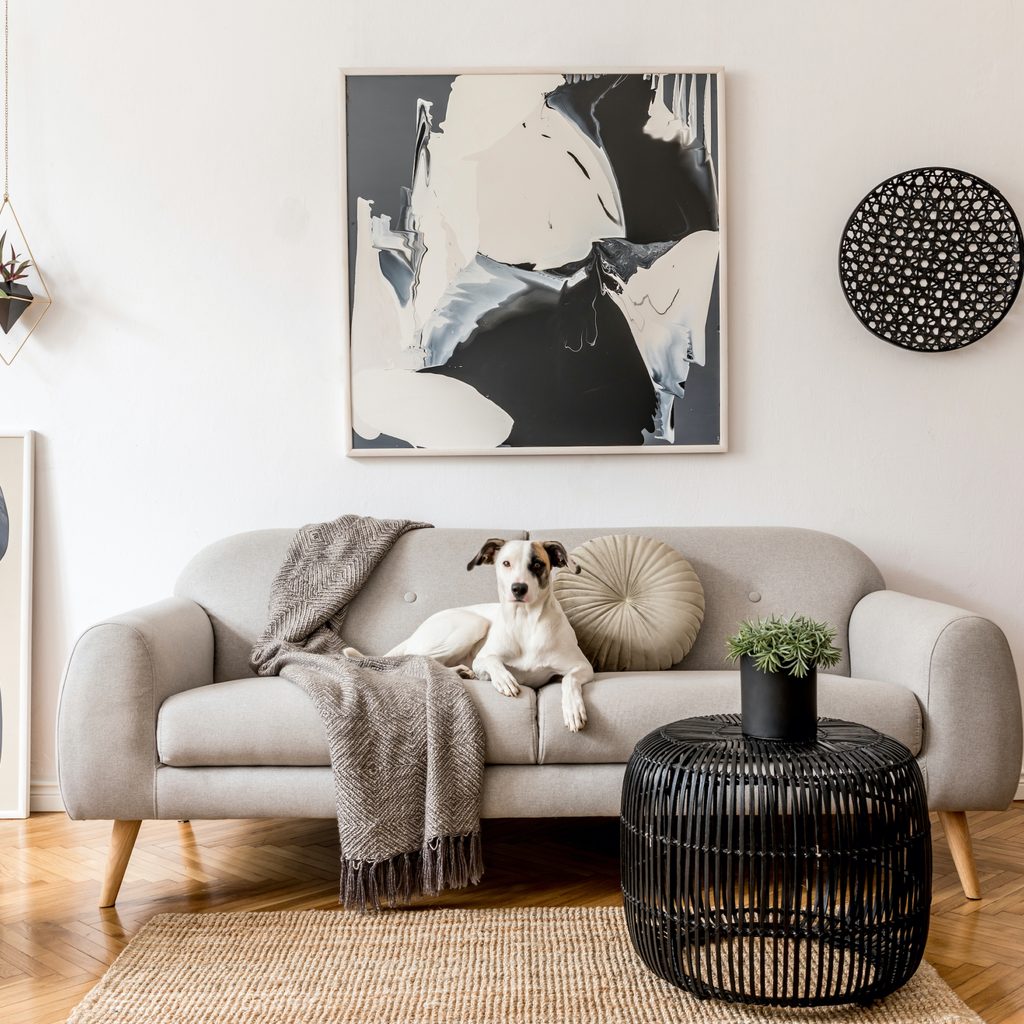
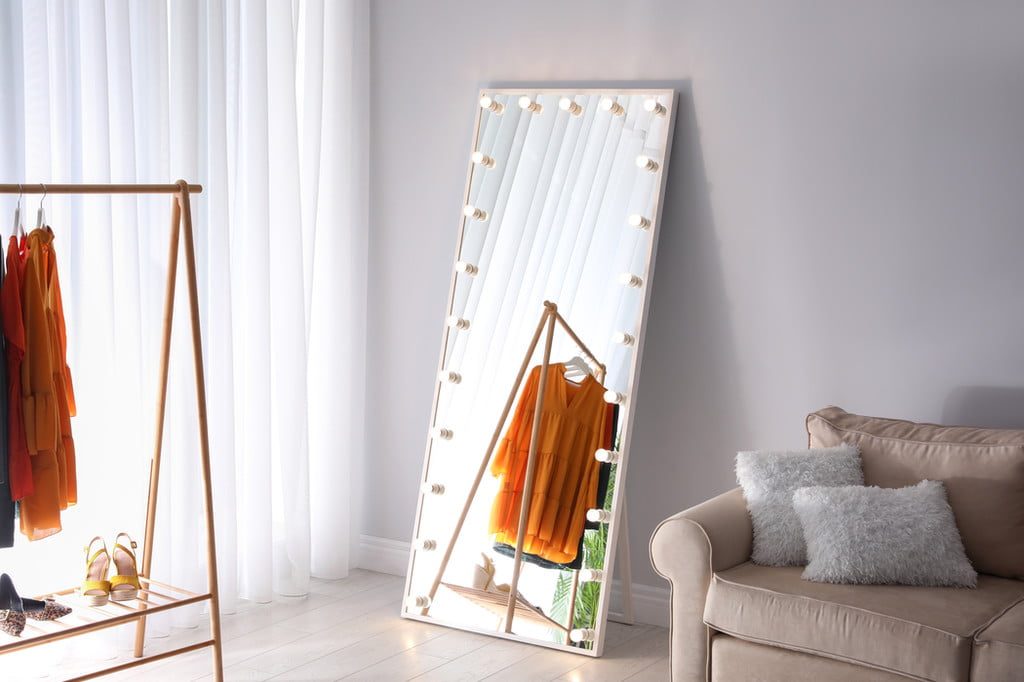
Learn to love the wall lean: So simple, yet so effective. Take advantage of empty wall space on top of your furniture to lean artwork or framed photos against the wall. For larger pieces or big framed mirrors, you can practice the lean method right on the floor.
Hang art from molding: If you’re fortunate to have picture rail molding in your apartment, take advantage by finding hooks that fit the width of the molding and some attractive rope or string to hang the art or photos.
Use your mantle: Stop wasting valuable real estate by cluttering your fireplace mantle with knick-knacks or an abundance of photos when you can have it be the place to rest a piece of art that will become the focal point of your room—no hooks required.
Utilize bookshelves: You can use bookshelves for more than just books. Add some smaller artwork or an assortment of your favorite photos to put your unique style on display.
Get an easel: Although easels do take up a decent amount of floor space, they can be a viable option for displaying that statement piece you want to make the focal point of your room.
Walls decorated with artwork, decorative mirrors, and photos deliver the unique style that turns a house into a home. Just because you don’t own your dwelling, that shouldn’t preclude you from expressing yourself. We hope that our suggestions will inspire you to put up the things that make you happy, whether you opt for the traditional method (now that you know how to fill in nail holes) or go the hole-free route. It’s possible to style your apartment your way without incurring the wrath of your property manager.


