
Can you grow garlic in containers? Here’s how

For some people, having an outdoor garden just isn’t practical. Whether you lack the space or lack proper soil, there’s no reason you should refrain from growing garlic at home.

Garlic is a hardy plant that thrives when planted in the fall. While it can take quite some time to grow, it has become a popular plant to grow indoors. What makes garlic challenging to grow indoors is that the plant needs regular watering over a long period of time.

Recommended Videos

We will cover exactly how to grow garlic in pots while also offering tips and tricks on reaping a good harvest.

Benefits of growing garlic indoors

The main benefit of growing garlic indoors is that you will have more control over your plant. Elements and weather outside can ruin a crop if you’re not careful. For those of us who lack green thumbs, growing garlic inside is a great idea!

When growing garlic indoors, you can control the amount of water and direct sunlight that the plant gets. Of course, this means that the pressure is on you to ensure your plant gets all of the proper elements for growth.

In time, another benefit to growing garlic indoors is that you will be able to grow it year-round if you’d like. Since you control the exposure of sunlight and water for your plant, you can eventually learn how to grow it out of season, thus having your own garlic supply throughout the year without the need to purchase storebought garlic.

garlic on table and small cutting board

What to look out for

There are a few things to consider when planting garlic indoors. While many factors go into planting and harvesting a healthy garlic crop, we have covered some essential facts below.

A large pot

First, you’ll want to make sure that you have a large container. If you plan to grow your bulbs individually, plan on using a pot that is at least six inches deep. A larger pot allows for more moisture to be collected without the soil becoming too soggy.

It’s also important to look for a pot with good drainage. Pots that do not have drainage holes and self-watering pots are not ideal for garlic. The soil becomes too soggy and can cause root rot on the plant, which can ruin the crop.

Lots of water

As mentioned above, garlic needs a fair bit of water to grow. The soil should be moist to the touch. If the top of the soil is dry, you may need to water your garlic plant. Of course, overwatering is also a predicament often seen when growing garlic. Finding the balance can be tricky. This may discourage new garlic growers.

Six hours of direct sunlight

It’s recommended that garlic has at least six hours of direct sunlight a day. South- and west-facing windows are an excellent place for your garlic pot. Since you control every factor of your plant’s growth, it’s up to you to make sure that your garlic pot is well positioned to receive six hours of sunlight a day.

Do not use storebought garlic

Storebought garlic often comes with special chemicals and pesticides that prevent the garlic bulbs from growing. While it may work in some cases, it’s best to buy garlic bulbs from the local farmer’s market or nursery. However, you can also purchase garlic bulbs online for your indoor garden!

man potting garlic on counter

How to grow garlic indoors

What you’ll need:

  • Garden trowel
  • Watering can
  • Large pot with good drainage
  • Potting mix
  • Garlic cloves
  • Slow-release fertilizer (optional)

The best time to plant garlic indoors is in the fall between September and November. Here’s the best way to plant:

  1. Fill your large pot with potting soil until it’s at least three inches deep. If your potting soil doesn’t already include fertilizer, this is when you’ll also mix in some slow-release fertilizer.
  2. Take your garlic bulb and divide the cloves from one another. Be careful! The cloves can sometimes break, which will hinder their growth. 
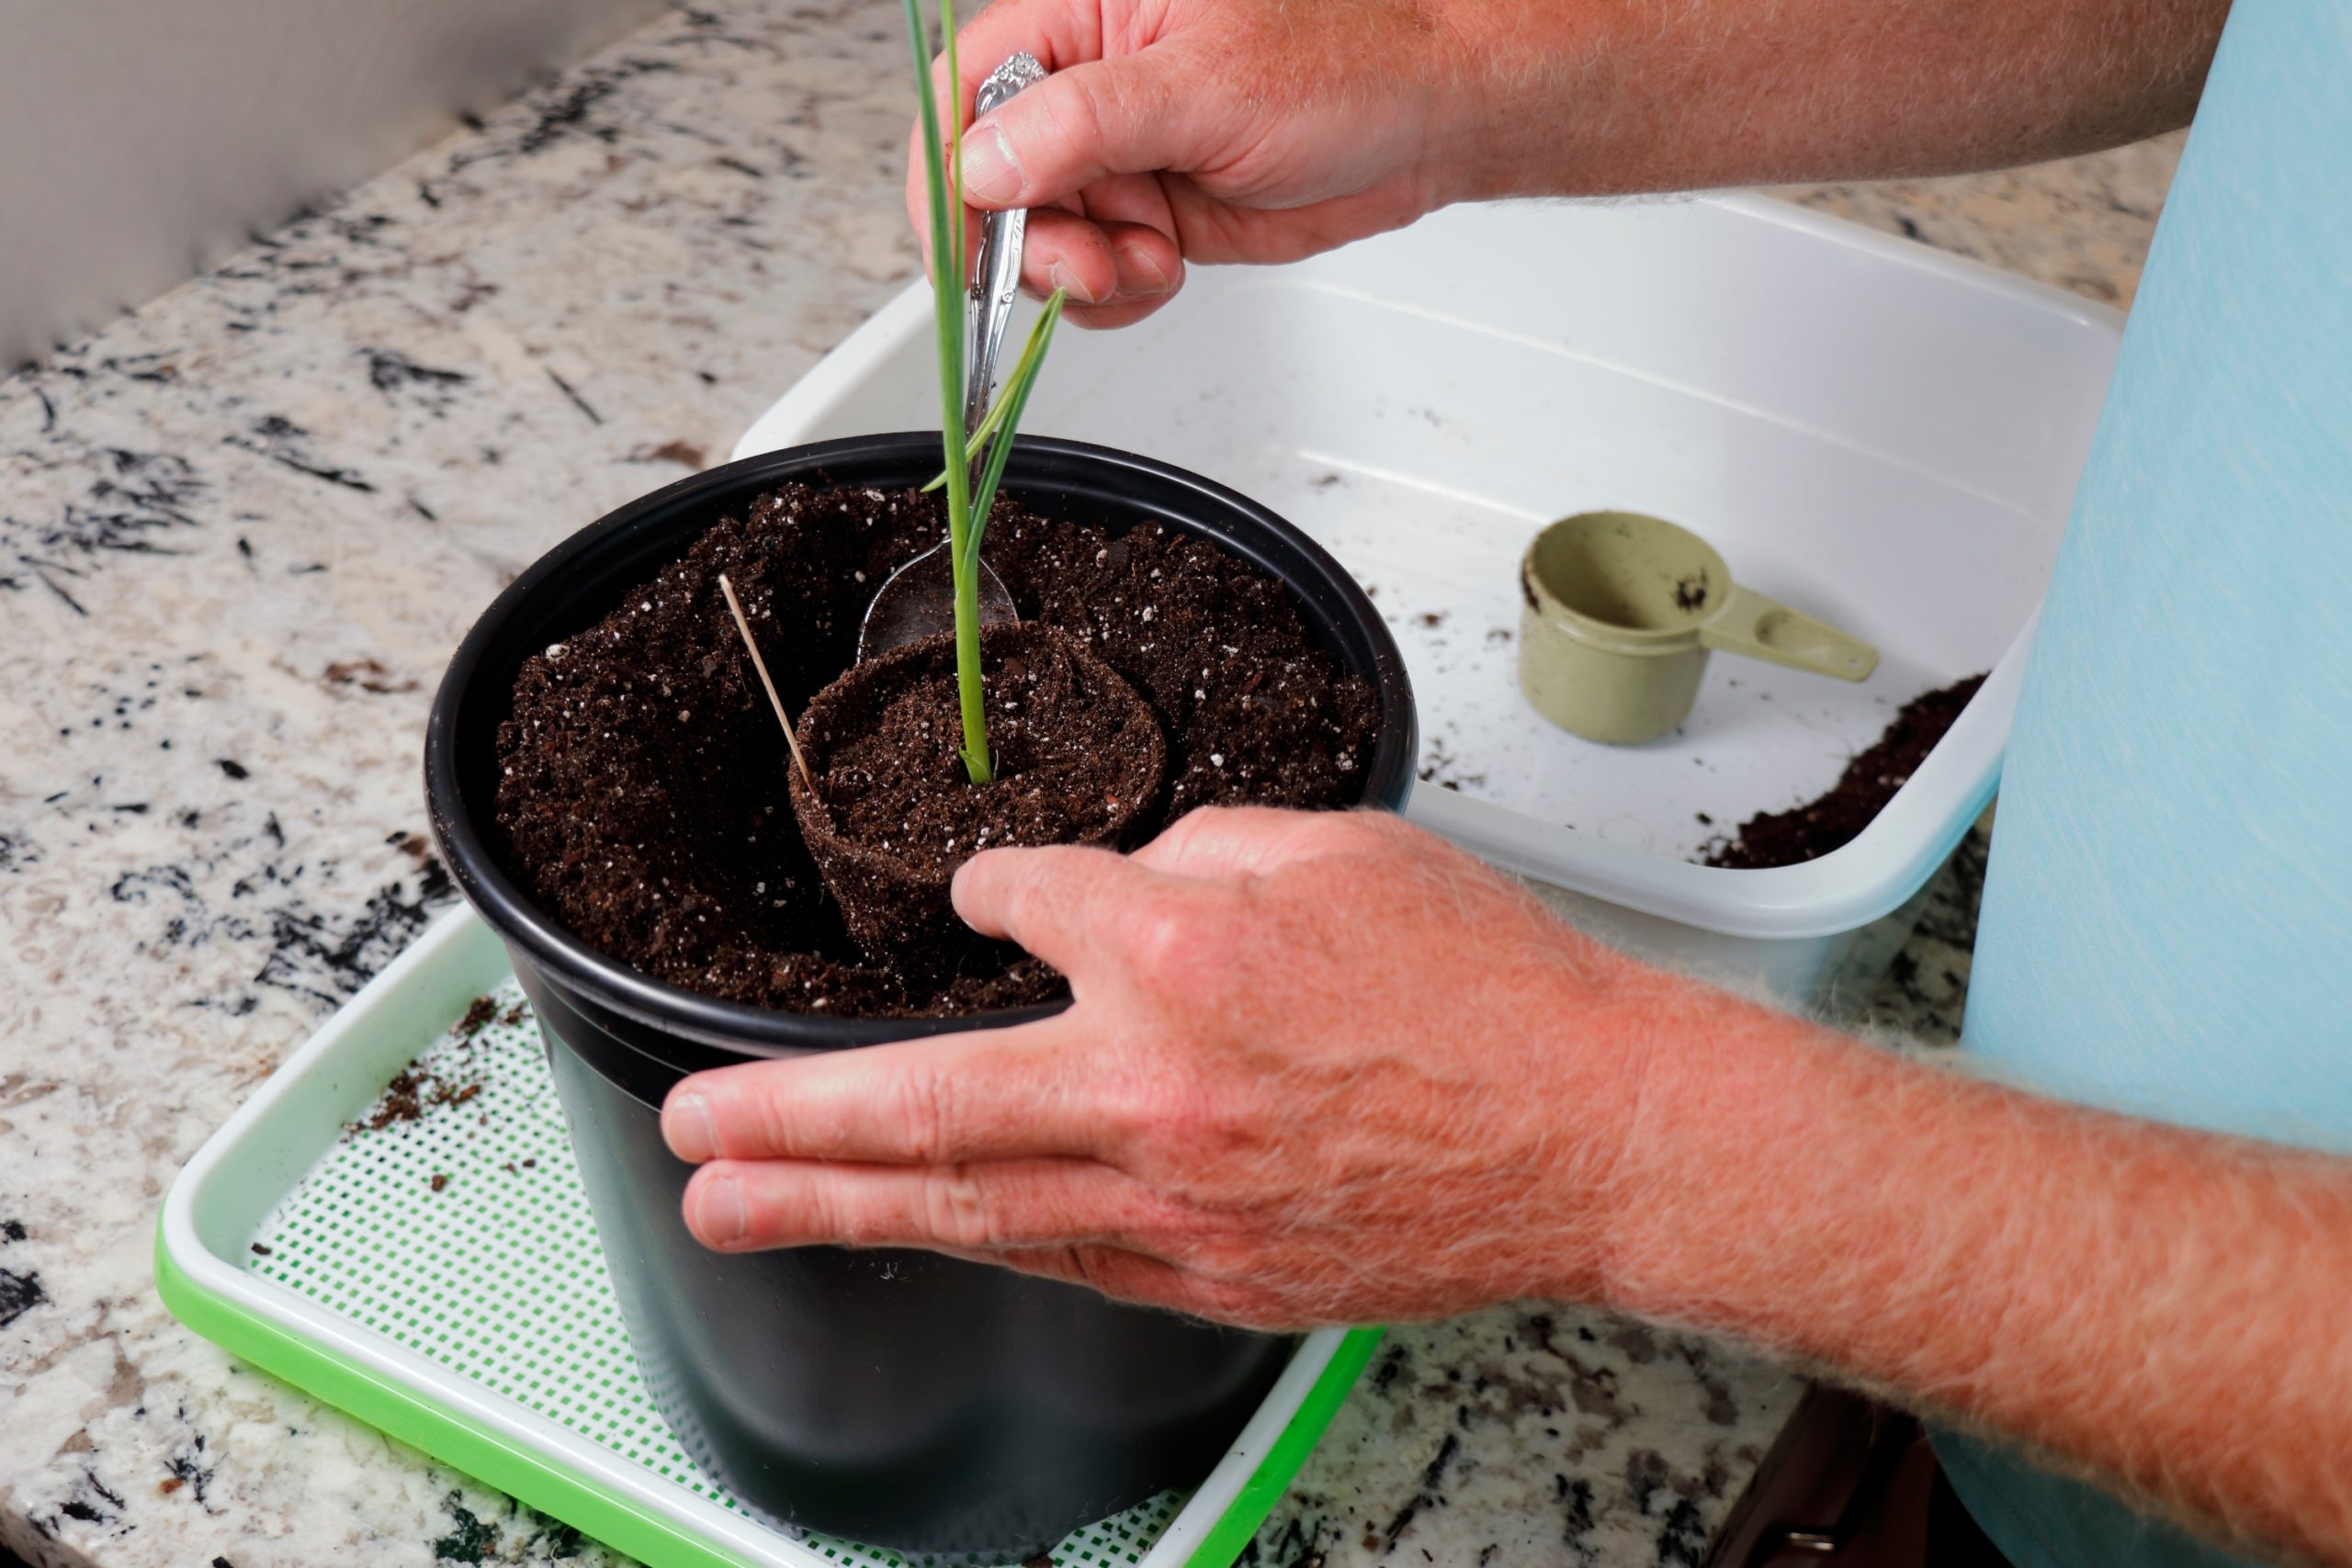
  3. Place your cloves in the soil at least three inches apart from one another. You’ll want to put them in the pot with the pointy end facing up as that is where your garlic will sprout.
  4. Cover the cloves with soil. Warmer climates can lay about an inch of soil on top, while colder climates are recommended to cover the cloves with two inches. Since you’ll be growing your garlic indoors, this step does not necessarily need to be precise. So long as your cloves are covered by an inch or so of soil, you’ll be fine. 
  5. Pat the soil on top to make it firm, and then place your pot near a window that gets at least six hours of natural light.
  6. Water the soil, and be sure to keep monitoring it throughout the winter. You should see sprouting in the spring. Make sure the soil stays moist but not soggy.

Tips and final thoughts

Your garlic will be ready to harvest in mid-summer. A promising sign that your garlic is ready to be collected is when the leaves begin turning yellow. To harvest your garlic, be sure to dig into the soil to pull the bulb out. Yanking the bulb by the stem can ruin your garlic.

Once the garlic is out of the pot, shake off any loose dirt. Hang or set aside your garlic to dry. You’ll know it’s completely dried out when the garlic bulb begins to flake. Gently separate the stem and roots from the bulb and store your garlic in a cool, dry place.

Editors' Recommendations

Amelia Wilson
Amelia Wilson (author pen name Amelia J. Wilson) is a content writer in Greenwood, IN. She often enjoys topics on…
How to clean glass shower doors the right way (say goodbye to streaks)
The natural way to get a sparkling, clear shower door — without all the chemicals
Shower with a glass door

Glass shower doors add a touch of elegance to any bathroom, but they can quickly lose their sparkle because of soap scum, grime, and pesky streaks. Fear not! With the right cleaning techniques and a few simple ingredients, you can restore your glass shower door to its pristine condition. Let's explore effective methods for how to clean glass shower doors without leaving behind streaks.
What is the best thing to use to clean glass shower doors?

When it comes to cleaning glass shower doors, you have two primary options: DIY natural cleaners or commercial glass cleaners. DIY solutions are often cost-effective and environmentally friendly, while commercial cleaners may offer convenience and specialized formulas for tough stains.
White vinegar and dish soap for cutting grime
For a powerful yet natural cleaning solution, mix equal parts white vinegar and water in a spray bottle, adding a few drops of dish soap. Spray the solution onto the glass surface and let it sit for a few minutes to loosen the grime. Then, scrub gently with a sponge or microfiber cloth and rinse thoroughly with water. However, exercise caution when using vinegar on surfaces like natural stone, as it can cause damage.
Baking soda and dish soap instead of vinegar solution
If you prefer to avoid vinegar, a mixture of baking soda and dish soap can also effectively tackle grime on glass shower doors. Create a paste by mixing baking soda with a small amount of dish soap, then apply it to the glass using a sponge or cloth. Scrub gently in circular motions, focusing on areas with stubborn stains, before rinsing thoroughly.
Lemon and lemon oil to kick streaks to the curb
Harness the power of citrus to banish streaks from your glass shower doors. Simply cut a lemon in half and rub it directly onto the glass surface, focusing on areas with visible streaks. The acidic properties of the lemon help dissolve residue while leaving behind a fresh, citrusy scent. For added protection against future water marks, lightly coat the glass with lemon oil after cleaning. Your glass won't streak again for a long time!
Tips for keeping your glass shower doors clean and streak-free

Read more
How to remove stripped screws without any hassle
Unlock our best solutions for this common DIY woe
Single screw pointed up on a wood surface

Stripped screws can be a frustrating obstacle that can easily halt the progress of your DIY building or repair project. However, with the right methods and a bit of patience, you can tackle this problem effectively. Let's explore the various techniques for how to remove stripped screws, ranging from simple tricks to more advanced solutions for those severely stripped screws.
How to remove stripped screws: Initial methods to try
Here are a few simple methods to employ when the screws aren't too much of a problem.

Remove the screw with pliers
One of the simplest methods involves using a pair of pliers. Grip the head of the screw firmly with the pliers and slowly turn it counterclockwise. Apply steady pressure to prevent slipping and gradually loosen the screw from its position.
Use the rubber band method
If the screw head has enough grip left, place a rubber band over the head before inserting the screwdriver. The rubber band fills the gaps and provides extra friction, enhancing your grip on the screw. This method works particularly well for smaller screws like those on old wood furniture or screws with shallow stripping.
Try using a different screwdriver
Sometimes, the head of a stripped screw may still have one or two slots that can accommodate a different type or size of screwdriver. Experiment with various screwdrivers in your home toolkit, such as switching from a Phillips to a flathead screwdriver or adjusting the size of the screwdriver to fit the remaining slots.
Next steps: Take your removal method up a notch
Here, we have some more advanced options when the job isn't so simple.

Read more
This is how much it really costs to replace the windows in your home
From window type to material, the scope of your project will affect your window replacement costs
Man installing bottom of window trim

Replacing a window is a bigger project than many homeowners realize. With so many options to choose from, windows come in a variety of materials and styles, each affecting their overall cost. Today, we’re discussing the window replacement cost, so you can get an idea of what to expect for your next renovation.

How much does it cost to replace a single window on average?
The cost to replace a window can range from anywhere between $450 and $1500, with the average price of a window replacement costing $730, according to MarketWatch. Depending on the type of window, the material, and the location you live, window replacement prices can change based on the scope of your project.

Read more