One thing many homeowners neglect in their home maintenance is cleaning out their outdoor AC unit. Outdoor air conditioning units collect a lot of debris and wear down over time. In order to have a continuous flow of fresh, clean air into your home, it's important to clean out your air conditioning from time to time.
Keeping your air conditioner coils clean also allows you to save money on your energy bills when you run it and keeps your home cool and refreshing. But when it comes time to think about cleaning your air conditioner again, you may be dreading the process, but it's necessary. And a good time to do this is at the end of the AC season.
There’s no need to fret over cleaning your air conditioner coils, however. This step-by-step guide will walk you through exactly what you need to do to accomplish a quick and effective AC cleaning.

Why you should clean your AC coils
There are several reasons why cleaning your AC coils regularly will benefit you and your home.
Save energy
The first reason is that routine cleaning of your HVAC coils will save you money on electricity. That’s because clean AC units use less energy to cool down a space.
Run cooler air
Another reason is that a clean AC unit will cool your home faster. This goes right along with saving energy, as well. Since your AC is clean, it will consume less energy to cool down your home. Additionally, the air will be much cooler since there is no internal dust or dirt buildup.
Less dirt and dust
Continuing with the above idea, a clean AC unit won’t have to work as hard from all the dirt and dust buildup. While this may be obvious, it’s important to note how beneficial a clean AC is for your home. Dirt and dust may transfer into the air you and your family are breathing if your unit is not properly maintained. This could lead to illnesses and allergy problems.
When to clean the AC
It’s best to clean your AC unit twice a year. Experts recommend cleaning it in the spring before you begin using it again and then in the fall once summer has ended. This will not only lessen your energy consumption in the summer, but will also provide clean, cool air from your AC.

Step-by-step on how to clean HVAC coils
There are many different types of home AC units. Here, we’ll discuss the best methods for cleaning larger, outdoor units.
Step 1: Turn off the AC.
The first thing you should do is turn off the power to the AC unit. Most outdoor units will have a shutoff box nearby so you can easily access the power switch. If you don’t have a shutoff box, you can flip the power switch in your circuit breaker.
Step 2: Clear away debris.
Many outdoor units will have a drain line that you need to ensure is clear of debris. And if it's autumn, then a lot of debris may have built up. The drain line will be located at the base of your air conditioning unit and will look like a hole or a small tube with a nozzle. Pour water into the drain line to flush any debris. If the line is clogged, mix a solution of one part bleach with one part water and pour it into the line. After a few minutes, the clog should vanish.
Step 3: Remove anything blocking the coils.
Look for debris on your unit both inside and out and begin removing anything that could be blocking the coils. On outdoor units, it’s especially important to be aware of bugs, sticks, leaves, and dirt that are sucked up and stuck in your unit. If you want, you can also purchase a special brush to clean out the debris.
Step 4: Inspect the unit.
Once all of the larger debris is removed, do a quick inspection of your unit for any tears, damage, oil leaks, dents, or anything that seems off. Contact a professional if you find any damages so they can guide you on the best methods for repair or replacement.
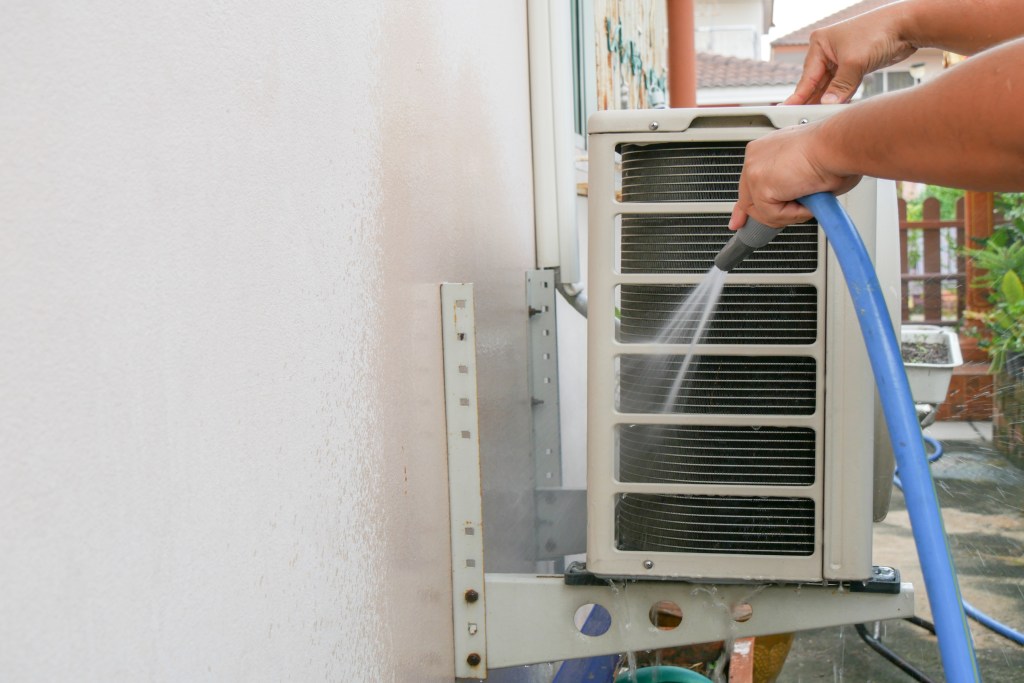
Step 5: Spray the coils with a hose.
For your outdoor unit, you can use a garden hose to spray down the coils. Avoid using a pressure washer as it could be too powerful on the sensitive pieces in your AC unit. Also, avoid spraying any wiring or fan components directly. The goal is simply to rinse off the coils to remove dirt and dust.
Step 6: Apply coil cleaner. Next, if you have a coil cleaner, you should apply the spray generously to the coils. Coil cleaner is specialized to remove dirt and debris from the air conditioner coils. Follow the instructions on your coil cleaner and let the solution sit on the coils for five to 10 minutes before rinsing it off with the hose.
Step 7: Straighten the bristles and reassemble the unit.
Before you reassemble your AC unit, you’ll want to straighten out the bristles and fins in your unit. A common problem for many units is that the fins get tangled and twisted. You can purchase a fin comb to help correct the fins to their original state.
Step 8: Turn it back on.
Once your unit is cleaned, you only have to wait a few minutes before turning it back on again. Then, you will be set for plenty of cool, clean air now, or when you actively use it in the summer.
Cleaning your air conditioning unit can be a daunting task, but in reality, the process is super simple. After a quick cleaning, you can rest assured that your AC will provide you and your household with fresh air for the summer months. Just be sure to check on the unit and give it a good cleaning in the fall before winter sets in!