
Add instant rustic charm to your home: How to make a pallet wall

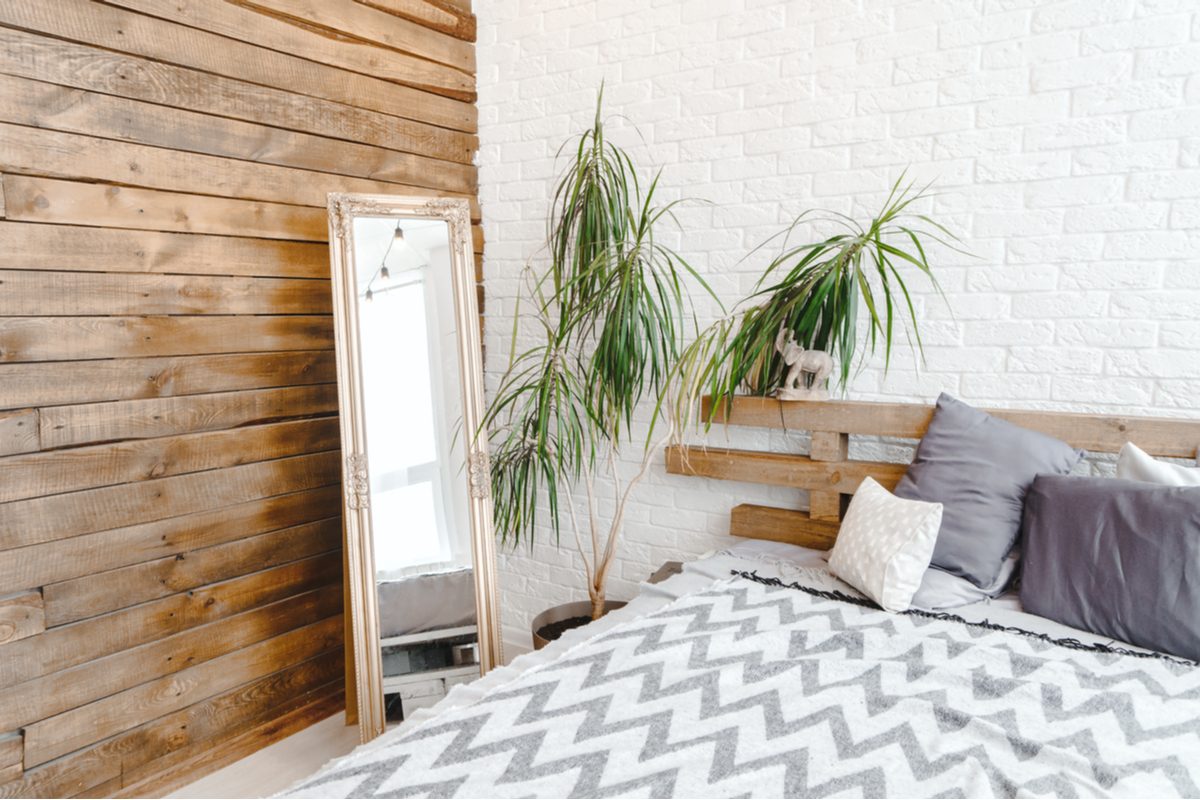
You’ve probably got a long list of home improvement projects waiting to be done. Don’t worry, we’ve all got that list. One great place to start updating your home is with a gorgeous accent wall. We’ve all got that one wall in our home that we’re not sure how to decorate. Maybe it’s at an odd angle, it’s an awkward size, or it’s just boring and you want to revive it. A pallet wall is a rustic, charming addition to any room, and it’s a stylish update for a home with a farmhouse-chic vibe. We’re going to walk you through how to make a pallet wall that accents the room beautifully.

Image used with permission by copyright holder

How do you build a pallet wall?

Before diving into this project, you’ll need to gather all of your materials and tools. Here’s what you’ll need to build a pallet wall:

  • Pallets
  • Pry bar
  • Hammer or pliers
  • Measuring tape
  • Circular saw
  • Sandpaper or electric sander
  • Wood stain
  • Paintbrush
  • Plywood
  • Stud finder
  • Wood screws
  • Electric drill and bits
Recommended Videos

Prep the wall space for a pallet wall

If you have floorboards or crown molding surrounding the wall, you’ll have to remove it for this project and re-install it after the pallet wall is completed. Note that the standard pallet board is 5/16 of an inch thick. If you’re installing pallets flush against a perpendicular wall, you may have to cut off a small portion of the floorboards or moldings on the perpendicular wall to accommodate the pallet thickness.

Prep the pallets for installation

If you got actual wood pallets that you’re upcycling, they’ll need a lot of prep before they’re installed. You want to be sure they’ll look evenly placed and perfectly colored on your wall.

  1. Dismantle the pallets using a pry bar so that each strip of wood is free-standing.
  2. Decide which pallets can be used and which are too damaged or discolored for your project.
  3. Use a hammer or pliers to remove any nails from the boards you’ll be using.
  4. Measure the wall space and then assemble the boards on the ground or another flat surface.
  5. Measure the assembled boards and cut off any excess wood using a circular saw.
  6. Sand down each board so that there are no rough sections that could give you splinters.
  7. Stain each piece of wood with your desired wood-staining product.
  8. Allow the wood to dry completely.

How do you attach a wooden pallet to the wall?

These next steps are crucial ones. In order to install the wood pallets on the wall properly, you’ll have to first put up a layer of plywood that’s secured to the wall’s studs. Then, you can install the pallets onto the plywood. This way, the wood pallets will be evenly placed and won’t damage the wall behind them.

  1. Measure the strips of plywood to ensure you have enough to cover the entire wall space. Cut off any excess plywood.
  2. Stain the plywood the same color as the pallet pieces so that you can’t see different wood colors through any gaps in the pallets.
  3. Allow the plywood to dry completely.
  4. Use a stud finder to identify where the studs are in the wall.
  5. Use a drill and wood screws to install the stained plywood securely to the studs.
  6. Using the drill and wood screws again, mount the individual pallet pieces on the plywood, starting at the center of the wall and working your way out.
  7. Once all pallet pieces are installed, wipe down your new pallet wall with a dry cloth to rid it of dust and debris.
Image used with permission by copyright holder

How do you make a living wall out of pallets?

If you need a place to display all those lovely succulents or herb plants, a living wall is a stunning option. Pallets, in their original form, are fairly close to what you need for a living wall, and you can get them into shape for your plant storage with just a few steps. Here’s how:

What you’ll need

  • Pallet in good condition
  • Pry bar
  • Hammer or pliers
  • Staple gun
  • Landscape fabric
  • Wood stain
  • Paintbrush

How to turn a pallet into a living wall

  1. Examine the pallet and be sure your plants will have enough room to grow between the existing slits. If you need more room, remove every other board from the pallet using a pry bar.
  2. Use a hammer or pliers to remove any excess nails that aren’t holding the remaining boards in place.
  3. Stain the pallet with a wood stain of your choice and allow it to dry completely. If you’re using the living wall for edible plants, make sure both the pallet and the stain are safe to use around food.
  4. Lay the pallet on its front and drape landscape fabric across the back.
  5. Measure and cut fabric so that you have enough for about double the length of the pallet.
  6. Use a staple gun to secure the fabric to the back of the a pallet at the top.
  7. Fold and bunch the fabric so that it creates pockets for the plants to rest in.
  8. Staple the fabric to each plank in tight lines, with enough staples to keep soil from spilling through.
  9. Turn the pallet upright and fill the pockets with soil and plants

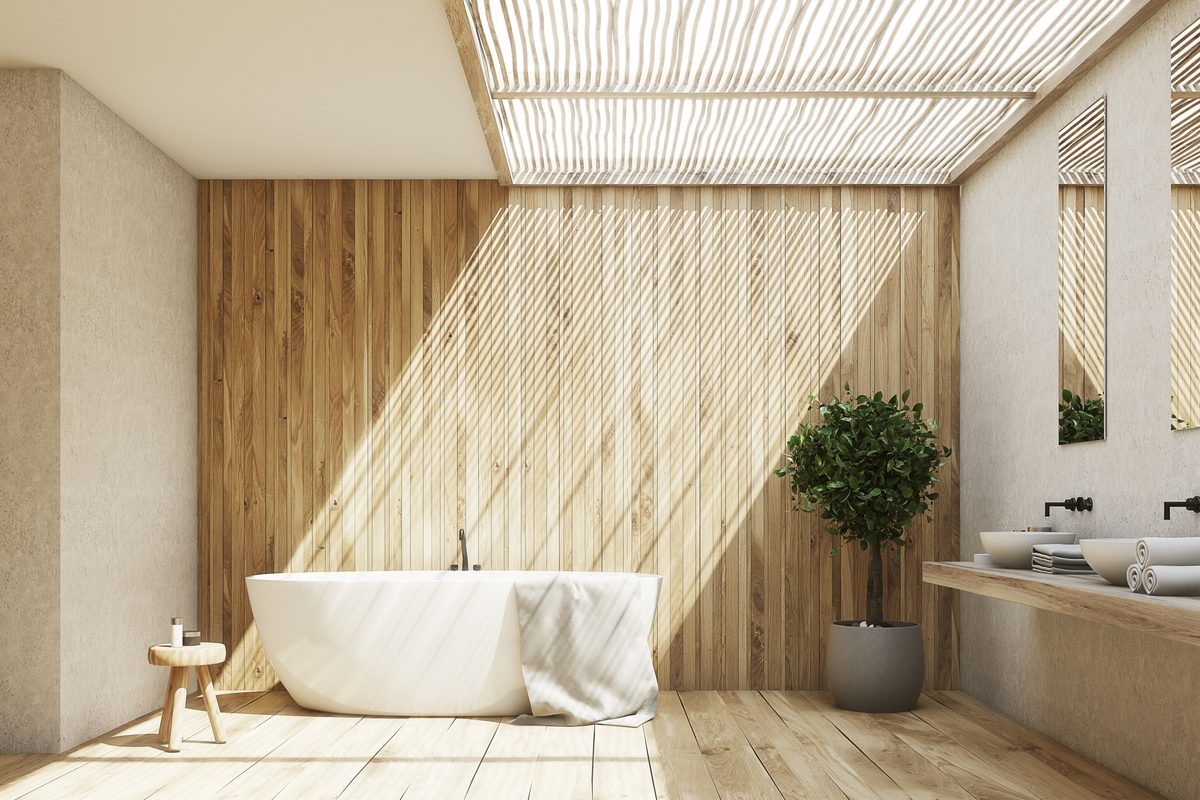
Pallets are visually appealing and versatile. They’re a great addition to walls or gardens, and they’re easy to work with. Whether you’re looking to create a portable living wall or an entire interior wall with pallets, this guide will help turn your room into a chic, farmhouse-styled space.

Topics
Veronica Sparks
Veronica Sparks is a writer from Milwaukee, Wisconsin who loves writing about gardening, home décor, and DIY life. She’s…
These incredible small patio ideas will make your outdoor space feel huge
You can have style and comfort outside without the square footage
Small patio with light colored walls and folding chairs

Small outdoor living spaces may seem limiting, but with the right design, they can become cozy retreats that feel spacious and inviting. Whether you're dealing with a tiny urban balcony or a petite backyard nook, there are many ways to maximize your outdoor oasis. From interesting gardens to clever seating solutions, these small patio ideas will transform your compact area into a stylish and functional oasis.
1. Think vertically

When space is at a premium, look up! Vertical gardens, gorgeous garden trellises, and tall, thin plants are excellent options for adding greenery without sacrificing valuable floor space. Consider installing shelves or wall-mounted planters to create a lush backdrop for your patio oasis. Not only do vertical elements add visual interest, but they also help to draw the eye upward, making the space feel larger and more expansive.
2. Make the floor pop

Read more
This unique wall design will make you rethink wallpaper
Wallpaper frames? An interesting concept to consider for your home
Geometric wallpaper with a console table

Wallpaper is becoming trendier in today’s home design, but some people aren’t ready to take the leap and wallpaper an entire room. This DIY project shows how you can add more visual appeal to a room using wallpaper ideas like creating individual "frames."
How to create this framed wallpaper look
@olivebranchcottage on Instagram shared a neat DIY wallpaper idea that she calls "wallpaper rectangles." This fun twist on adding traditional wallpaper to a room helps add visual appeal without being overwhelming. Here’s how she did it.

Pick your wallpaper
First, @olivebranchcottage suggests picking your wallpaper. In the nursery she designed, she opted for a black-and-white pattern depicting nature scenes.
Choose your trim
To create the "rectangles" on the wall, you’ll want to choose some wood trim. The creator chose some from The Home Depot.
Paint the trim the same color as the wall
Next, you’ll want to paint the trim the same color as the wall tone. This creates a greater sense of flow once you add the wallpaper.
Use painter’s tape to outline your design
@olivebranchcottage used painter’s tape to outline the design. This makes it easy to move pieces as needed and readjust until you find what is right for you. Also, she notes that the size and spacing of your rectangles are entirely up to personal preference. For the nursery, @olivebranchcottage placed the tape 5 inches from the ceiling and 5 inches from the baseboards.
Add your wallpaper
The creator suggests using a laser level to keep things even and straight as you place your wallpaper.
Cut your trim pieces
To cut your trim pieces, measure them to the same length as the painter’s tape you used for outlining. The Instagram creator says a 45-degree angle is best.
Use a nail gun to attach your trim pieces to the wall
Using a nail gun, attach your trim pieces to the wall. You should do this after you’ve laid your wallpaper. It’s OK if the wallpaper goes beyond the painter’s tape outline you created.
Cut the excess wallpaper
Once you attach your trim pieces to the wall, you can use an X-Acto knife to cut off the excess wallpaper. After you cut all the edges, you’ll have a stunning wallpaper design.
How to style framed wallpaper in a room
Styling the framed wallpaper is up to personal preference.

Read more
Cringe-worthy decorations that definitely ruin good home design
Experts say these are some of the most common design mistakes that ruin your home's interiors
Woman placing a pillow on bed for cohesive design

If you’re aiming for a stellar home design, then there are a few things many experts urge you to watch out for. Good home design is all about intentionality and ensuring that your design appears balanced through the use of color, texture, and form. So, to help alleviate any worries and to save you from a cringe-worthy design, we’re offering a few tips on how you can decorate your home to achieve a stunning look.
Uninspired, boring artwork

One of the most common aspects of bad interior design is adorning your walls with uninspired, boring artwork. Artwork is a great way to express your personal style while also adding color and character to your room decor. For homeowners in need of decorating a blank wall or who crave more visual interest, artwork can be a fantastic solution. However, it’s easy to pick out any old piece to style your space quickly. But doing so can sometimes leave your design feeling cheap or poorly planned.

Read more