
When it comes to revamping your home’s aesthetic, texture is a powerful yet often overlooked element. The right wall texture can add depth, character, and style to any space, transforming plain walls into eye-catching design features. Whether you’re aiming for a cozy, rustic vibe or a sleek, modern look, there’s a wall texture technique to match your vision.
Wall texture types
Before diving into techniques, let’s explore the different types of wall textures that set the stage for your home’s unique personality.
- Popcorn: Known for its bumpy, cottage cheese appearance, this texture was a popular choice in midcentury homes for its ability to mask imperfections and provide sound insulation.
- Knockdown: This technique creates a slightly flattened, stucco-like finish. It’s achieved by applying a wet layer of texture and “knocking it down” with a trowel for a soft, understated look.
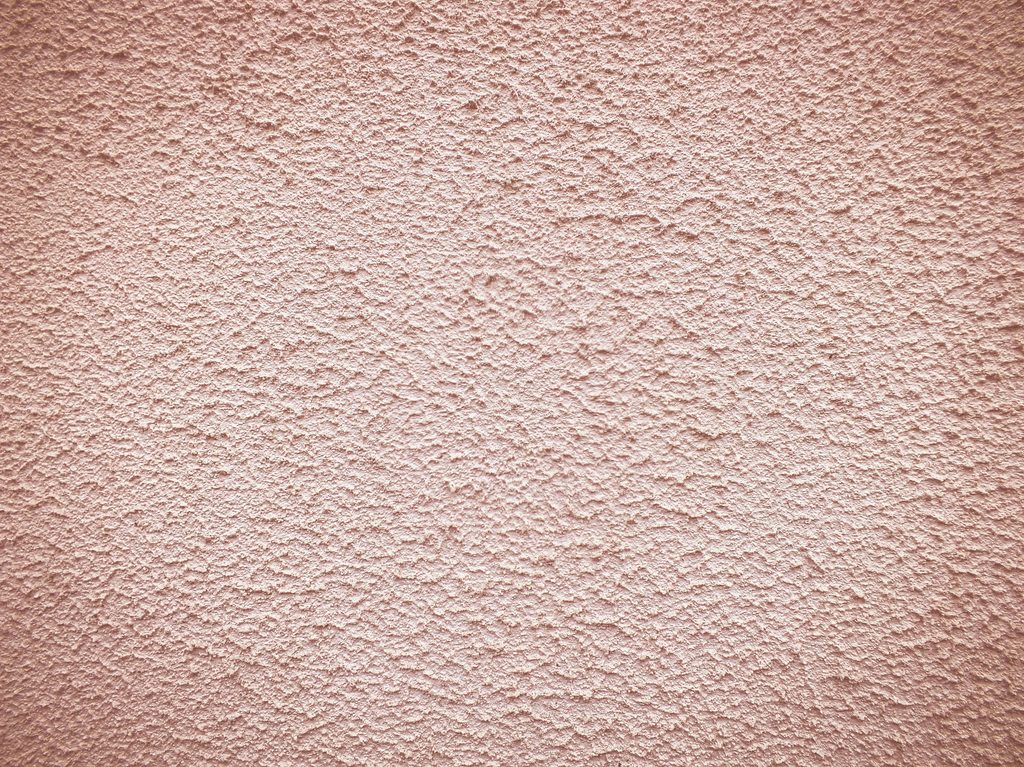
- Orange peel: Resembling the dimpled surface of an orange peel, this texture offers a subtle yet stylish finish that’s ideal for modern interiors.
- Comb: With its linear patterns that resemble combed hair, this texture adds a touch of artistic flair. The design can vary from straight lines to swooping curves, depending on your tools and creativity.
- Sand swirl: A whimsical option, sand swirl uses a mixture of sand and paint to create overlapping circular patterns. It’s a great way to introduce movement and texture to your walls.
- Slap brush: This technique uses a brush to slap wet texture onto walls, resulting in unique and dynamic patterns. It’s a great option for adding a playful, dramatic touch.
Wall texture techniques
Now that you’re familiar with the various styles, let’s look at how you can achieve these stunning textures. Whether you’re a DIY enthusiast or hiring a professional, these methods will help you create the wall texture of your dreams.
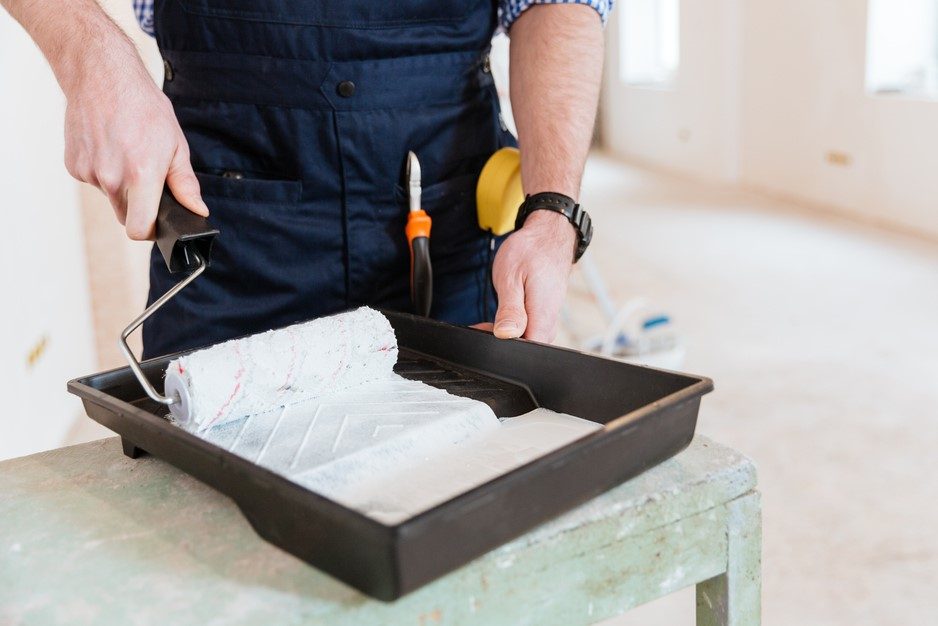
1. Use a paint roller
One of the simplest ways to texture a wall is by using a paint roller. To achieve a textured finish, choose a thick roller cover designed for rough surfaces or use a specialty roller with pre-designed patterns. Apply a mixture of paint and drywall mud, rolling it evenly across the wall. For a more dramatic texture, roll over the surface multiple times or experiment with different roller types.
2. Use joint compound
Joint compound, commonly referred to as drywall mud, is a versatile material for creating wall texture. Spread the compound evenly over your wall using a trowel or putty knife. From here, you can experiment with various techniques: Use a brush for slap brush texture, drag a comb through the compound for comb texture, or dab it with a sponge for a custom look. Once the compound dries, sand any rough edges for a polished finish.
3. Use a texture machine
For larger projects or more intricate textures, a texture machine is your best bet. A texture sprayer or hopper-style spray gun allows you to apply materials like joint compound or textured paint quickly and evenly. Adjust the nozzle settings to achieve the desired finish, whether it’s orange peel, knockdown, or a custom pattern. This method is especially useful for professional-grade results or when texturing multiple rooms.
4. Use a sponge
A sponge offers incredible versatility when it comes to texturing walls. Start by applying a thin layer of joint compound or textured paint. Then, gently press a damp sponge against the surface to create a subtle, organic pattern. You can vary the pressure or twist the sponge to achieve different effects. This technique is perfect for adding a soft, natural touch to your walls.
5. Use the Venetian plaster technique
Venetian plaster is a sophisticated technique that creates a smooth, marble-like finish. Apply thin layers of tinted plaster to the wall with a trowel, allowing each layer to dry before applying the next. Once the plaster is dry, burnish the surface with a steel trowel or sandpaper to achieve a high-gloss finish. This elegant texture works beautifully in luxurious or minimalist spaces.
6. Use the rag-rolling technique
For a textured look that’s both dynamic and artistic, try the rag-rolling technique. Apply a base coat of paint to the wall and let it dry. Then, roll a crumpled rag or piece of fabric dipped in a contrasting paint color over the surface. This creates a layered, dimensional effect that can be as bold or subtle as you like.
Tips for texturing your walls
- Practice first: If you’re trying a new technique, practice on a piece of scrap drywall or an inconspicuous section of your wall before committing to the entire surface.
- Prepare the surface: Ensure your walls are clean, dry, and free of cracks or imperfections before applying any texture. A smooth base will result in a more professional finish.
- Use quality tools: The right tools, such as rollers, brushes, or trowels, can make all the difference in achieving your desired texture.
- Work in sections: To prevent the material from drying out too quickly, work in small, manageable sections. This is especially important for techniques like knockdown or slap brush.
- Be creative: Don’t be afraid to experiment with different materials, patterns, or tools to create a one-of-a-kind look.
Adding textured walls to your home is an exciting way to elevate your interior design. Whichever texture type you choose and whichever technique you use, wall texture can transform any space into a visual masterpiece. With a bit of creativity and patience, your walls can become an artistic expression that reflects your personal style. So grab your tools, pick your favorite technique, and start transforming your home today!


