Pickles are a fun treat for any time of the year. What makes them so great is their sour and savory flavor and the fact that they are super easy to make yourself! If you’ve been craving a pickled treat and wondered how to make your own at home, look no further.
We’ve gathered some of the best tips to help you make crisp and flavorful pickles from your own kitchen that you can store and enjoy whenever you like.
What can you pickle?
Many people are aware that cucumbers are used to make pickles. However, a common misconception when it comes to pickling is that pickles are reserved for cucumbers only. That’s simply not true! You can pickle nearly any produce item, whether it be a fruit or vegetable.
Common pickled goods include mushrooms, sweet peppers, blueberries, beets, and even garlic! The only limit is your imagination when it comes to pickling.
Fermentation vs. vinegar brine
Fermentation is a standard method used for pickling and was often the primary process for people of the past. While fermentation often results in crisper and more flavorful pickles, the process can take an entire month before you get results.
Alternatively, vinegar brines are much faster for creating tasty pickled treats. The downside is that your pickles may not be as crisp or seasoned unless you know the best techniques.

Here’s how to make delicious pickles in a weekend
Below is our simple guide for making delicious pickles without waiting months for fermentation. What you’ll need:
- Fruits or vegetables
- Homemade vinegar brine described below
- Seasonings for flavor
- Thermometer
- Quart-sized canning jars
This process will require 30 minutes of active cook time and 12 hours in total to produce amazing pickles.
First, make your brine
The brine is the most important part of any pickling process. A good brine will yield flavorful pickles that are well seasoned. Vinegar is the main ingredient for creating brine, and it’s recommended that you opt for quality cooking vinegar.
Most bottles of vinegar, whether distilled or apple cider, will be 5 percent vinegar. We’ve found these work best. Be sure to check the label if you are uncertain.
Savory brine
Savory brines are best for vegetables as they add a bit of a sour kick to pickling. To make a savory brine, you’ll need to mix the following.
- 14 oz vinegar
- 14 oz water
- 2 oz sugar
- A pinch of salt
If you would like to add additional spices and seasonings such as garlic or pepper, be sure to add them to your brine as well until you reach the desired flavor.
Sweet brine
Sweet brines are best for fruits. You’ll need the following to create a sweet brine.
- 14 oz vinegar
- 14 oz water
- 9 oz sugar
The measurements for these brines are best for quart-sized canning jars. With a bit of experimentation and trial and error, you could convert these for different can sizings or enhance flavor.
Next, prep the produce
Once you have your brine, gather together the fruits or vegetables you plan to use. Cut off any stems or bits you don’t want to eat and rinse all your herbs.
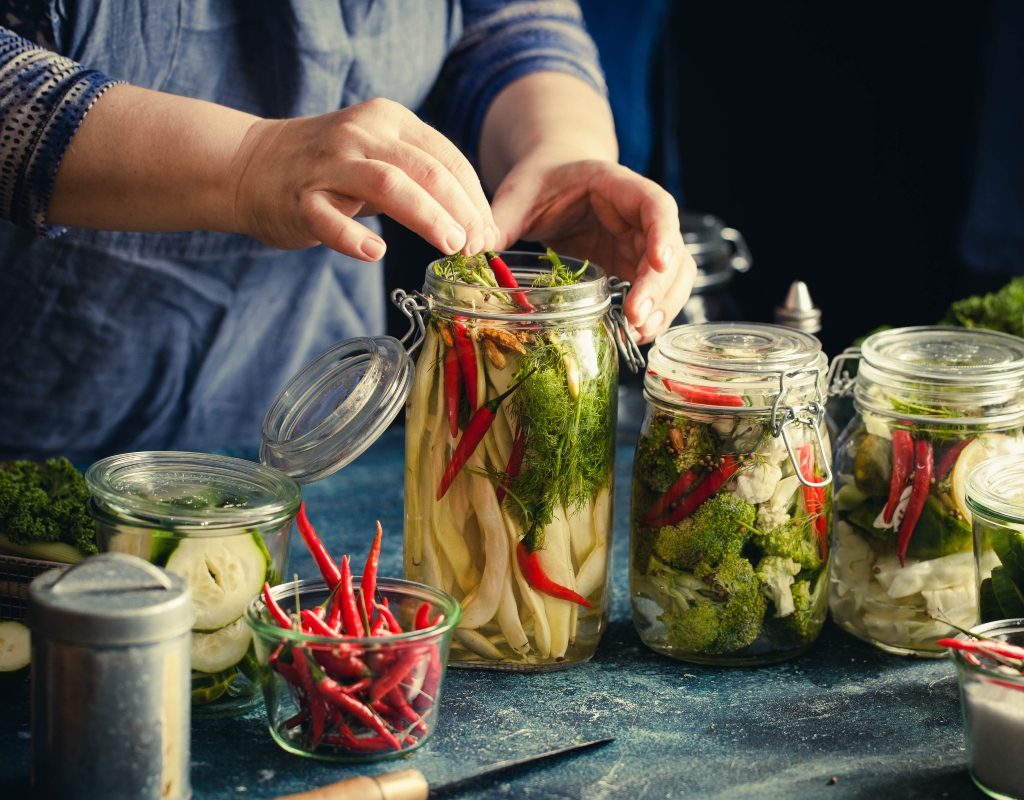
Add it to your jar
Once your produce has been prepped, you can begin adding ingredients to your jars. Always inspect your jars to ensure they’re clean and close properly. Add your produce and spices to the jar making sure not to overcrowd them. Fill the jar with the brine and ensure there is about one centimeter of space at the top. This will help the canning process.
Make sure your fruits and veggies have room to float and move around in the brine. This will ensure an even pickling.
Seal and cook
Boil water and use a waterproof thermometer to ensure the water temperature reaches 140 degrees. Pickling at a low boiling point will help create the crisp texture of fermentation without the need for an extended wait.
Close your jars so that they are tight but not overtightened. You want any trapped air to escape during the sealing process. Lower your jars into the water using canning tongs and allow them to cook for two and a half hours.
Store for later
When the time is up, pull your jars out of the water and set them on the counter to cool overnight. It’s imperative to avoid submerging the jars into ice water as this will crack and break the glass. When you’re ready to store them the next day, place them in a cool, dark cabinet. They will last up to six months.
Pickling is an easy and fun activity for those who love these crisp and flavorful treats. If you’re interested in pickling your own produce, this guide is a surefire way to ensure you get great results every time. Be sure to experiment with flavors and spices as you go on, and don’t be afraid to step out of your comfort zone and can something you’ve never considered before!


