How to repurpose pallets into amazing gardenscapes

Gardens are a lot of work. If you have a garden, you are surely aware that the work is well worth it. Gardens are rewarding, whether they are filled with beautiful plants and flowers for you to look at or produce fruits and vegetables for you to eat. Choosing plants for your garden may take up a lot of research, planning, and effort, but regardless of what you fill your garden with, you may be looking to add some decoration that is also functional to the landscape. It is also possible that you don’t have a yard or room in your yard for a whole garden. No matter what your current garden situation is, repurposing pallets into gardenscapes is a great way to upcycle old pallets and add some greenery to your life. If you’ve never thought of wooden pallets as decorations, now is the time to consider turning old wood pallets into amazing gardenscapes. This trend is popping up everywhere, and there are a ton of cool ideas that you can try out. Pallets are cheap, and sometimes free, making this a great project for people on a budget or for people who want to try something new without risking a lot of money.

Vertical Gardening
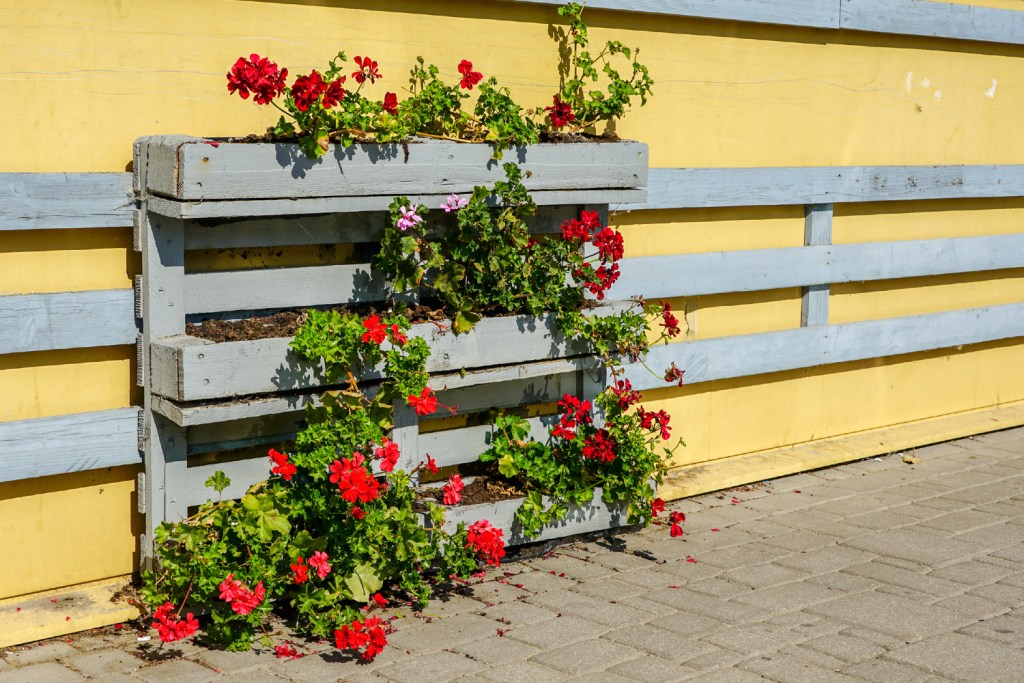
Image used with permission by copyright holder

Vertical gardening is perfect for people who don’t have a ton of space and pallets are a great way to start a vertical garden. Turning the pallet into planters for herbs or flowers is a fairly easy DIY project. Begin by stapling (or nailing) landscaping fabric to the back of the pallet and then fill the pallet with soil. Once you stand the pallet up, you can plant whatever plants you’d like in the soil. Feel free to paint or stain the pallet before you fill it with plants if you want some added color in your garden. You can also stand the pallet up and fasten planters, pots, or jars to it. Once the containers are in place, fill them with soil and plant flowers or other plants in the containers. Both of these designs work well on apartment balconies or patios.

Recommended Videos

Raised Garden Beds

Image used with permission by copyright holder

Old pallets laid flat can easily be turned into raised beds for flowers or vegetables by following almost the same steps as above for vertical gardens—first, staple landscaping fabric to the bottom of the pallet. Next, either fill the spaces with soil or small pots (square plastic pots work well for this) and plant as you normally would. These garden boxes take up a bit more space than a vertical pallet garden but are still a great way to garden with limited space.

Window Flower Boxes
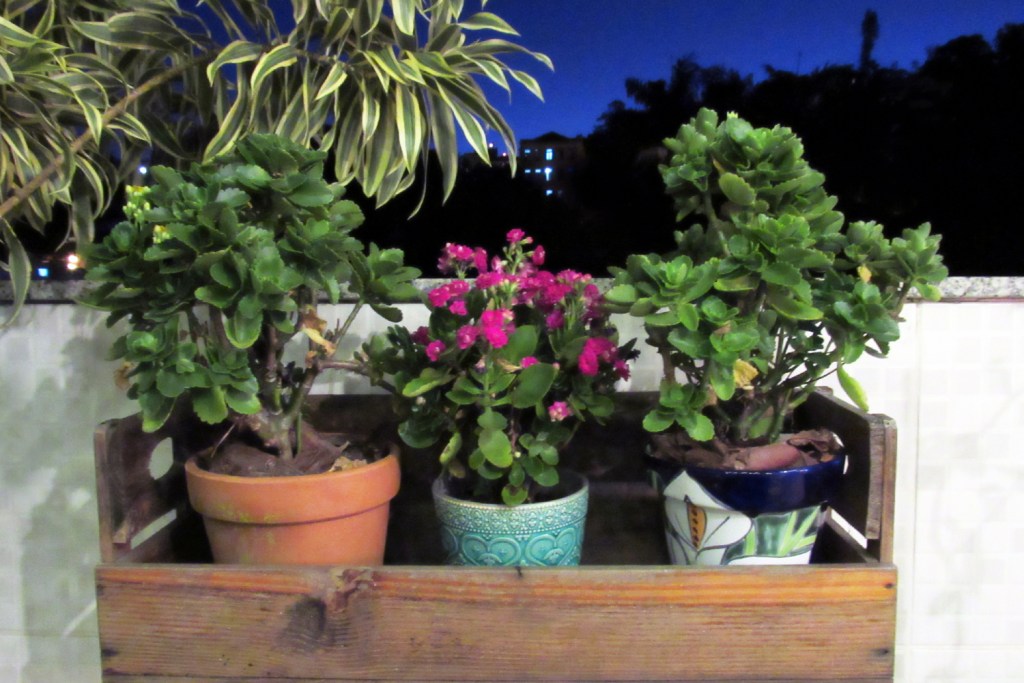
Image used with permission by copyright holder

You don’t have to use the whole pallet to create beautiful gardenscapes from old pallets. Using some of the wood from old pallets is a great way to save money on lumber. To turn an old pallet into several window flower boxes, you will have to cut the pallet into rectangles. The best part of this project is that there is no need to measure anything since the pallet is already ‘divided’ into separate sections for you. Once you have disassembled your pallet into separate boxes, fill them with soil and start planting. You will have to mount the boxes under your windows, which can be done in several different ways depending on what kind of windows you have (shelf brackets work nicely for this project). Be sure that the boxes are adequately supported since they will get heavier when you water them.

Potting Bench

Image used with permission by copyright holder

A potting bench is technically not a gardenscape, but it is a great way to repurpose old pallets and is used for gardening, so why not? Use as many pallets as you have on hand (depending on how big you want the bench to be) to make a workbench for all of your garden projects. The bench can hold extra pots, watering cans, garden tools, and more and give you a space to work on your potted plants.  You can add hooks to the bench to hang tools and store extra items on the shelf below.

Editors' Recommendations

Kelly Kaliszewski
Kelly's work has appeared in blogs and on websites. When she's not writing, she is playing with her two dogs, cooking, or…
How to remove stripped screws without any hassle
Unlock our best solutions for this common DIY woe
Single screw pointed up on a wood surface

Stripped screws can be a frustrating obstacle that can easily halt the progress of your DIY building or repair project. However, with the right methods and a bit of patience, you can tackle this problem effectively. Let's explore the various techniques for how to remove stripped screws, ranging from simple tricks to more advanced solutions for those severely stripped screws.
How to remove stripped screws: Initial methods to try
Here are a few simple methods to employ when the screws aren't too much of a problem.

Remove the screw with pliers
One of the simplest methods involves using a pair of pliers. Grip the head of the screw firmly with the pliers and slowly turn it counterclockwise. Apply steady pressure to prevent slipping and gradually loosen the screw from its position.
Use the rubber band method
If the screw head has enough grip left, place a rubber band over the head before inserting the screwdriver. The rubber band fills the gaps and provides extra friction, enhancing your grip on the screw. This method works particularly well for smaller screws like those on old wood furniture or screws with shallow stripping.
Try using a different screwdriver
Sometimes, the head of a stripped screw may still have one or two slots that can accommodate a different type or size of screwdriver. Experiment with various screwdrivers in your home toolkit, such as switching from a Phillips to a flathead screwdriver or adjusting the size of the screwdriver to fit the remaining slots.
Next steps: Take your removal method up a notch
Here, we have some more advanced options when the job isn't so simple.

Read more
This is how much it really costs to replace the windows in your home
From window type to material, the scope of your project will affect your window replacement costs
Man installing bottom of window trim

Replacing a window is a bigger project than many homeowners realize. With so many options to choose from, windows come in a variety of materials and styles, each affecting their overall cost. Today, we’re discussing the window replacement cost, so you can get an idea of what to expect for your next renovation.

How much does it cost to replace a single window on average?
The cost to replace a window can range from anywhere between $450 and $1500, with the average price of a window replacement costing $730, according to MarketWatch. Depending on the type of window, the material, and the location you live, window replacement prices can change based on the scope of your project.

Read more
10 simple yard cleanup tips that will make your life easier
Restore your neglected yard to its former glory with these essential cleanup tasks
Single-family home with curved walkway and large tree in front yard

Is your once-lovely outdoor space starting to become an eyesore? If your yard has been neglected, it's probably time for some heavy yardwork and landscaping to restore to its former glory. But trying to get your yard, trees, bushes, and beautiful garden space back into shape after a long bout of neglect may seem overwhelming. That's why we've broken down the task into 10 simple yard cleanup tips that will get your lawn and your outdoor space looking pristine once again.

What does a yard cleanup consist of?
Not sure where to start with your yard cleanup? There may be a ton of debris from storms, and there are probably a lot of mangled trees, weeds, and dying spots of grass that need some TLC. But the whole process is pretty straightforward and generally consists of three overall phases:

Read more