Halloween is just around the corner and that means it’s time to roll up your sleeves and get messy carving pumpkins. Not only is carving pumpkins fun (and the roasted seeds delicious), but it’s also an opportunity to show off your creativity and imagination. There are tons of fun and unique jack-o-lantern patterns online, but once you settle on your design, it’s important to blend these decorative gourds into your existing Halloween decor.
There are no wrong ways to go about pumpkin carving, but taking inspiration from your existing design scheme will bring your carving game to the next level, making your home look more thoughtfully designed. Here are just a few fun ways to design, display, and light up your jack-o-lanterns for a Halloween that will invite trick-or-treaters from all around the neighborhood to take a second glance at your house.
Have the right tools
First things first: You need the right tools to get the job done. Things are going to get messy, so having everything you need on hand before you start is key — you don’t want to be rifling through drawers with sticky hands. If you have the room, we recommend carving outside.
- Table: Find a sturdy table and line it with a garbage bag or newspaper for easy cleanup.
- Serrated knife and a scraper/spoon: Next, grab a serrated knife to cut the pumpkin and a scraper or large spoon to remove the stringy insides.
- Two bowls: Keep two bowls nearby to separate the seeds from the flesh.
- Marker: If you feel confident enough to freehand your design, go for it, but we recommend using a marker to trace the outline of your design.
Do your research
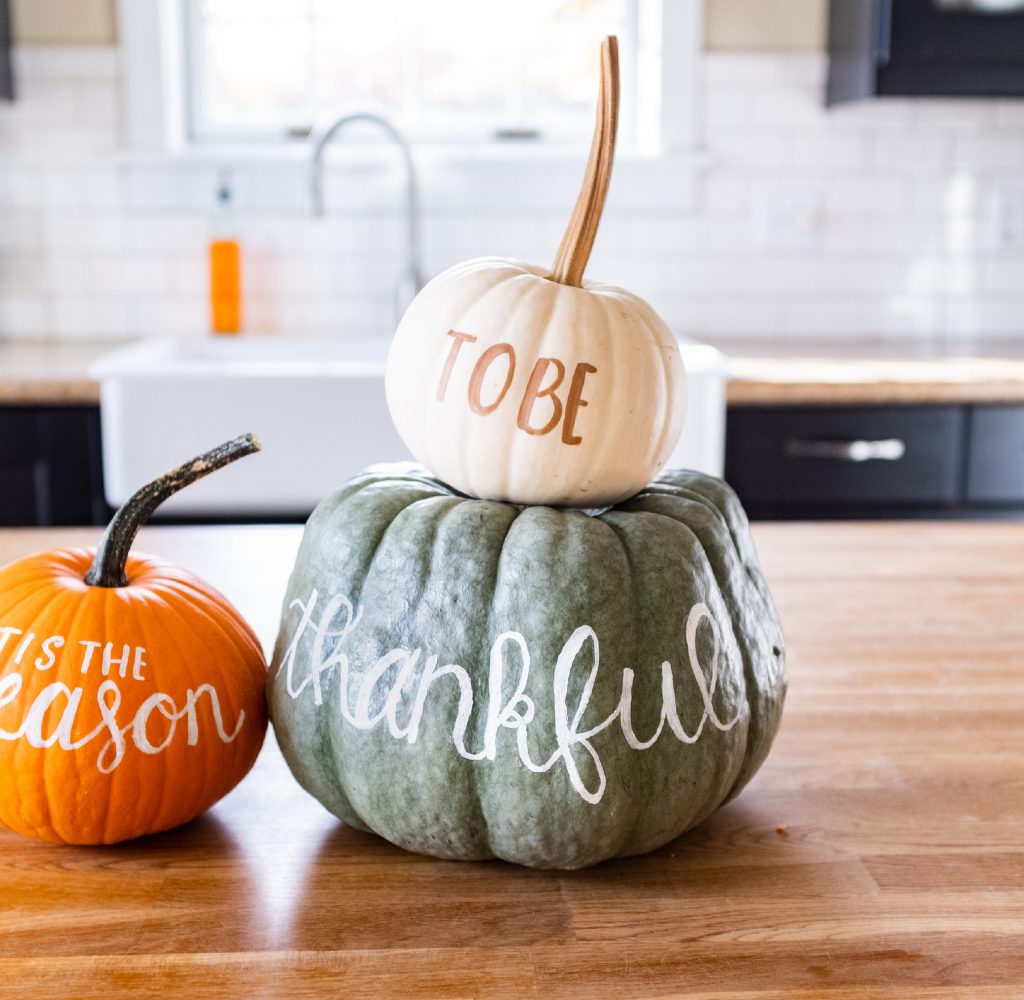
It may seem natural when the knife is in hand to just start carving away, but if you want to match your pumpkins’ design with the rest of your decor, spend some time looking at a variety of options for inspiration. There’s more to carving than two eyes, a nose, and a crooked smile. If your home follows a farmhouse design, try carving polka dots all over so it creates a fun pattern on your walls when illuminated. If you have a monochromatic or contemporary design, replace the knife with a paintbrush and paint your pumpkin ivory.
If you have multiple pumpkins, find a way to tie the design together. For instance, consider arranging the gourds to make phrases like “Boo!” and carving a letter into each of the three pumpkins.
Get a helping hand
If you’re not the artistic type, have no fear. There are hundreds of free stencils online that you can download and print out to help. All you need to do is position them the way you want, tape them to the pumpkin, and poke small holes through the outline of the design so, when you remove the paper, you’ll know where to carve.
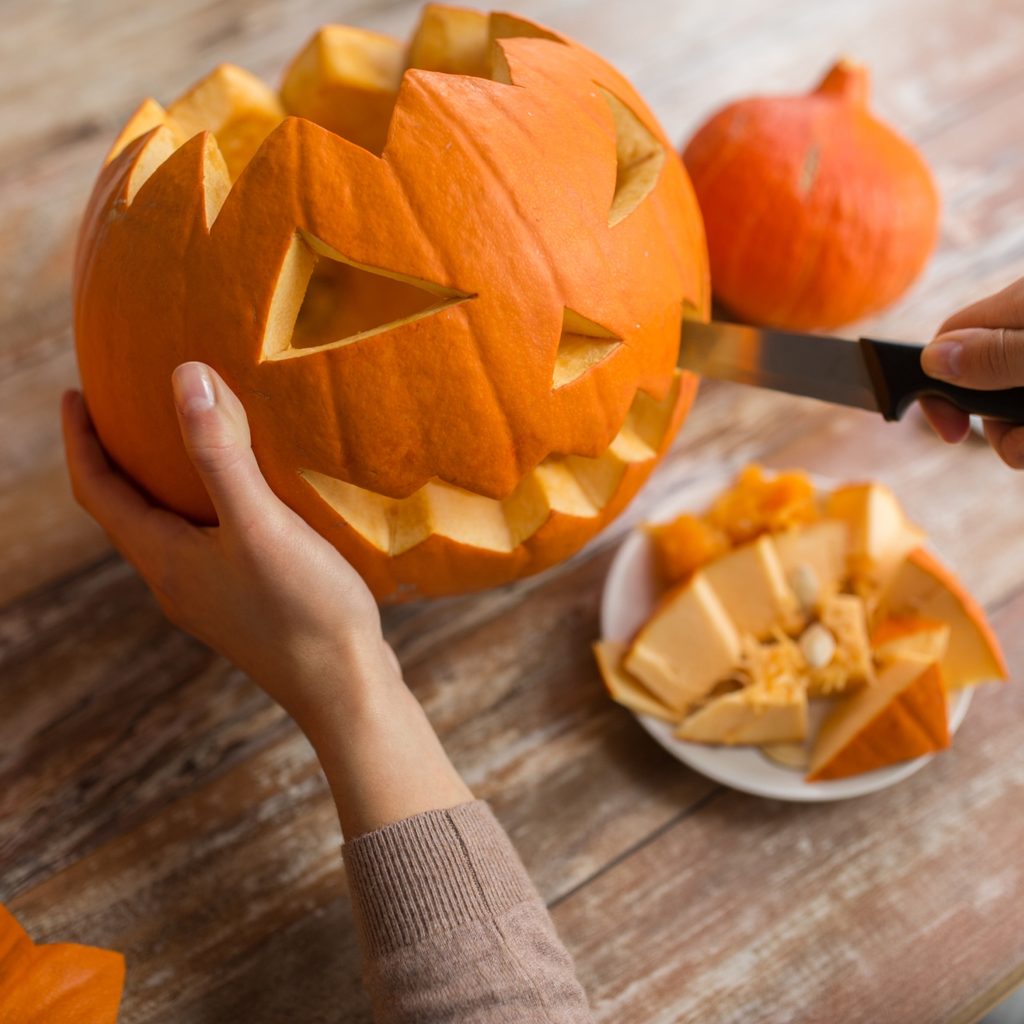
Carve the pumpkin
- Determine if you want to cut the lid or the bottom. If carving a lid, be sure to angle the blade toward the center of the pumpkin. You can also cut a notch on one side, so you know how to replace the lid Use the knife to carve a hole big enough to make scooping easy.
- Scoop out the seeds and string.
- Scrape the inner pulp away from the front of the pumpkin (wherever you’ve decided to carve). The wall should be about 1-in. thick when you’re done.
- Use your stencil (or your freehand) to carve your design.
Light it up
After all the work you put in carving your pumpkin, you’ll certainly want to display it in a manner that highlights all your efforts. If your pumpkins are going to live on your front porch, find LED lights like these remote-controlled ones. While placing candles inside of jack-o-lanterns is classic, they blow out fairly easily, leaving you with a sad, dark pumpkin. If you’re displaying them indoors for a Halloween party, however, feel free to add tea candles to deliver the best ambiance. Just make sure the top is open or else the flame will run out of oxygen and burn out.
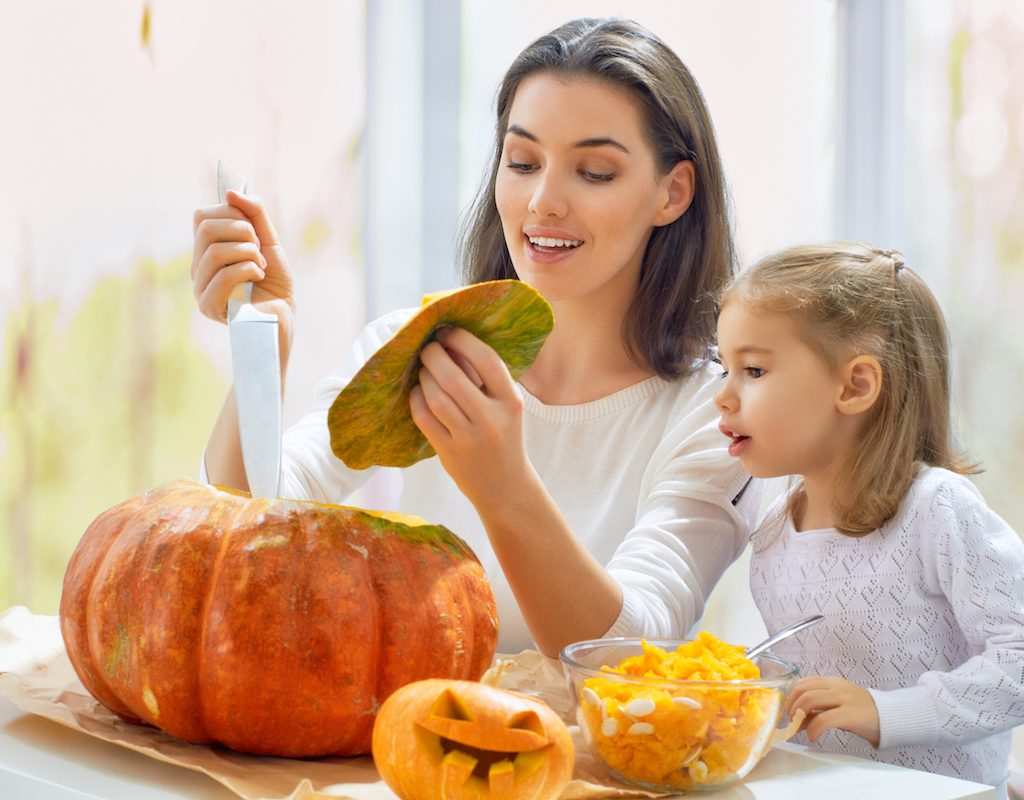
Want to get the little ones involved? There are plenty of pumpkin carving kits available that are safe for little fingers since they don’t require the use of a kitchen knife. Plus, it wouldn’t be Halloween if the whole family isn’t involved in scooping the goo out of your hand-picked pumpkins! For the older members of the family, engage in a little friendly competition and initiate a contest where each member carves their own creations. You can keep the voting within the family, share it as a Facebook poll, or encourage guests to vote for their favorite look during your Halloween party.
You can make your pumpkins as ghoulish, scary, trendy, or funny as you’d like — the important thing is that you get creative, spend quality time with your friends and family, and show off your, and your home’s, personality. You’re only limited by your imagination, so sit back, do some research, and craft the perfect pumpkin design for this year. Happy Halloween!


