Kitchen cabinets often get neglected. You can get excited about picking new kitchen towels, or even anticipate cleaning kitchen floors and tables. But when it comes to kitchen cabinets, it’s just not the most exciting thing you can do. However, it is a rewarding task. Once the whole kitchen, including the cabinets, is clean, you can stand back and admire your sparkling work. There are many different methods to clean your kitchen cabinets, but we think we’ve found the best way. If you want to learn more about how to clean kitchen cabinets (our favorite method involves vinegar), then read on. Before you know it, you will have cabinets so clean you’ll wonder how you could have possibly neglected them for so long.
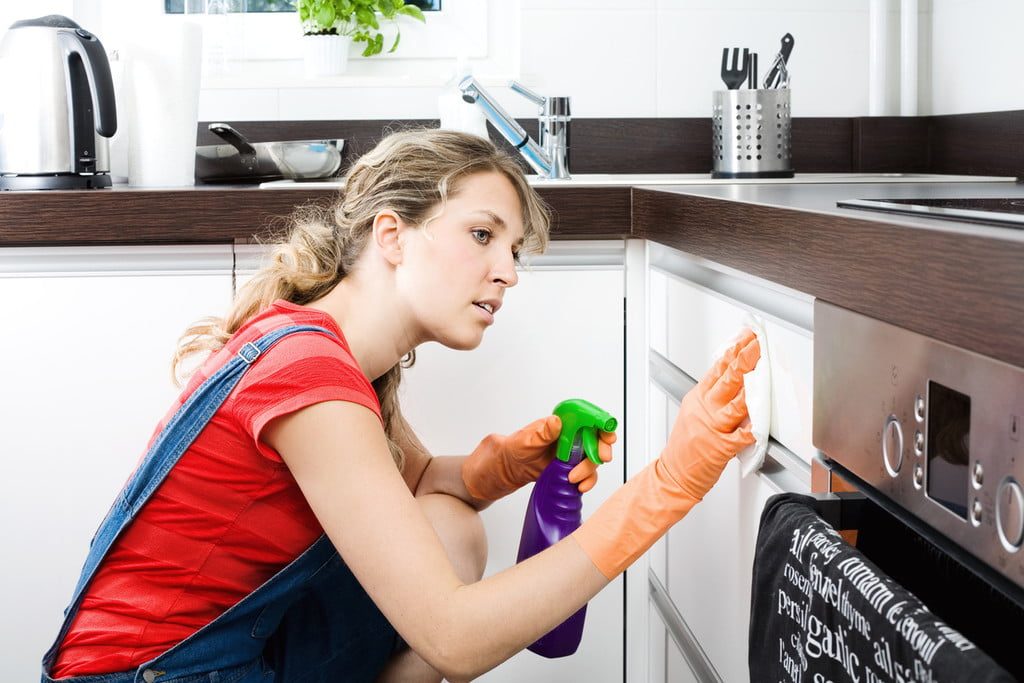
No matter what material your kitchen cabinets are made of, they probably get dirty quickly. Food splatter, grease residue, spills, drips, and gunk from your hands all end up on the surface of your cabinets, whether you know it or not. You can use a store-bought cleaner to clean your cabinets if you wish, but we like to use a homemade concoction and a spray bottle. We like to clean entire homes with vinegar, and so naturally, that’s our preferred option when it comes to kitchen cabinets. Follow the steps below for cleaning kitchen cabinets with a vinegar solution to have cabinets so clean you would eat off of them (though we don’t recommend that).
Assess the situation
If your cabinets are sticky or greasy or haven’t been cleaned in a long time, you may want to add a few drops of liquid dishwashing detergent to the vinegar solution described below. If they aren’t filthy and you’re just doing maintenance cleaning, leave the soap out of the mixture since soap can leave a residue that will require you to wipe the cabinets again, and you don’t want to create more work for yourself. After assessing whether you need soap or not, mix equal parts distilled white vinegar and warm distilled water in a spray bottle.
Spray and wipe
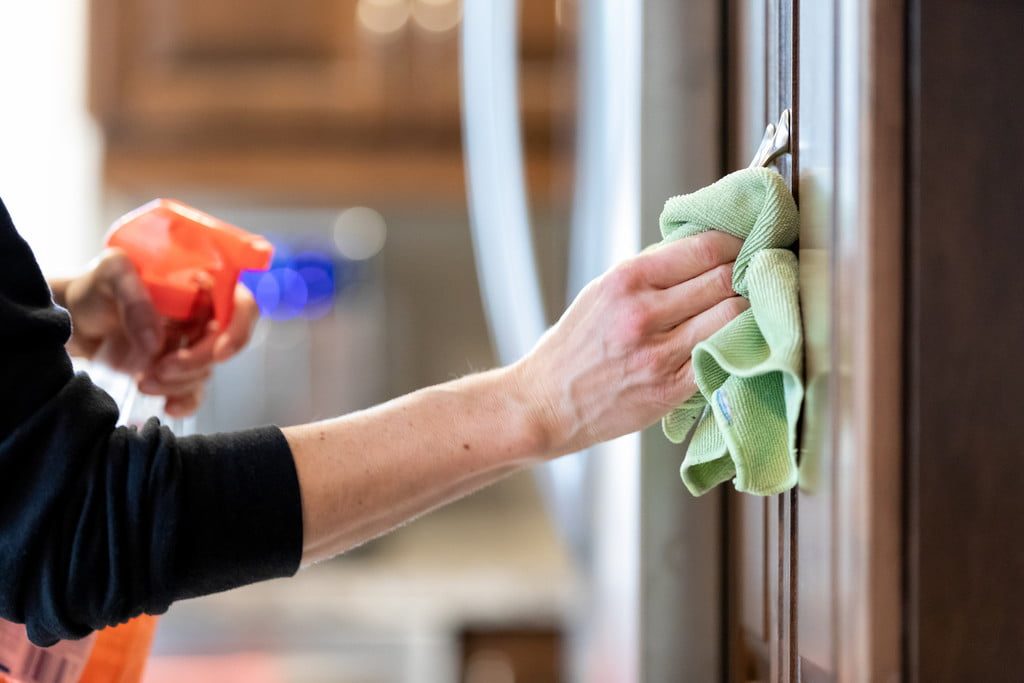
Spray a mist of the solution on the cabinets and let it sit for a few minutes to work its magic. Use a soft cloth, like microfiber, to wipe the cleaner on the outside of the cabinet doors and drawers. If there are food bits and tough spots, you may want to use a sponge with a scouring pad to get those spots off. Don’t forget to wipe the door handles and drawer knobs.
Now is also a good time to take off any handles and knobs that need to be cleaned. Make a separate bowl of hot water and white vinegar to soak them in while you complete the rest of the steps below. After soaking, most will need a final wipe and rinse before you put them back on your clean cabinets. This also gives you a chance to tighten loose screws. If you find some of the screws are loose and won’t tighten, a bit of wood glue will do the trick.
Detail
Most cabinets and drawers have crevices or trim that require some finer detailing. Dip an old toothbrush into the vinegar and water solution and scrub the intricate places that cloth just won’t get into. A toothbrush also works well on the narrow sides of the drawers and cabinets. If there are stubborn spots such as chocolate or syrup, you can make a paste out of either salt or baking soda and vinegar and use the toothbrush to scrub the stain. Don’t press too hard, though, or you’ll scratch the surface of the cabinet. Once you’ve finished with the toothbrush, wipe the insides of the doors and drawers.
If you’re really feeling ambitious, empty the cupboards and drawers and clean the insides of them as well. If you take this extra step, now would be an excellent time to purge unused items and reorganize the contents. Trash items that are broken or damaged and donate items that you don’t use anymore.
Final touches
Use a clean cloth or sponge dipped in clean water to remove all the cleaner from the surfaces you just cleaned. Then, use a dry towel to dry all surfaces. The drying step is crucial for wood cabinets since water left on wood can damage it. If you want your wood cabinets to shine like new, you can apply a commercial wood treatment at this point. The oil will protect the wood and help prevent them from getting dirty as quickly next time.


