Do you want a beautiful and lush lawn this summer? While you may want the benefits of a gorgeous yard, you may not want to enlist the help of a lawn care company due to the harmful chemicals they use (not to mention the high cost of these services). The good news is, there are more natural and organic methods for promoting growth in your lawn. One such method is called “topdressing.” It’s a tried and true method that has been used for generations, and it’s sure to give you the lovely yard you’ve always dreamed of.
What is “topdressing”?
The secret weapon of any organic gardener who wants a beautiful and lush yard, topdressing is the practice of spreading compost onto the top of your grass. It’s made with a mixture of loam, which is a fine soil that crumbles easily, sand, which makes the mixture spreadable, and heavily decomposed organic matter. This combination nourishes your lawn’s soil and promotes new grass growth. Golf courses first adapted topdressing to keep turf thick and lush. Recently, however, it has started to rise in popularity among homeowners who want to up their lawn game without using harmful chemicals to treat their grass.
What are the benefits of adding compost to lawns?
There are many benefits to topdressing your lawn with compost, making the practice a must-do for any organic gardener. All of these benefits will lead to a healthier, flourishing lawn that is safe for your family to enjoy.
- Nourishes soil and promotes new growth
- Helps lock in soil’s moisture on hot days
- Reduces growing capability of weeds
- Promotes microbial activity to reduce thatch
- Chemical-free treatment that’s safe for people and pets
When should you topdress your lawn?
In the fall before frost hits and in the spring after your first mow are the best times to perform topdressing. You’ll want to avoid doing so in the hotter summer months as the organic material in the compost could burn your grass, weakening or killing it completely. You don’t want to put in all this effort to damage your lawn further by topdressing at the wrong time of year.
Before you topdress
To facilitate the most successful topdressing for your lawn, it’s best to do a few things before starting the process:
- Water your grass the day before you topdress your lawn.
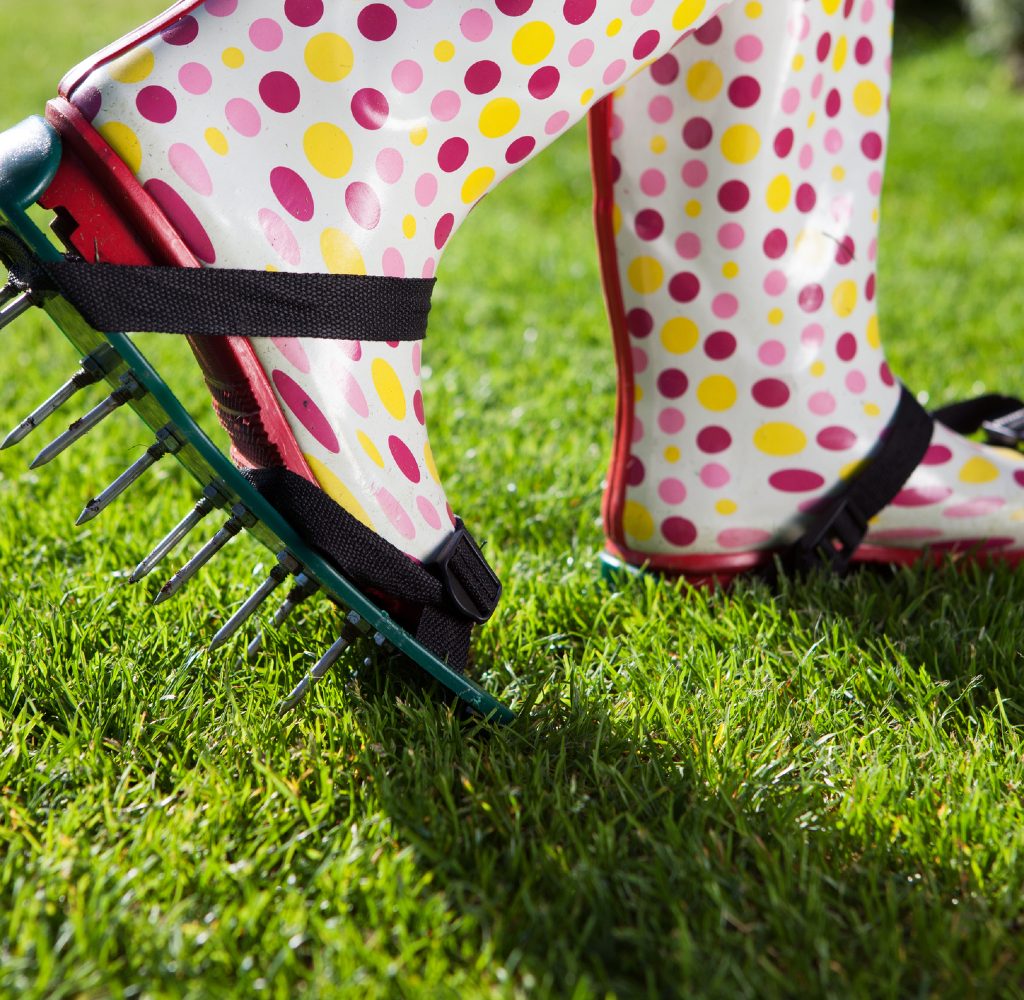
- Right before you add your topdressing, aerate your lawn by using a manual or powered aerator, depending on the size of your lawn. You can either purchase an aerator, or you may be able to rent one from your local home and garden depot. Aerating your lawn is important for topdressing since it will allow the nutrients of the compost to seep down deeper into the soil.
- Reseed your lawn after aerating, and before topdressing. Since compost nurtures the soil and provides excellent germinating conditions, this is a good opportunity for seeds to sprout.
Materials for topdressing your lawn
- Lawnmower
- Metal rake
- Topdressing
- Wheelbarrow
- Shovel
Steps for successful topdressing
Topdressing is a pretty vigorous and time-consuming process, so you want to make sure it’s done right the first time. Improper topdressing can hinder the growth of your lawn and even kill patches of your existing grass. Don’t worry, though. We’ll make sure you are well informed on the process.
- Mow your lawn to about one inch long. This length allows room for the topdressing to reach the soil between the blades of grass but won’t smother it. You want the grass to still be able to get all the sunlight it needs.
- Rake the grass and clear it of any debris like dead leaves, weeds, or thatch. If this step is skipped, the topdressing may be blocked from reaching the soil.
- Measure out your topdressing into a wheelbarrow. Be sure you have 3/4 cubic yards of topdressing for every 1,000 square feet of lawn. This will result in roughly 1/8 – 1/2 inch of topdressing on your lawn.
- Use a shovel and fling the topdressing all over your lawn as evenly as possible.
- Use a rake to distribute concentrated piles of topdressing evenly throughout your lawn.
- Perform a light watering on your lawn to get the topdressing moist so it can seep into the soil.
Quicker solutions to topdressing
If the process we’ve outlined seems too labor-intensive or time-consuming for your abilities, never fear. Some alternative methods will make the process easier on both your body and your schedule. You can invest in purchasing or renting a spreader machine that distributes the topdressing evenly. Additionally, many lawn care companies are starting to offer topdressing services due to organic lawn care becoming more popular. Note that these methods may be a bit tougher on your pocketbook, but you may find that the cost is worth it.
If you and your family love being in your backyard during the summer, you deserve to have a lawn that you can enjoy. It’s a good thing there are organic methods like topdressing that encourage your lawn’s growth and development without the use of harsh or harmful chemicals. While caring for your lawn can be a labor-intensive practice, nothing beats the look and feel of a healthy, flourishing lawn.


