When the growing season ends, it’s common to end up with several old and unused planters. Before deciding to toss them, why not try repurposing them?
Repurposing old planters is a fun DIY activity that anyone can enjoy. It takes a little bit of creativity, but with a bit of time and effort, you can find a way to spruce up your home without breaking the bank!
Tips before you start
Before diving into your repurposing project, you’ll need to tackle a few things first.
You’ll want to make sure that you wipe down your old planter to remove any dirt or grime from the outside. Empty unused soil if your planter still has some, and scrub the inside to clean the pot. Check for any cracks or chips in your planter, since this may affect what you choose to do for repurposing. For example, if you’re turning your planter into a vase, a chipped edge may not look as appealing. Once your pot has been cleaned and inspected for any damage, you can move on to working some magic to transform the planter into a unique decor piece.
Turn it into a vase
A great idea for repurposing an old planter is to turn it into a vase that can decorate a side table, entryway, or dining room. You’ll need some paint, a top coat for the paint, some brushes, and your own personal flair.
Begin by using a pencil or other drawing utensil to outline your design on your pot. Clay posts work best for this project thanks to their texture, but you can also paint over a porcelain or plastic planter, as well. Once you have your design stenciled on your planter, use acrylic paint to color your pot.
When the paint dries, you may need to go back with a second coat to ensure there are no thinly painted areas. Follow this step with a top coat to seal the artwork and set aside to dry.
Once your vase is finished, you can place it wherever you wish to enrich any space in your home. Fill your vase with flowers, pens, keys, or whatever your heart desires.
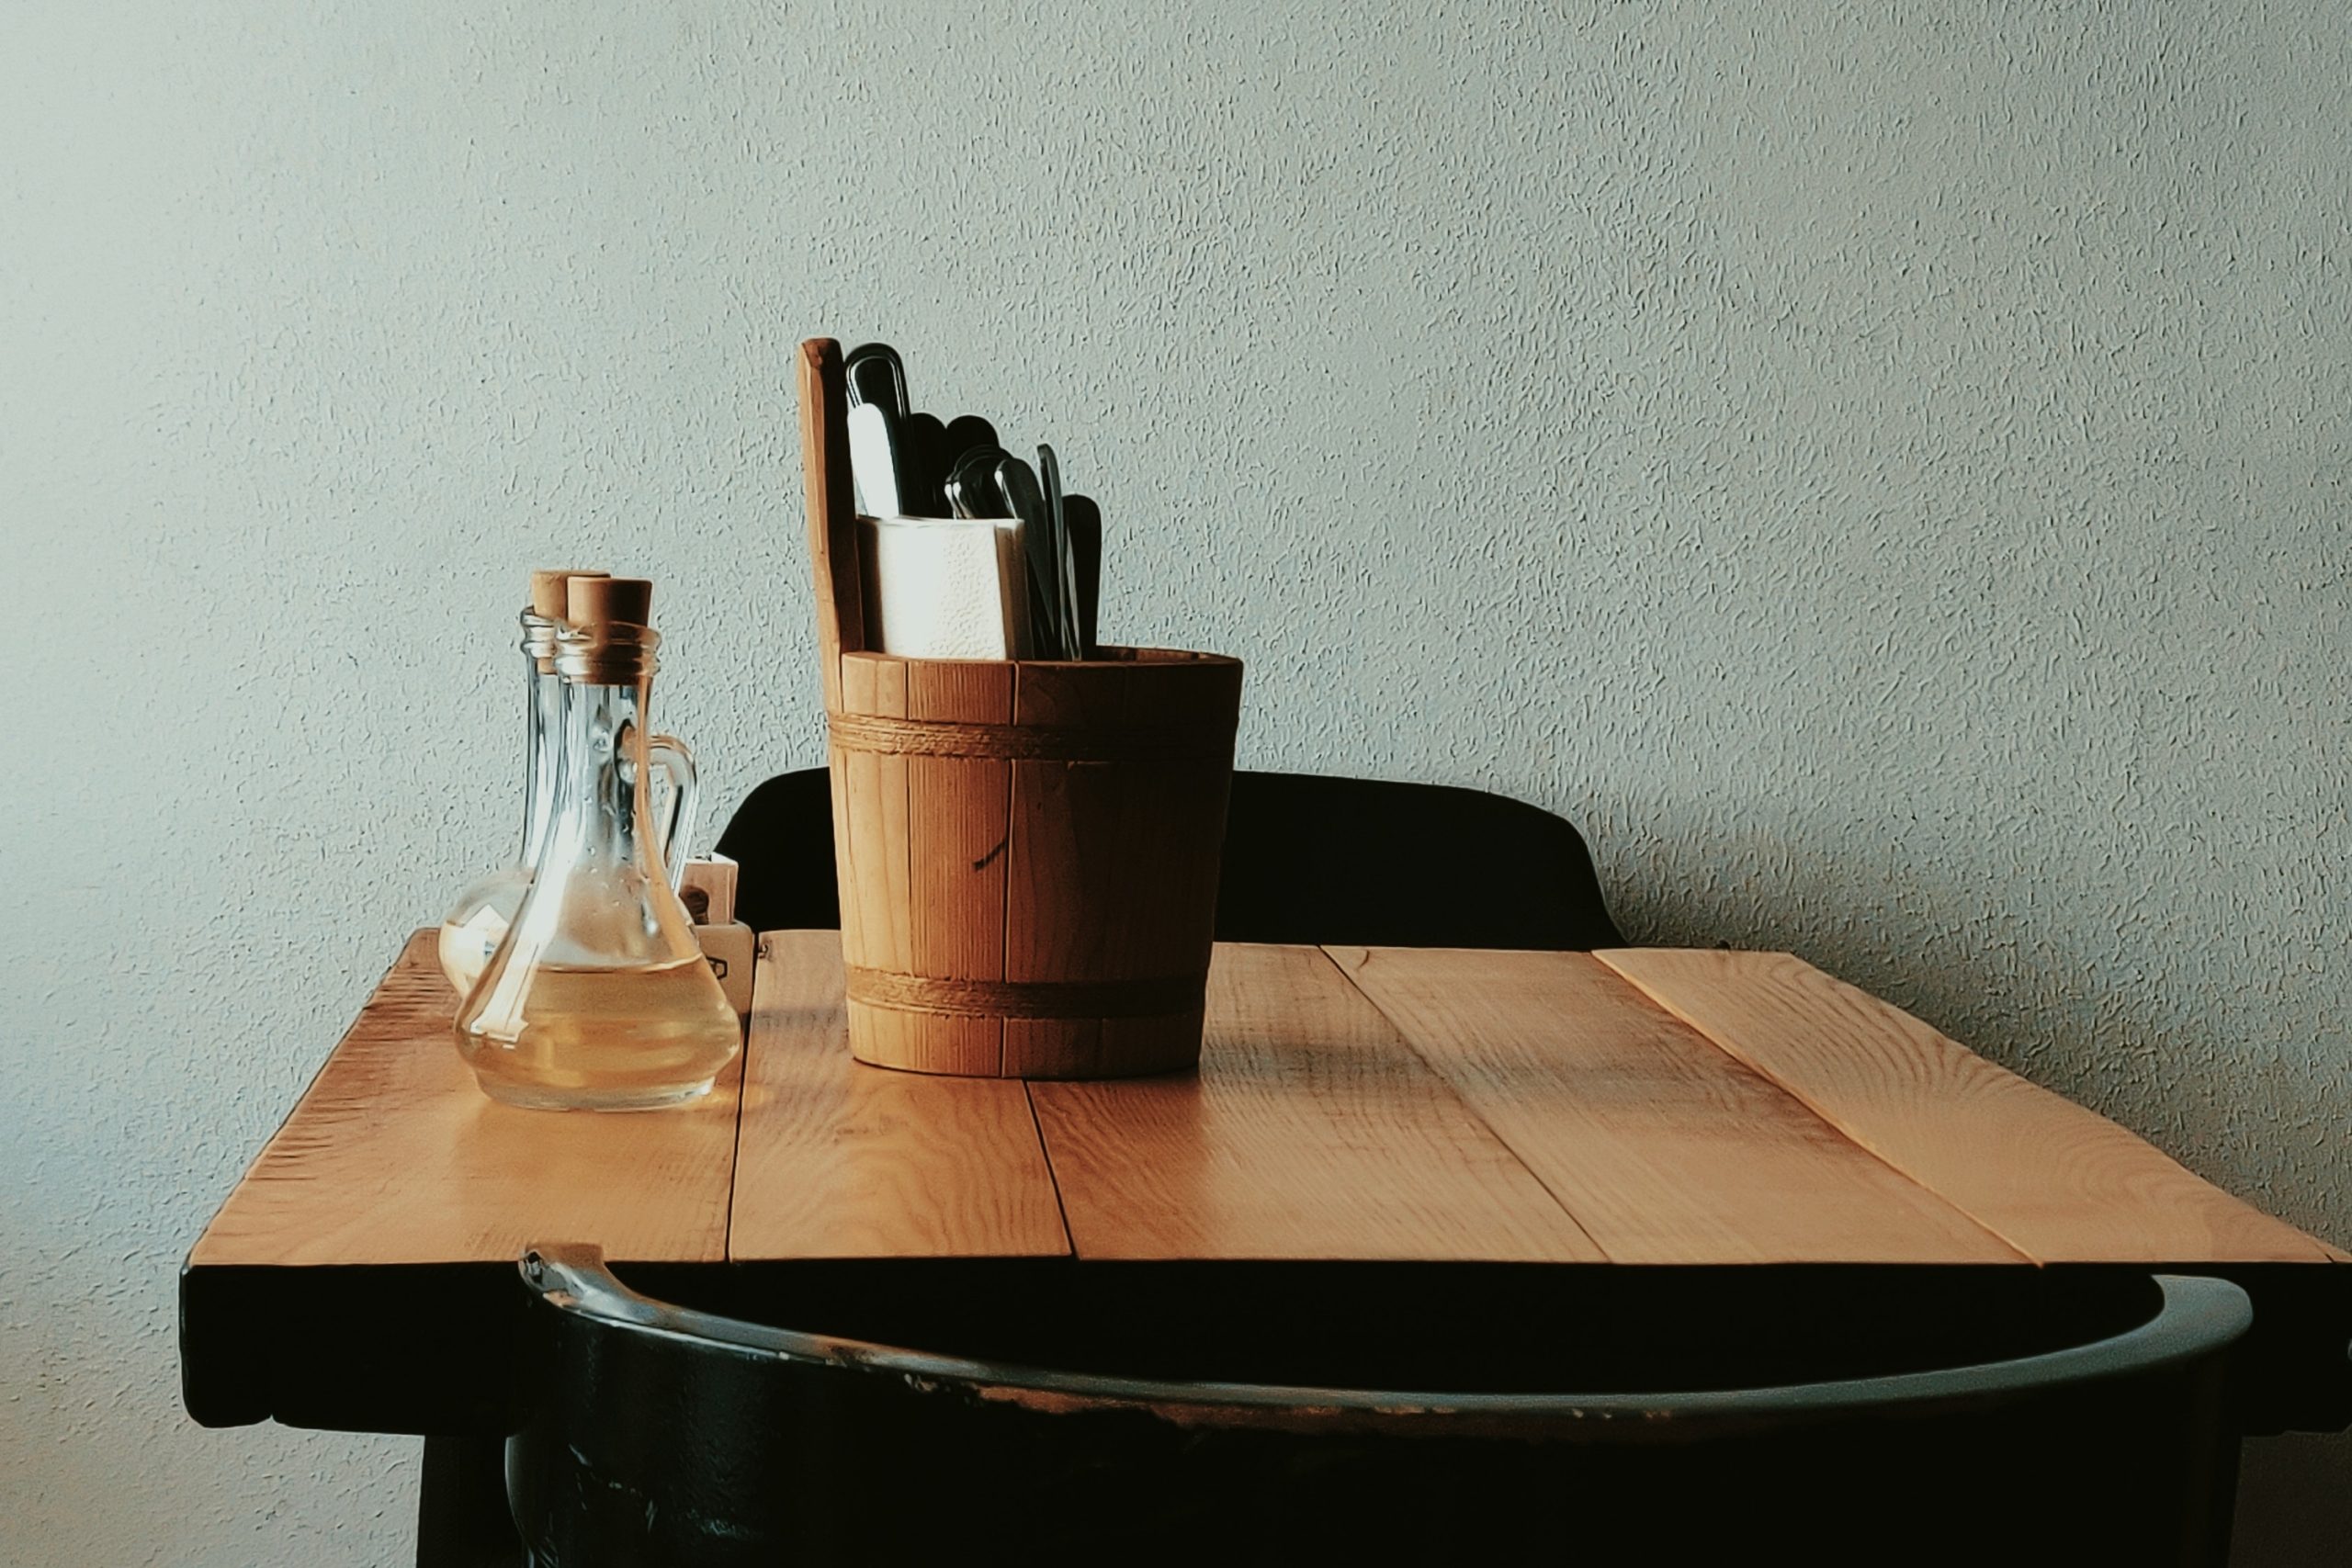
Make a utensil holder
One way you can spruce up old planters is to use them as utensil holders. Smaller planters are perfect for this DIY craft. You can take the same approach with the vases above by painting and sealing a design on the planter, or you can leave it as is.
Small planters are great for storing pencils, pens, scissors, and other office tools on your desk. You can also stack planters for a layered cup look or use them as small coin-collection cups for any loose change you may have.
An especially fun thing to do with smaller and narrow planters is to put them in your kitchen to hold kitchen tools. You can use a clay pot as a standard utensil holder, or if you want to be more creative, you can store twist ties, clips, or other small kitchen trinkets in an easy-to-access space.
Create a DIY wastebasket
If you have a large planter, you may opt for transforming it into a wastebasket. Wastebaskets for bathrooms, bedrooms, and offices can become expensive. The thing is, there isn’t anything exceptional about ordinary waste bins. If you’re feeling thrifty, you can upcycle your old planters and transform them into a wastebasket for any room. Paint them a unique shade that matches the decor and place a trash bag inside.
Planters with lips on the edge are great for this, as they hold a trash bag much easier than other bins. You can also use these larger planters to collect dirty laundry or to store blankets in your living space. Line the pot with a linen bag to hold your fabric items. It’s a simple hack that saves you money and still leaves your space looking timeless and eccentric.
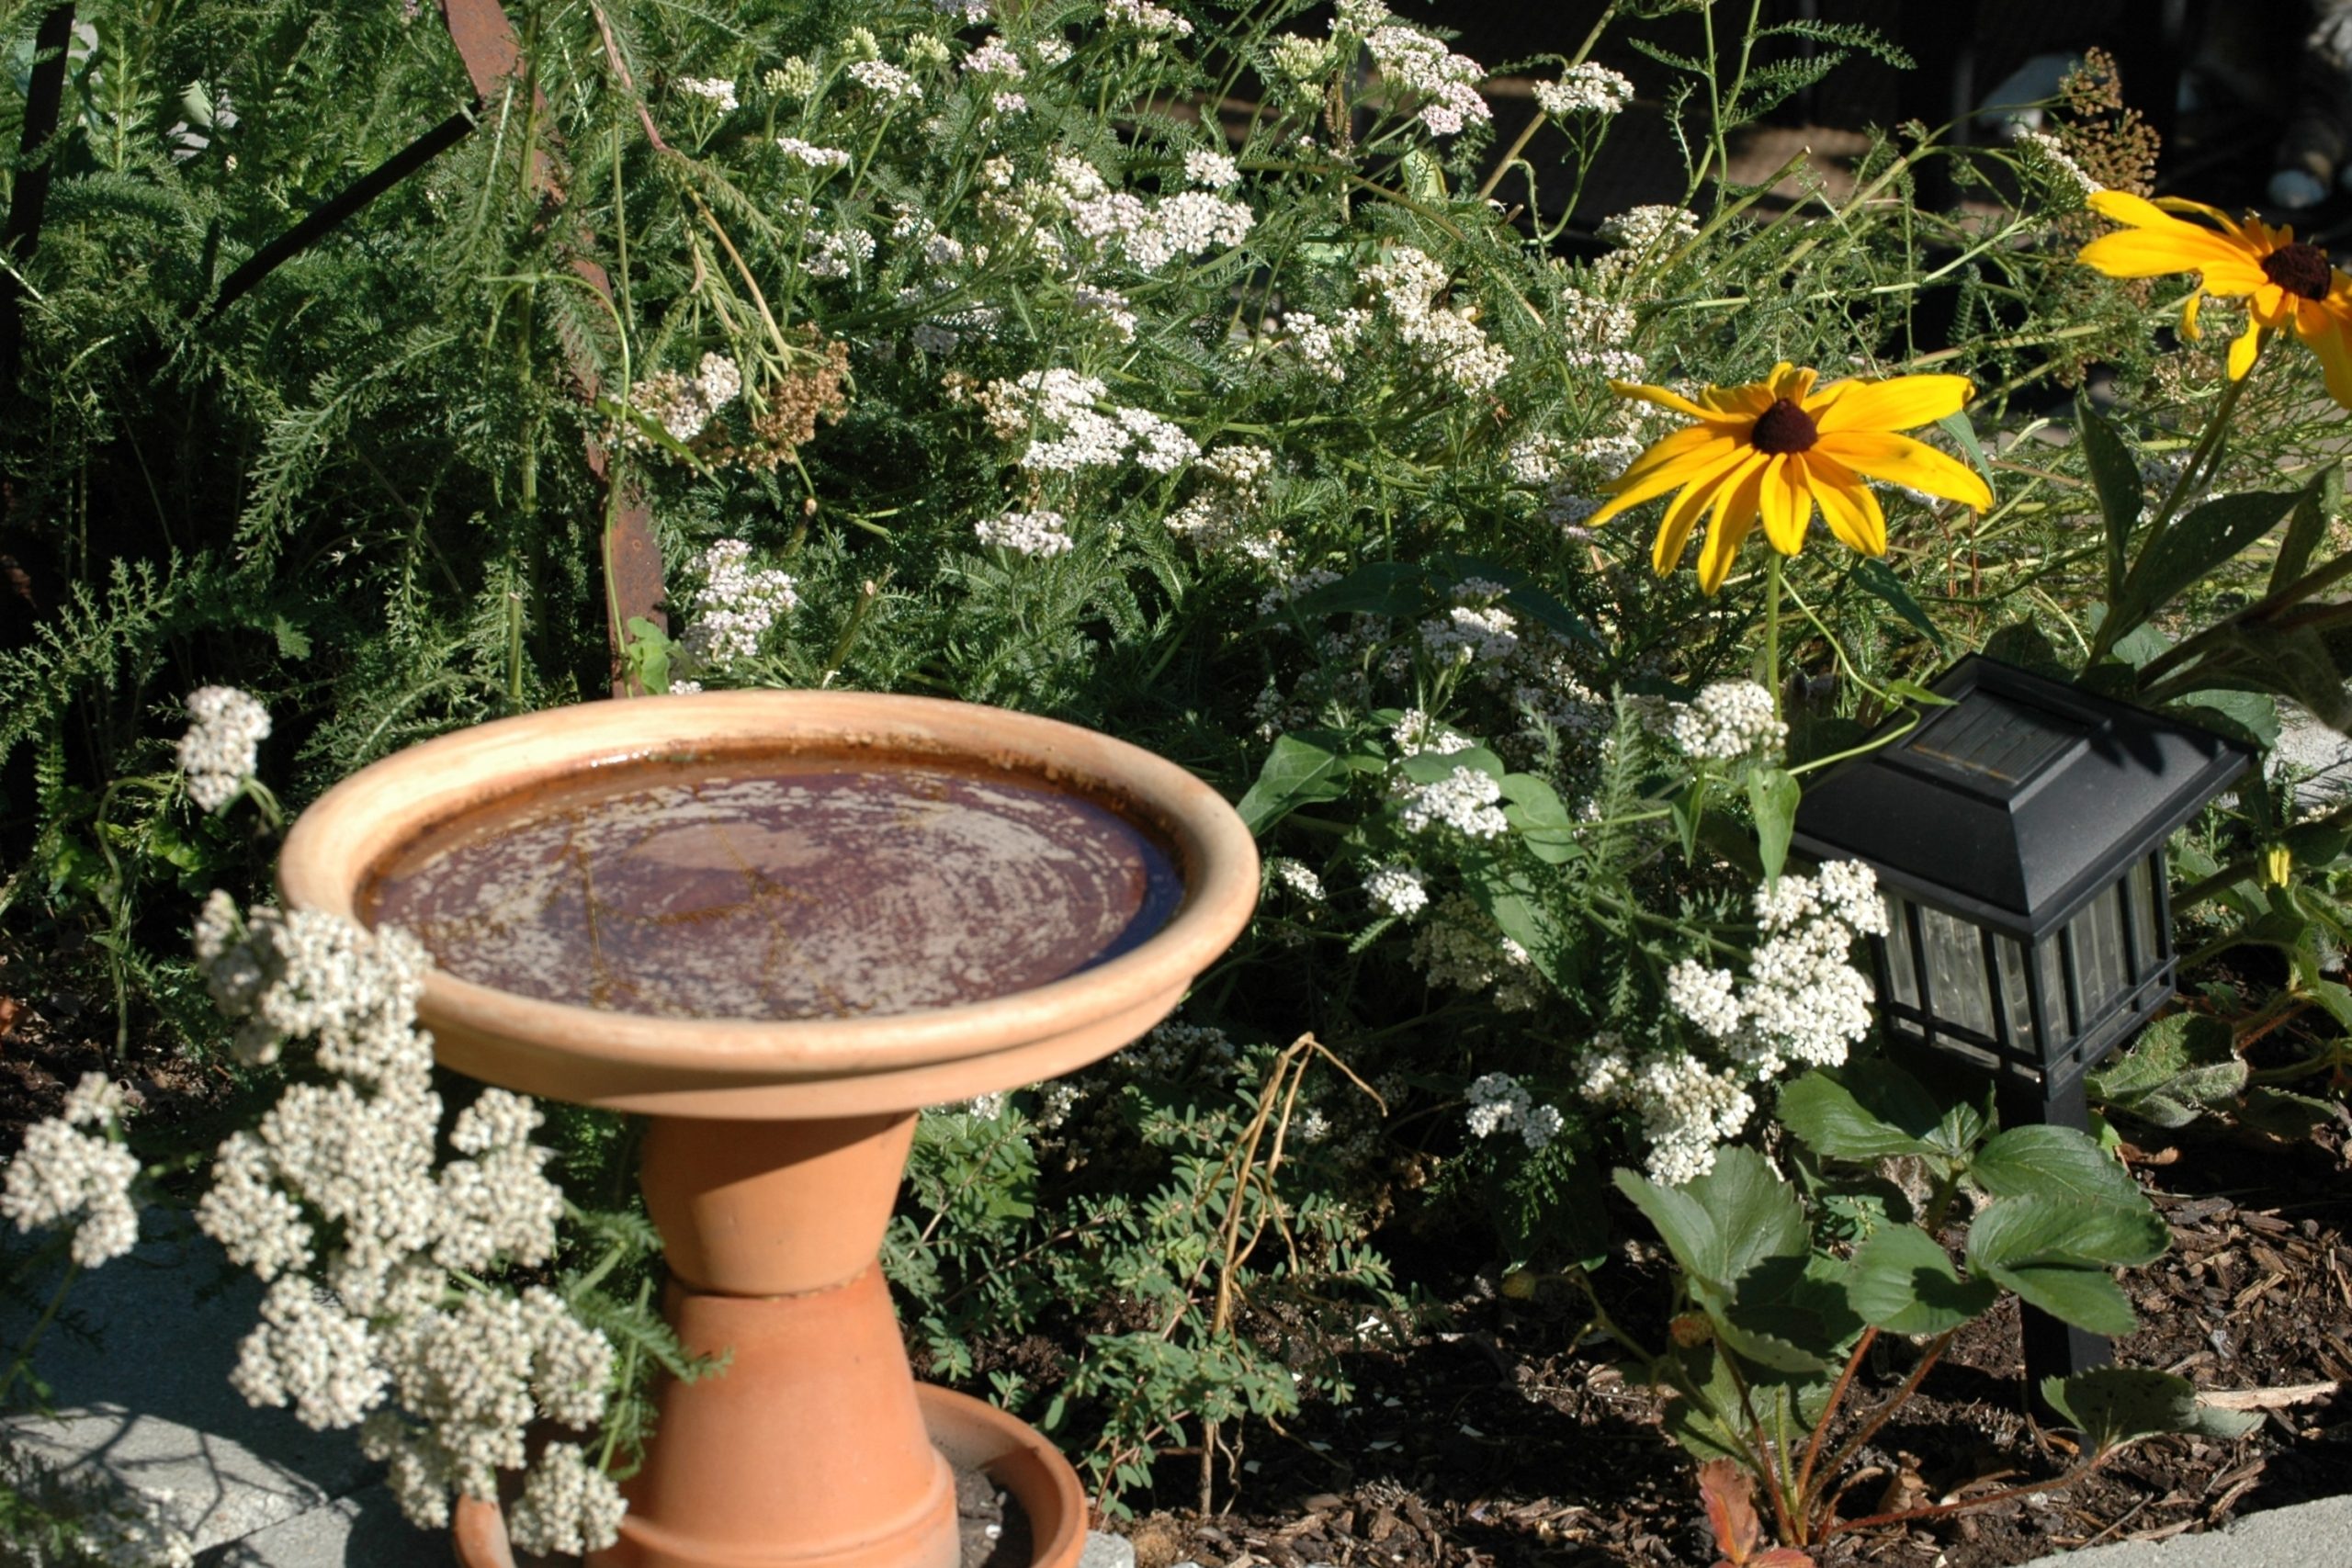
Make a birdbath
While repurposing the pots is great, you may wonder what to do with the small saucers you place beneath them.
A great idea to put those dishes to use is by creating a birdbath. You don’t need to paint the bath unless you want to, which is why this is one of the simplest repurpose ideas on our list!
There are a few ways to approach this craft, the first being to stack old planters on top of each other until you reach your desired height and glue them together. Using your glue, attach the saucer on top, then fill it with water, stones, or anything you like to make your birdbath one of a kind.
Create wall-storage bins
The last hack on our list is to use your planters as wall storage bins. This is an especially fun hack for offices or kids’ rooms. Colorful plastic bins are the best for this project, as they are lightweight and less likely to break. However, if you want more elegance, small porcelain or clay planters work wonderfully.
You can buy wire racks with round holders at the store, or you can make your own. If you choose the DIY route, make sure to purchase a sturdy, durable wire.
Twist the wire using pliers so that it can fully surround the planter. You want to make sure that the wire is tight enough to hold the cup without it falling through. Twist the ends of the wire together to ensure that it doesn’t come undone. Attach the rounded wire to a painted piece of wood and then hang on the walls for easy storage.


