Laying sod is mostly an intuitive job. The green side goes up and the brown side goes down. But there are a few minor details that make all the difference when it comes to the finished appearance and how quickly the lawn grows in. We’ll cover how to lay sod shortly. But first, a few preparations are in order to make sure you’re ready for installation day.
How to prepare for sod
Prepare for irrigation
The most important step is to ensure that you will be able to water the area. If the yard is irrigated, double-check the condition of the system to ensure that all of the heads are working and there are no leaks. While you’re at it, flag the locations of the sprinkler heads and mark the water lines with paint to avoid damaging them later on.
If you don’t have irrigation, make sure you have enough hoses to reach the whole area. Watering will be a long-term commitment, so do not skimp here. Along with the hose(s), you’ll need a sprinkler — more than one if the area is large. Also, a watering timer could be a good investment.
Prepare the soil
Prepping for sod could begin a month or more in advance of taking delivery. If there is an existing lawn or a crop of weeds, it should be removed before installing sod. Remove existing vegetation with a sod cutter, or spray a chemical weed killer according to the label directions, allowing for the designated wait time between spraying and replanting.
Once the area is clear and weed-free, it’s time to prepare the soil. This can be done any time within two weeks of installation. Bear in mind that heavy rain will erode and ruin a well-prepared surface, so waiting until almost installation day is best.
For best results apply a 3-inch layer of compost over the area, spread starter fertilizer and lime as needed, and rototill to a depth of 6 inches. Use extra caution to avoid rupturing irrigation lines. Then rake the area smooth, removing any rocks larger than a quarter.
Place your order
Confirm the type of grass that you need before placing the order. If you aren’t sure, and you’re trying to match up with another area of the yard, bring a sample to your sod supplier when you order. Calculate the square footage (length x width) of the area and add about 10 percent to cover the odd spaces. Bear in mind that sod must be installed within 24 hours of delivery to avoid loss. If the area is large, it may be beneficial to make two or more small orders.
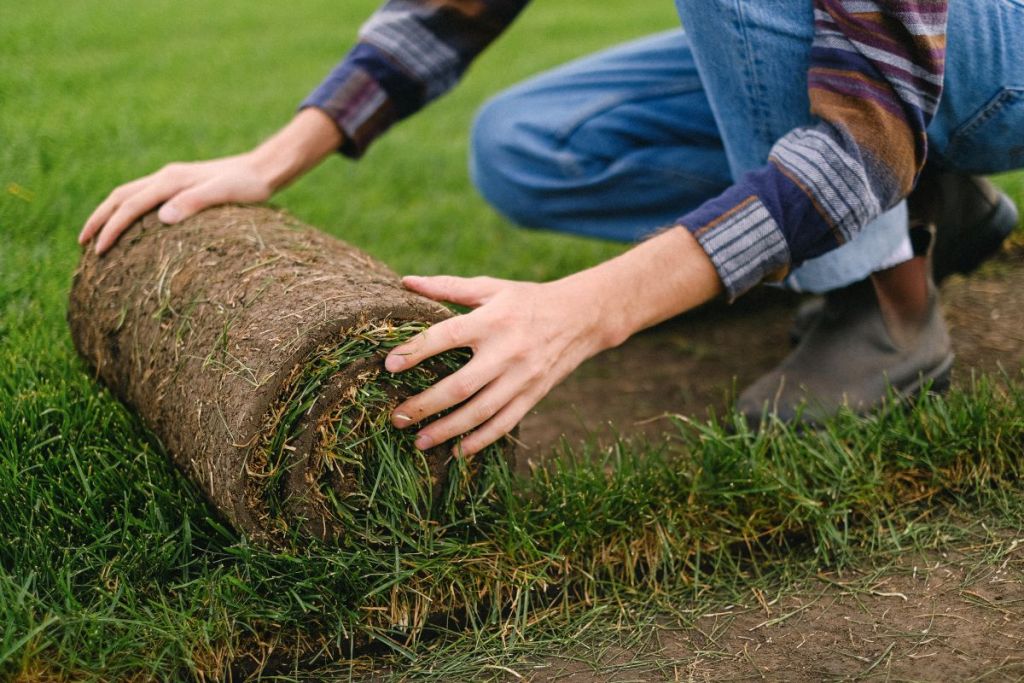
Sod typically comes in pallets of 450 or 500 square feet, so be sure to confirm the pallet quantity with your supplier so that you get the right amount. Also, find out if you have a choice between slabs and rolls. Slabs are smaller and lighter, but rolls allow you to work faster with fewer edges. Place the order two to three weeks before you plan to install.
How to lay sod
Plan to start early on installation day in order to make good progress before it gets hot. If the area is dry, it’s a good idea to moisten the soil before laying the sod. This is also a good time to mark the edges of any tree mulch rings or landscape beds with marking paint so that you don’t accidentally waste sod in these areas. Following are the top tips for laying out the pieces of sod.
- If the ground is relatively flat, orient the long edges parallel to the curb.
- If the ground is sloped, orient the long edges perpendicular to the slope.
- Use sod staples to anchor pieces that are laying on sloped ground.
- When starting new rows, stagger the end seams like brickwork.
- Use a utility knife to make cuts and clean up the edges.
- Be sure to cut out holes for sprinkler heads, and avoid covering utility meter boxes.
- Irrigate heavily immediately after installation. For all-day jobs, begin irrigation after the first few hours.
Avoid these common sod installation mistakes
Overlapping edges
Lay the sod pieces flat on the ground with the edges touching. Overlapping the edges leads to a lumpy surface and dead streaks. Some of the ends may be curled slightly upward, but these should be smoothed out by hand when they are laid.
Poor watering
Proper watering is one of the most critical parts of sod installation. If the sod dries out, the pieces will shrink away from one another and dead patches will develop. During installation, begin watering as soon as a large enough area is covered with sod, and continue doing so throughout the day. Water heavily, three times per day, about 20 minutes at a time, for the first week.
Mowing too soon
The grass will begin to grow soon after installation, but mowing too early can delay rooting. Wait until it has grown to the maximum height that your lawnmower can cut. The extra leaf surface will give the grass energy to root in faster. Keep the mower on its highest setting the first couple of cycles before gradually lowering to the regular maintenance.
Laying sod isn’t difficult, but it does need to be done right. If you follow these steps, you’ll have a gorgeous green lawn in no time.