There’s no doubt about it: having the perfect slice of bacon is like winning the lottery. Okay, maybe that’s an exaggeration, but the perfect piece of bacon is challenging to achieve for many home cooks. While it definitely comes down to whether you like your bacon crispy or a bit chewy, there are a few tips that will satisfy any palate.
Here are the three best ways to cook bacon, no matter how you like your slices.
Cook on the stovetop
Stovetop bacon is a classic, and it’s a no-fuss method to cook a single serving. While pans don’t offer much space for family-style cooking, it locks in flavor and delivers perfect crispiness. This is also the most time-effective method, so you can enjoy a continental breakfast, even on busy mornings.
A non-stick pan is also a favorite of busybodies because it’s quick to heat and easy to clean. Bacon grease can be frustrating to remove, and non-stick pans make this process much more manageable. Additionally, with a non-stick skillet, you have more control over the texture of your bacon. For a chewier texture, cook it low and slow, being sure to keep the amount of excess oil in the pan to a minimum. For crispy slices, cook at a slightly higher heat and allow the oil to fry the bacon.
When cooking bacon in a non-stick pan, be sure to get a cold start — the pan should not be piping hot. If it is, you may be met with hot grease splatters. Also, remember to cook the meat on low to medium heat. If the pan is too hot, it will scorch your food and burn off much of the flavorful fat.
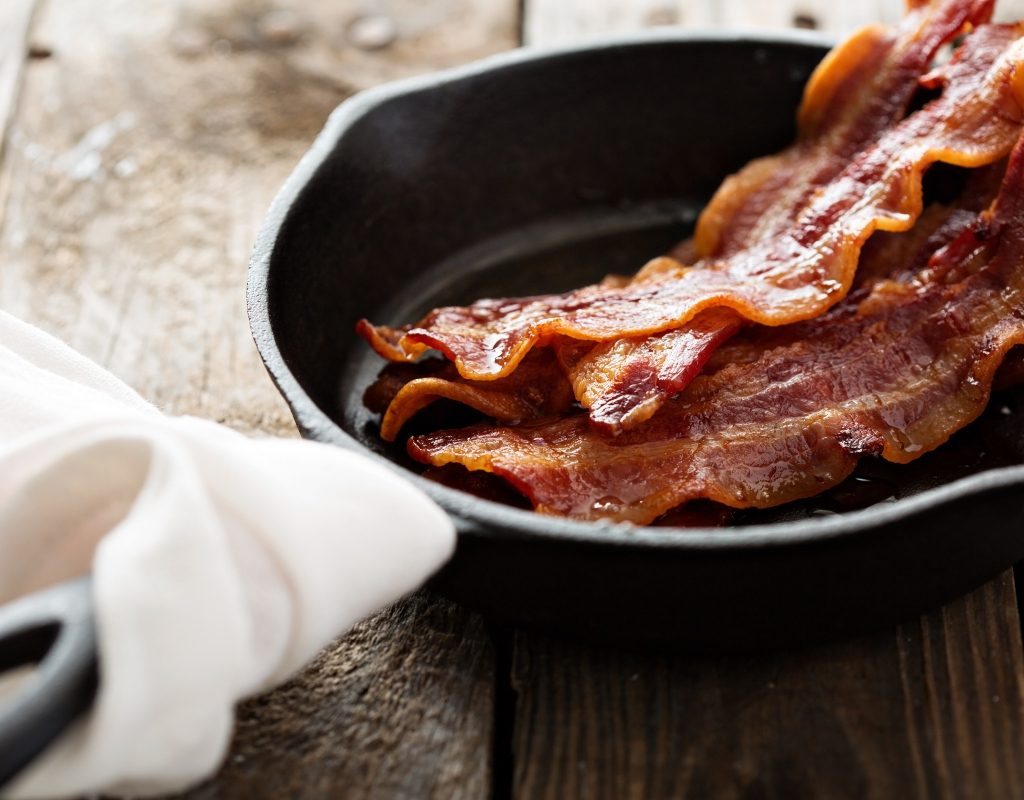
Cast iron vs. non-stick
Cast iron skillet fans are emphatic that this method leads to more flavorful bacon. Cast iron conducts heat extremely evenly, so you won’t end up with some spots that are burnt and others that are chewy. Additionally, cast iron is relatively easy to clean when you’re finished. Whether you cook bacon on it or not, a good-quality cast iron pan should still be a staple in your kitchen. It’s durable, perfect for searing meat, and lasts for decades, even with constant use.
Bake it in the oven
Cooking bacon in the oven is fantastic for feeding a crowd. The oven offers more room, and it distributes heat evenly to give your bacon more consistency. If you’re cooking a full breakfast and have other dishes to prepare, this is the perfect method for you. You can set it and forget it.
To cook bacon in the oven, use a rimmed pan lined with parchment paper or aluminum foil. Lay your bacon in the pan so that it overlaps, and set your oven to 375 degrees. Some cooks recommend a cold start on the oven, just as you would with a pan, and set your bacon in the oven as it preheats. This is the key to more tender slices, and you save time by not waiting for the oven to come up to temperature.
This is another method where it’s fairly easy to control the crispiness. Simply keep the pan in the oven longer for a satisfying crunch, or remove it as soon as it’s cooked through for a chewier texture.
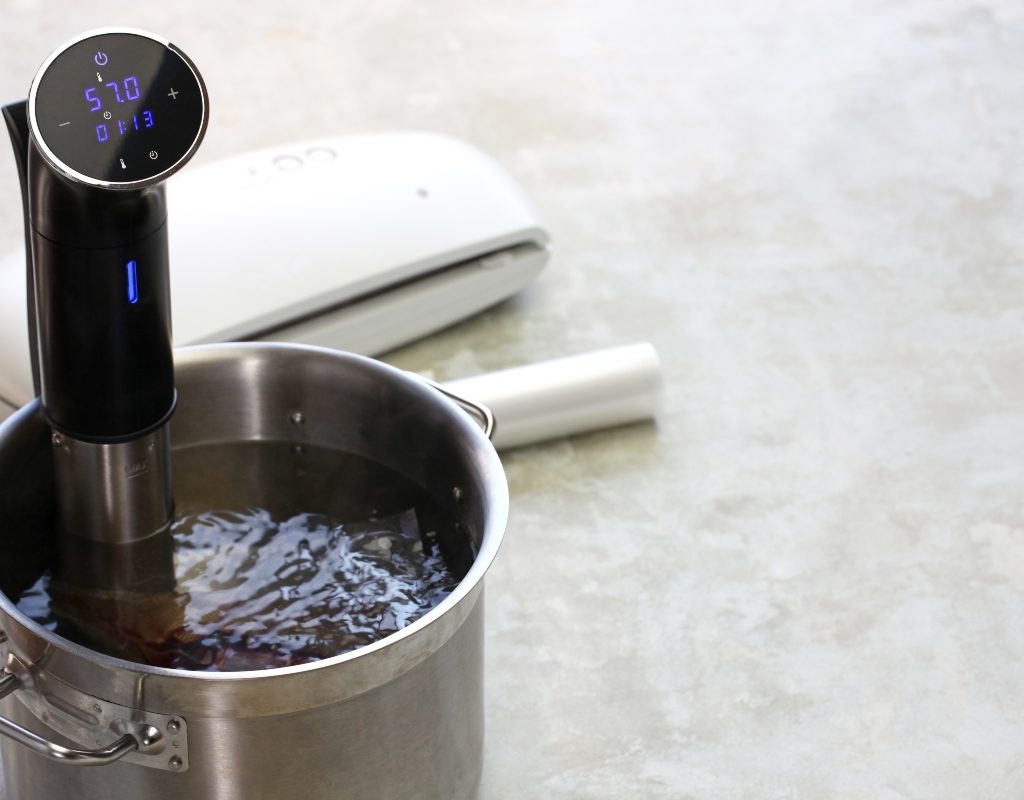
Try the sous-vide method
Cooking bacon in water probably doesn’t sound like the most flavorful method. However, cooking your bacon using the Sous-vide method will give you perfectly tender, thick-cut bacon every time. The thick cut is a must because, if the slices are too thin, you’ll end up with scorched meat without any of the bacon’s natural flavor and texture.
Set the temperature of your Sous-vide machine to 145 degrees and cook for approximately eight hours. To take the stress out of early morning breakfast prep, cook the meat overnight and grab a few slices when you wake up. Simply seal the bacon in a plastic bag, place it in the hot water, and leave it overnight. For more crispiness, pull the slices out of the Sous vide in the morning and place them on a hot griddle.
With these three tips, you can say goodbye to burned or undercooked bacon in the mornings. Bacon can be very personal comfort food, so don’t be afraid to experiment with temperature, cooking times, and methods to find a process that delivers your ideal slice.


