Of all the types of mess people will overlook, a gross bathroom isn’t one of them. If you’re embarrassed by the state of your bathroom when guests come over or you’re sick of those trouble spots that you can’t quite get clean, here are some helpful hacks to restore your bathroom to its glory.
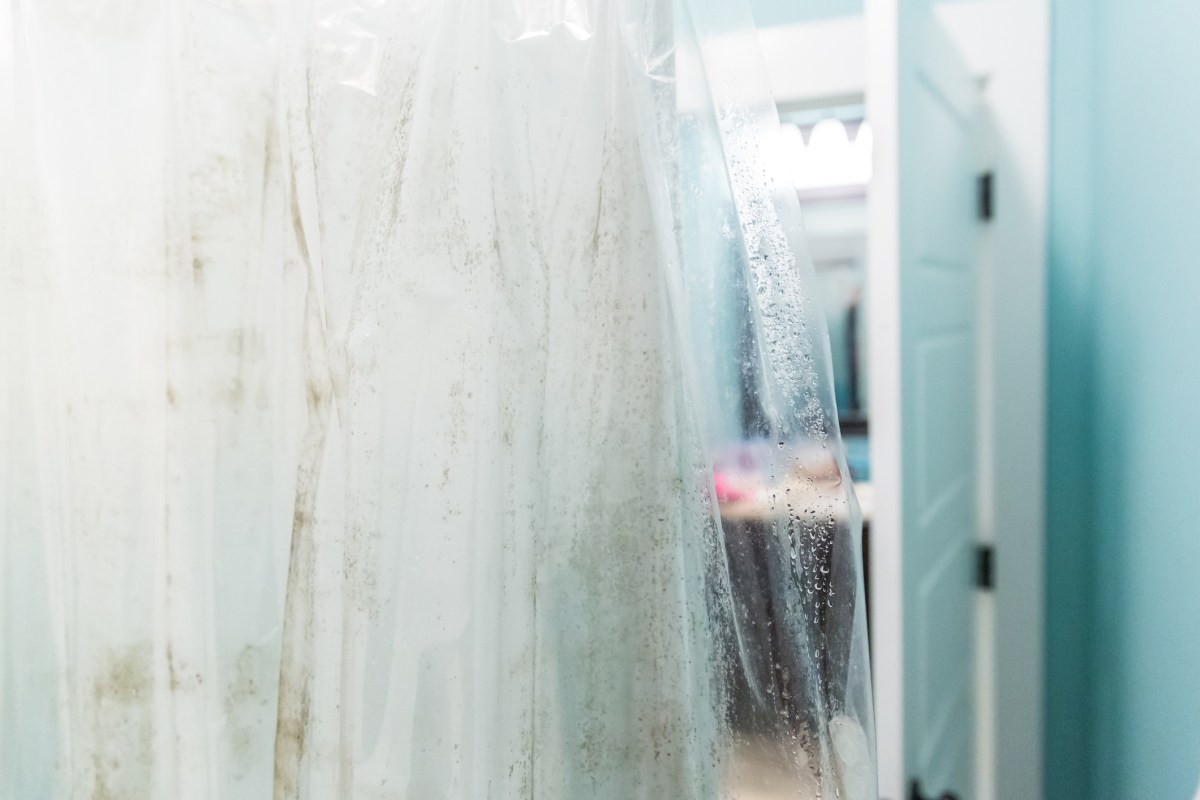
Moldy shower curtain
One of the biggest eyesores is a moldy shower curtain. A Magic Eraser can be the first step in getting your shower curtain clean. Another thing you can do is soak the shower curtain in a tub full of hot water and a cup or two of white vinegar to help kill mildew and mold stains.
Gently scrub the stains down with your scrub brush before giving it a good rinse. You might even be able to wash it on the gentle cycle in your washing machine to help agitate away stains. Make sure to spread the curtain out each time to allow it to dry thoroughly and invest in a mildew-resistant curtain to halt growth in the first place, says Well+Good.
Gross toilets
Sometimes, it’s more than just a ring. If you’ve got a stubborn stain that doesn’t seem to come off no matter how hard you scrub, it might be time to get creative.
Denture tablets can put a considerable dent in stuck-on stains, including mineral deposits and other gross rings. Simply put a tablet or two into your toilet bowl and let it do its magic. Wait 15 to 20 minutes to allow the tablet to effervesce and begin using your toilet brush to brush away any lingering stains. Flush, and your toilet should be as good as new.
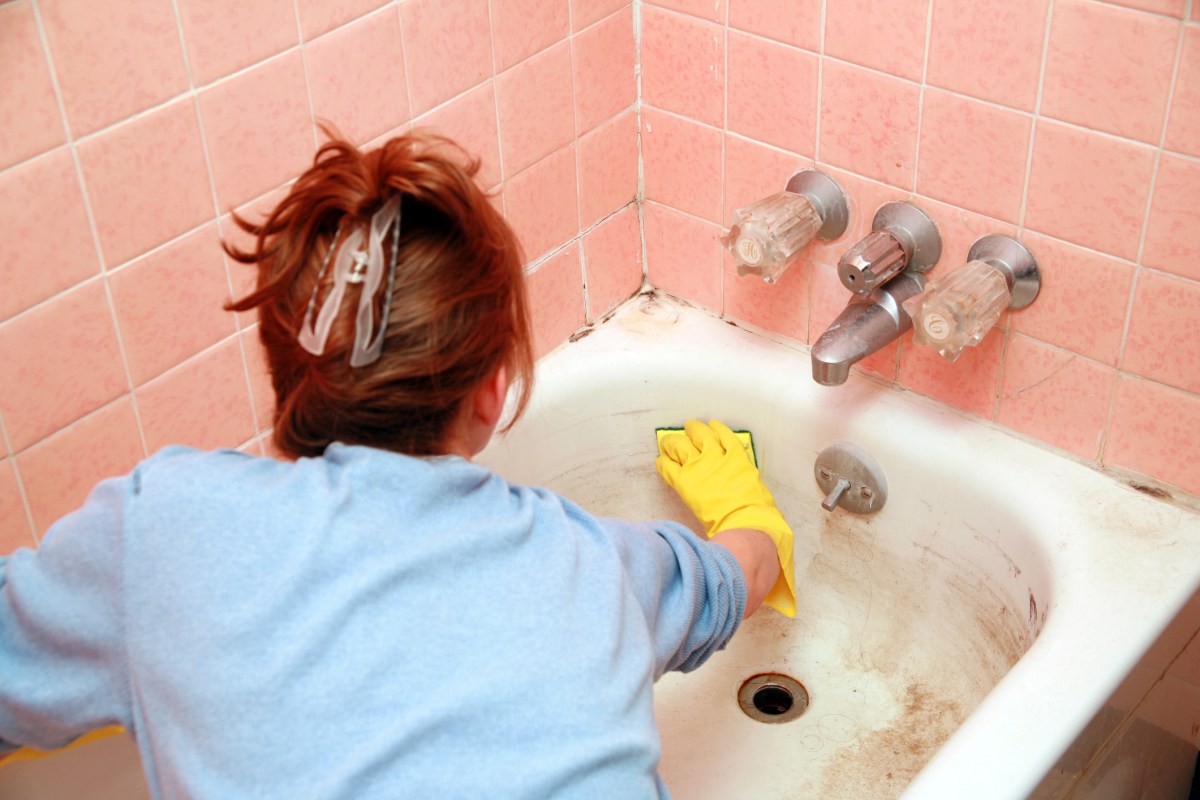
Dirty tubs
The tub can be a difficult area to clean. One secret to getting things clean is to preheat your tub and tiles to help gently loosen stains. Run hot water into your tub and allow it to sit for a few minutes until your tub is warm to the touch.
Drain the water and apply your cleaner, allowing it to sit for a few minutes. Use a cloth or sponge to make sure the cleaner gets into all the spots on the tub. Scrub and gently rinse.
But wait — what about problem areas? Here are a few further tips for tackling those issues:
- Rust – check out your local hardware store to get recommendations for rust-remover products. Make sure you read the directions and follow them carefully. For minor rust, you can try a lemon and salt. Cover the stain with salt and squeeze the lemon, leaving it to absorb for a few hours and then rinse clean.
- Grout – Brighten your grout with a toothbrush and lemon juice if it’s looking a little dingy. For more difficult stains, a paste of baking soda and water can also do the trick. Add vinegar to your baking soda for really difficult stains, suggests HGTV.
- Showerhead – White vinegar can get rid of mold and mildew as well as hard-water scale clogging the water flow. Fill a plastic bag with white vinegar and tie it around the showerhead, soaking it for a few hours. Wipe off any remaining residue and then run hot water for a few minutes to clean out all the vinegar.
Plumbing-Fixture Scum
A close look at the ring around your faucets and handles might send you running. However, a bit of white vinegar and a grout brush can freshen up those areas quickly. The grout brush can also help remove hard-water stains and scale from the fixtures, as well.

Mildewed Tub Borders
One way to freshen the caulk around the base of your tub is to use bleach-soaked cotton. You can get cotton coil from places like Amazon. Follow the instructions on the bleach for simple cleaning and test a small area of your tile and tub first to ensure that no staining occurs. Leave the cotton against the caulk until the stains are gone. A word of caution — do this only in white bathrooms.
Dingy Walls
Choose a mildew-resistant paint for your bathrooms to help refresh them. Bob Vila says, “Homeowners should opt for paint with anti-microbial additives that resist mold.” If you can’t do that, spray a cleaner on the walls and ceiling and turn on the shower to get full steam going. Shut the door behind you and leave it to work for about 20 minutes.
Return and use a power scrubber with an extendable handle to wipe the walls from top to bottom, gently removing both the condensation and the cleaner in one go. Wipe down the walls with a clean cloth and allow the room to dry.

Smelly towels
Yes, your bathroom towels are some of the grossest parts of your bathroom. There’s a right way to clean them. Spread towels out to allow them to dry completely and change them out at least every three days.
Wash towels on a sanitizing setting or use color-safe bleach on a hot setting to make sure you’re getting them truly clean. Wipe down your towel bars regularly and avoid hanging towels above the toilet.
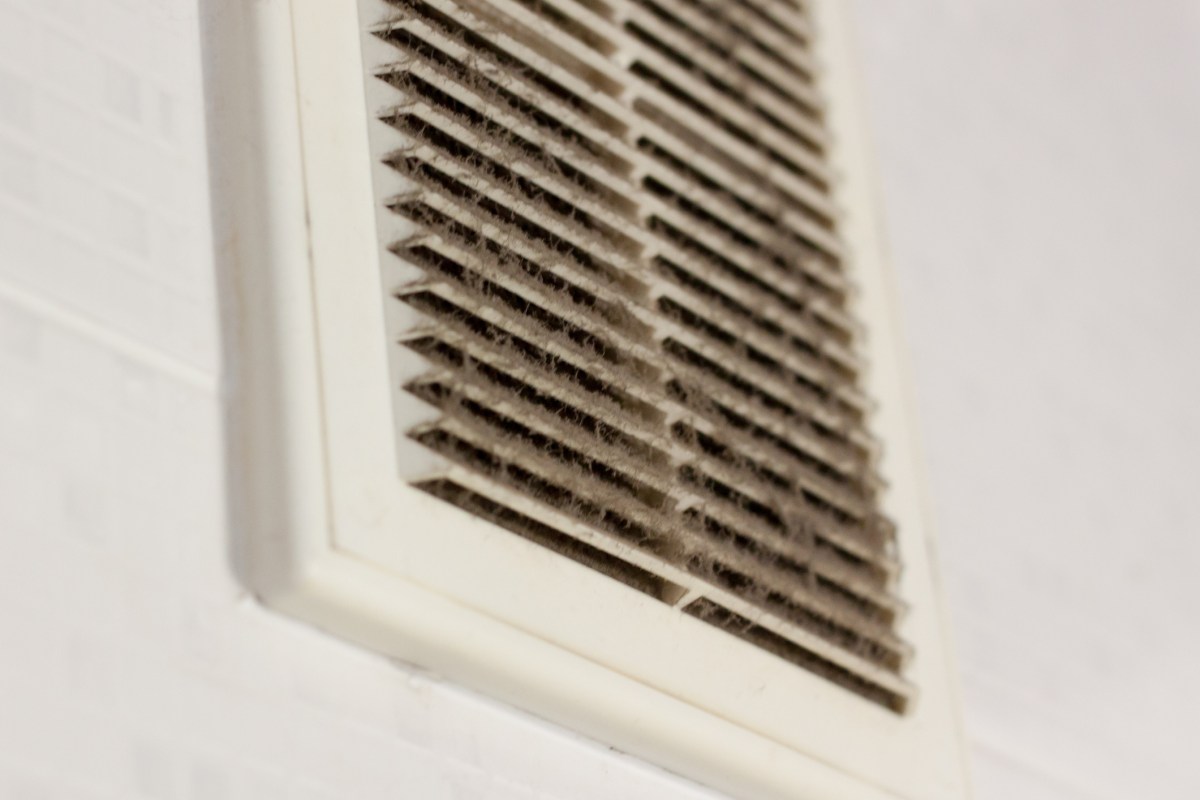
Bathroom vent
Turn off your circuit breaker and remove the cover from your bathroom vent. Use your vacuum attachment to remove any dust, debris, and lingering gunk. Wipe the blades and the cover with a clean cloth to remove anything that doesn’t come off from the vacuum.
Use a clean, soft brush (like a paintbrush) to knock off dust and dirt and vacuum it up from the floor. Keep your eyes and mouth covered if it’s been a while.
Bonus tip: Keep wipes handy
You should be cleaning your toilet off after each use because germs can spray everywhere. A simple container of disposable wipes allows you to wipe off the seat and handle after each use, cutting down on stains and giving everyone who uses the bathroom the responsibility of cleaning up after themselves.

Keeping the bathroom clean
Your bathroom isn’t a lost cause. With the right tools and the right amount of smart work, you can restore the grossest parts of your bathroom. Once you follow our steps, you won’t have to worry about surprise guests ever again.
Editors' Recommendations
- How to find studs in walls if you don’t have a stud finder
- Get rid of gross washing machine smells with these simple tips
- How to hand-wash clothes (so you don’t ruin those special garments)
- Avoid a huge fire risk in your home: How to clean your dryer vent
- Sick of cloudy glasses? This is the cleaning hack you need